
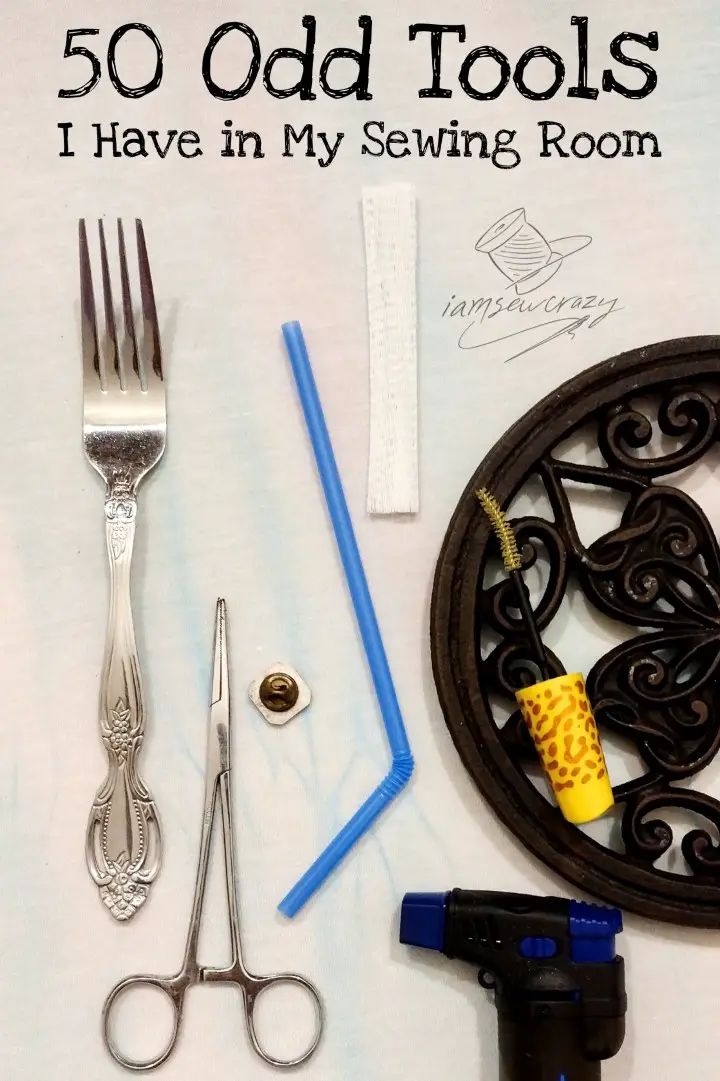

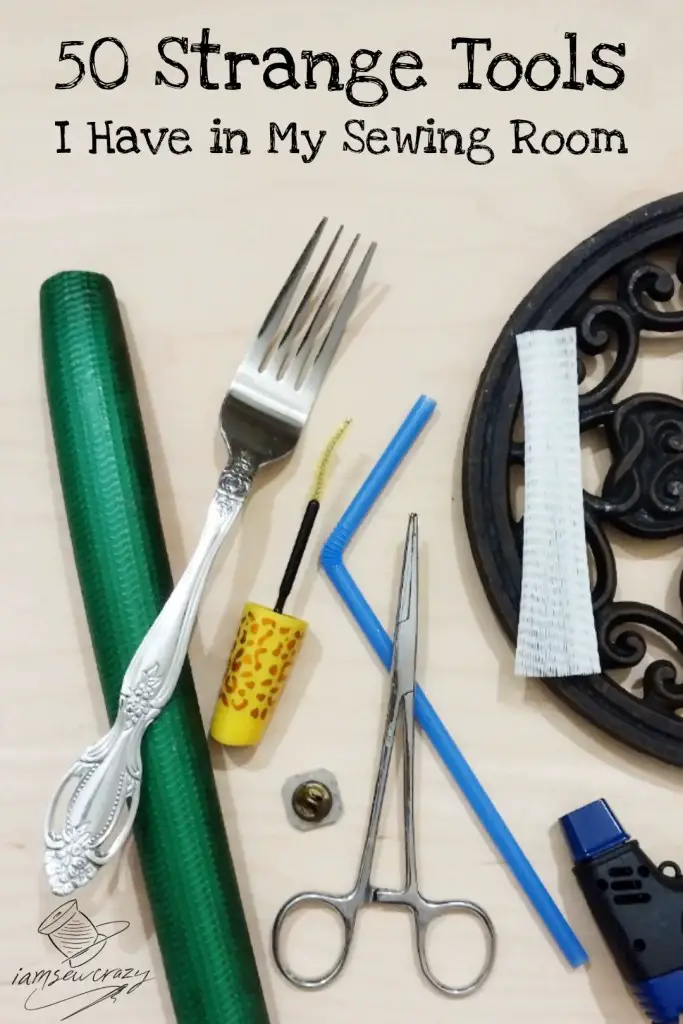
It’s no secret that I love using strange materials in my upcycled sewing and craft projects. But I also use a ton of unusual sewing “tools” that really aren’t really sewing tools at all! So why do I have empty mascara tubes, a butane torch, silicone caulk, a fork, and a drinking straw in my sewing room? Read on for some sewing and crafting hacks involving 50 of these unusual sewing tools! And if you’re interested, check out the more conventional list of my favorite sewing supplies. (That’s a list of awesome sewing supplies that are actually sewing supplies!)
I don’t remember where I got some of these ideas; I know a lot of them are original, and at least one of them came to me in a dream. I will give proper credit where I can.
Unusual Sewing Tools From: The Hardware Store
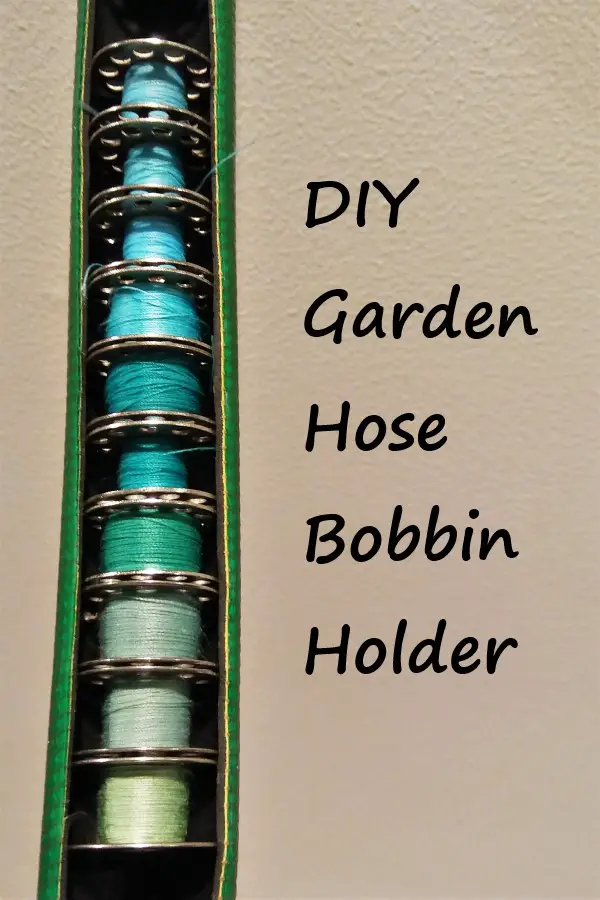
- Garden hose: I used a piece of discarded garden hose to make this very handy DIY sewing bobbin holder that I absolutely love! The hardware store also sells clear tubing that can be cut to length for this purpose.
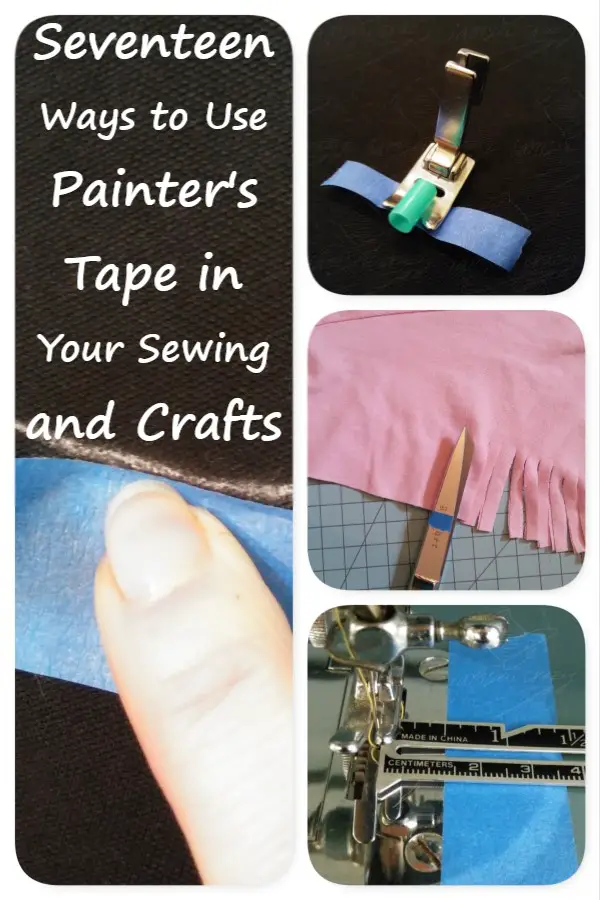
- Painter’s tape: (The blue stuff) is a mainstay in my sewing room. I wrote an entire post about painter’s tape hacks that make your sewing and crafting easier, but here’s a summary:
- It doesn’t leave marks behind and is easy to remove, so I use it to mark the desired position of embellishments, etc. on garments.
- It makes a good temporary aglet (the stiff part at the end of a shoelace) if you need to thread rope through a hole or grommet, or if you’re using a rope that frays easily for weaving or macrame. Just use the tape to wrap the first inch or two of the rope, and remove the tape when you’re done with your project.
- I also use painter’s tape to “pin” some finicky items such as 3D cardboard shapes that I can’t use pins or clips on. (Like the top hat I made for this giant bunny sculpture!)
- It’s handy to hold down thicker things like zippers until I’m ready to sew them.
- It makes a good custom hem or seam gauge on the throat plate or bed of your sewing machine. Take the width that you want your hem or seam to be, and place the painter’s tape that distance from the needle. Sew with the edge of your fabric lined up with the edge of the tape.
- I also have used it to mark a gauge line on my scissors. For example, when I need to make a bunch of 1/2″ snips, I put a piece of painter’s tape 1/2″ away from the tip of the scissors. Then I just clip the fabric up to the line of tape, and my cuts are all the same depth.
- You can use the same trick to drill holes to a specific depth by wrapping the drill bit with tape 1″ away from the tip (or whatever depth you need.) Then drill like normal, stopping when the tape touches the surface of your material. This is especially handy if you want to keep from drilling all of the way through a board or frame.
- Sometimes I stick a piece of painter’s tape to the front of my sewing machine and write on it the size and type of needle I have installed in that machine. That way, I don’t forget what kind of needle it is and have to try to read the tiny print on the needle shank later. If you don’t anticipate using your machine again for a little while, it’s a great way to keep tabs on what kind of needle is installed.
- Here’s a great hack: use a couple of pieces of painter’s tape and a thumbtack to sew perfect circles without marking or tracing!
- I have used painter’s tape to mark the wrong side of fabric when the two sides looked similar.
- I use it to tape pattern pieces together when I’m still drafting the pattern and know I might want to un-tape them to make adjustments, or make marks on top of the tape. (Unlike clear tape, you can peel painter’s tape off of a printed pattern without ripping the paper, and write on top of it.)
- Similarly, you can use a piece of tape to wrap around the front of your presser foot, for when you’re sewing something with loops that can get snagged on the toes of your presser foot.
- Trim rollers and brushes: This one is obvious, I’m sure. I use small paint rollers and brushes often in crafting. The cheap ones (like the ones they sell at the hardware store for painting trim and edges) are perfect to cover larger areas. I have these nicer paintbrushes for detail work, but covering a background isn’t rocket science, so go for the cheapies. They’ll do fine.
- Hammer: Any day I get to use a hammer (or fire) when I’m sewing, is a good day.
- I love using a hammer to “dye” fabric with natural leaves and flowers, sort of like a cross between stamping and dyeing. It’s a very fun and satisfying process, but not incredibly predictable. Most fern leaves work beautifully. This video isn’t one that I made, but she explains the process very well. And as an added bonus, she has an awesome accent!
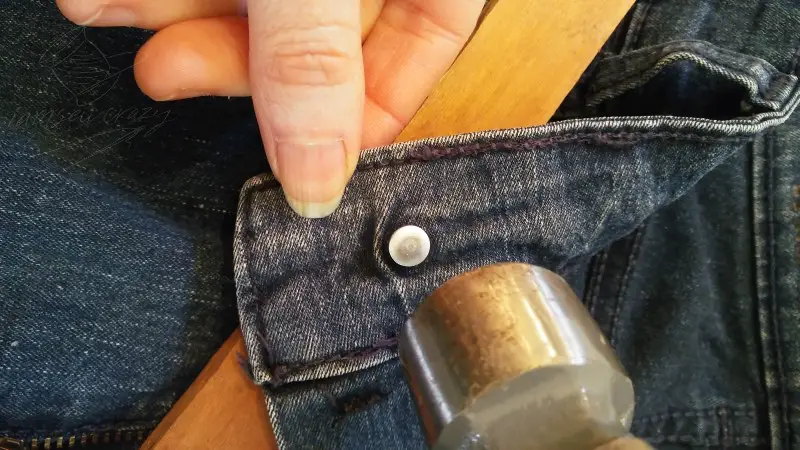
- I use a hammer to install and replace grommets, snaps, and jeans buttons. (If you don’t know how to replace a jeans button, check out my tutorial! I even included a hack that lets you reuse an old jeans button.)
- I also use a hammer to flatten very thick seam crossings before I sew over them. I use a hammer to help me “iron” extremely thick creases, like the center fold of a DIY wallet.
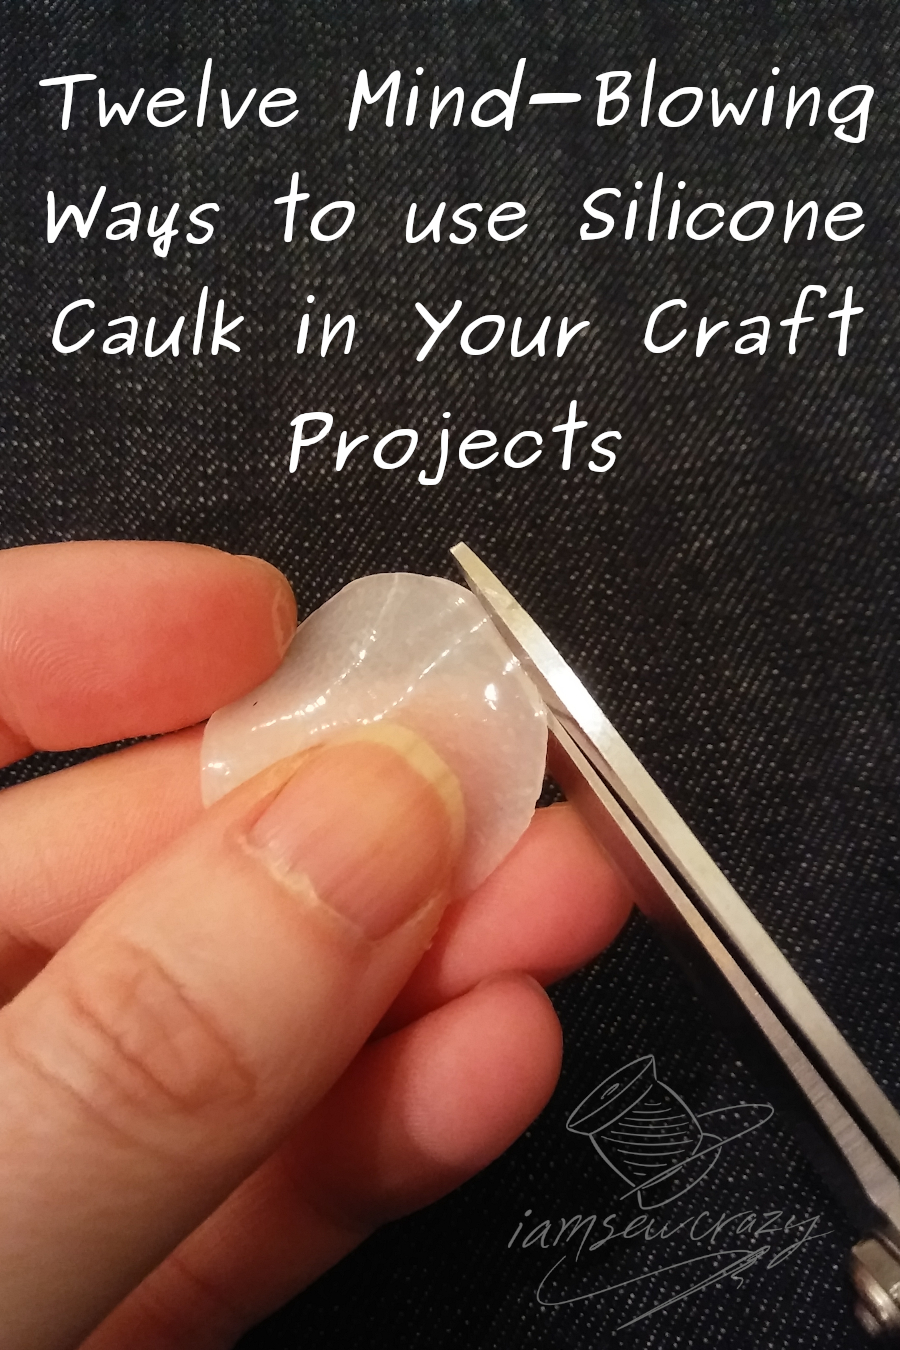
- Silicone caulk: I recommend getting a squeeze tube like this, because those huge caulking guns are pretty hard to control for precision crafting tasks. I wrote an entire post about how to use silicone caulk in your sewing and crafts, but here’s a quick rundown:
- I use it to add traction to a lot of my projects. I place anti-slip dots on the back of mats and rugs that I make, like this bath mat I made out of t-shirts. Silicone caulk is also one of my 7 ways to keep bra straps from slipping off your shoulders. You might also want to try it on the soles of slippers or children’s footed pajamas. I used it to keep my Dragon Scale Arm Cuff in place, and if you want to make one of your own, you can print the PDF pattern for free!
- In the silicone post, I show you how to use silicone caulk as glue, and it works really well. I love using it when I’m setting very heavy items like flattened marbles or glass mosaic pieces, because silicone is thick enough to keep them in place! It’s also very weather resistant, so it’s great for outdoor sculptures.
- Silicone was used in the reader-made craft that won my DIY Message in a Bottle contest! The reader used my free printable scrolls to make a message in a bottle that had a tiny bottle floating inside. The smaller bottle was kept dry with silicone caulk.
- You can use silicone caulk to make your own custom stamps!
- Caulk also makes wonderful resin molds. There are a couple of different techniques to choose from, and I love the results!
- You can also use silicone caulk to make custom reusable gaskets. I demonstrate the process in the post, where I’m making a gasket for my Shipwreck in a Bottle. Check out my post, 12 Awesome Ways to use Silicone Caulk in Your Sewing and Crafts, for more details on these methods and projects.

- Heat-shrink tubing: This is basically a tough, rubbery tube that gets a lot smaller when you heat it up.
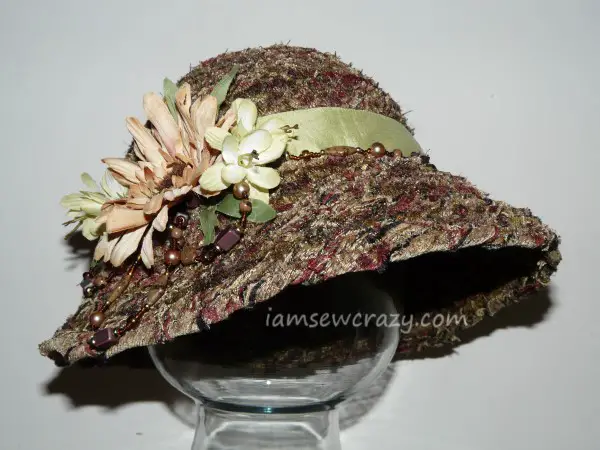
- I use heat-shrink tubing to cover and join the sharp ends of wire when I’m making a moldable hat brim.
- It works very nicely to join or cover sharp ends when I’m making jewelry out of wire.
- You can also reinforce cables with it, or cover other materials that don’t have a delicate finish.
- Bolt: A bolt is a key component in this DIY pincushion I came up with. Check out my tutorial if you’d like to make your own!
- Soldering iron: I actually use this to cut foam! They sell “hot knives” for this purpose, but I love to use what I already have.
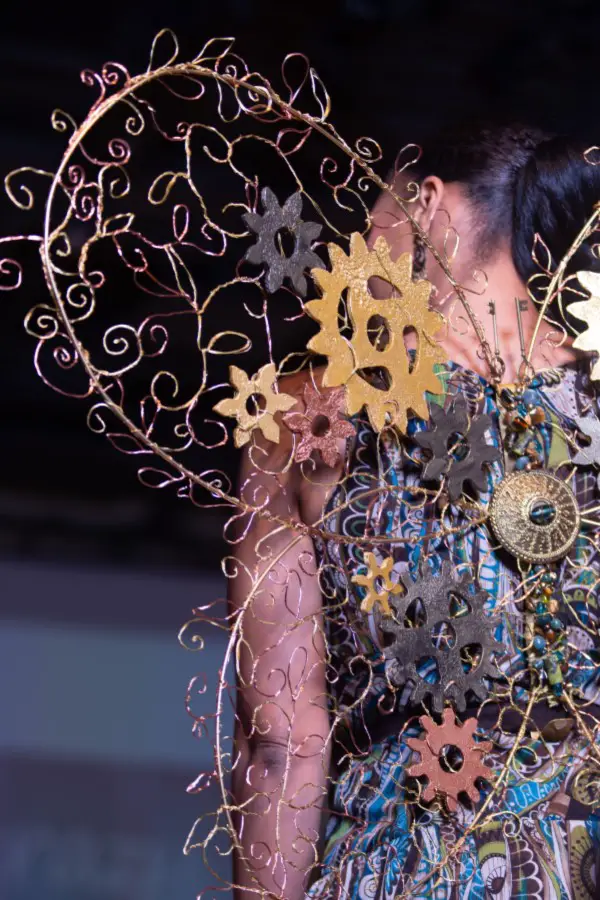
- Electrical wire, welding wire, and heavy-gauge wire: The wire that’s sold for floral arts and jewelry is great, but sometimes you need a large amount. It’s just not always cost-effective to buy small rolls from the craft store! So I really like to check out what the hardware store has to offer. I used 9-gauge wire and stripped electrical wire in these steampunk butterfly wings. I mixed it with gold florist’s wire for additional pops of color. I’ve made bracelets and earrings out of welding wire. And I love putting stainless steel wire in the brims of hats to help them keep a specific shape. The hardware store always gets me fixed up with large amounts of crafting wire!
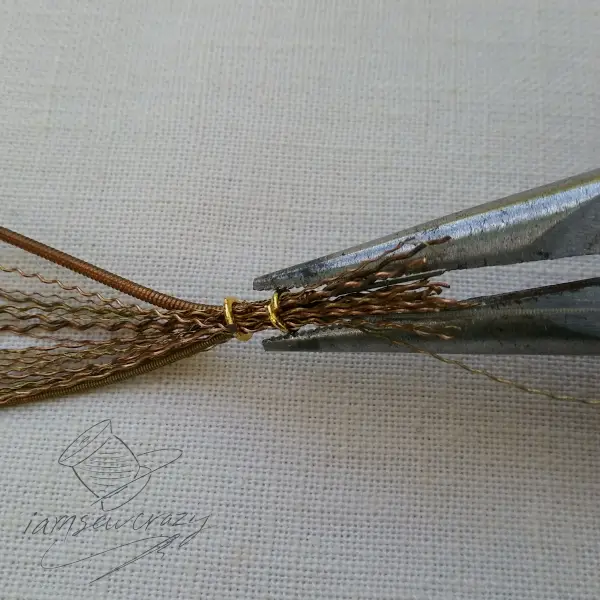
- Pliers: I cut and bend a lot of wire! From jewelry making, to this guitar string sculpture, to millinery wire for moldable hat brims, I’m always reaching for a good pair of pliers. I have a very well-loved set of small pliers for jewelry-making that includes cutting pliers, needle-nosed pliers, round-nosed pliers, and bent-nose pliers.
- The needle-nosed pliers are what I reach for most often. They’re well-suited to twisting/bending/cutting wire, and the long thin jaws give a nice amount of control.
- The bent-nosed pliers are like needle-nosed pliers that have an angle to the jaws. They can help you get into tricky spots, and you’ll probably use those and the needle-nosed a lot at the same time, when you need to use two pairs of pliers at once (for example, when you’re opening and closing a jump ring, or unwinding a guitar string.)
- You can use the cutting pliers for a lot more than just cutting wire. I use them for snipping the shanks off of shank buttons so I can glue them to flat surfaces. Or for removing broken jeans buttons. I’ve used them to cut sewing pins, pen caps, and lots of other cutting tasks that are just too much for a pair of scissors to handle.
- The round-nosed pliers are sort of like the needle-nosed pliers, but each jaw is a tapered circular shape, like a jewelry mandrel. So if you’re bending wire and want to end up with a small rounded shape, these are perfect. You’ll reach for them often if you make jewelry, and use them to shape ear wires for earrings, attach bracelet and necklace clasps, and about 6,000 other tasks.
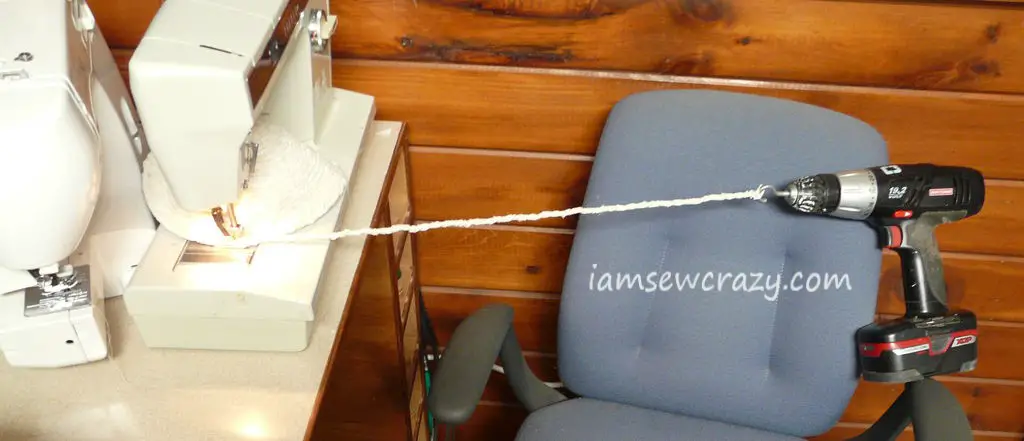
- Cordless drill: I’m actually very attached to my drill! I definitely use it for drilling holes and driving screws, like it was made for. But here are a few other ways to use a drill:
- You can chuck all kinds of things into the jaws! Here I’ve added a screw hook to the jaws, and I’m using it to twist strips of fabric. (The twisted strips are getting turned into a fun DIY sunhat!)
- If you need to mix large amounts of paint, you can chuck a whisk or an old mixer’s beater into your drill.
- I have also chucked a brush into my drill, when I needed to take the gunk or paint off of something.
- Small flashlight:
- A keychain or pen flashlight really makes it easy to see inside the sewing machine while I’m cleaning, oiling, and un-jamming my machines.
- I also use a small flashlight to find beads, needles, and other small items after my klutzy self has dropped them on the floor!
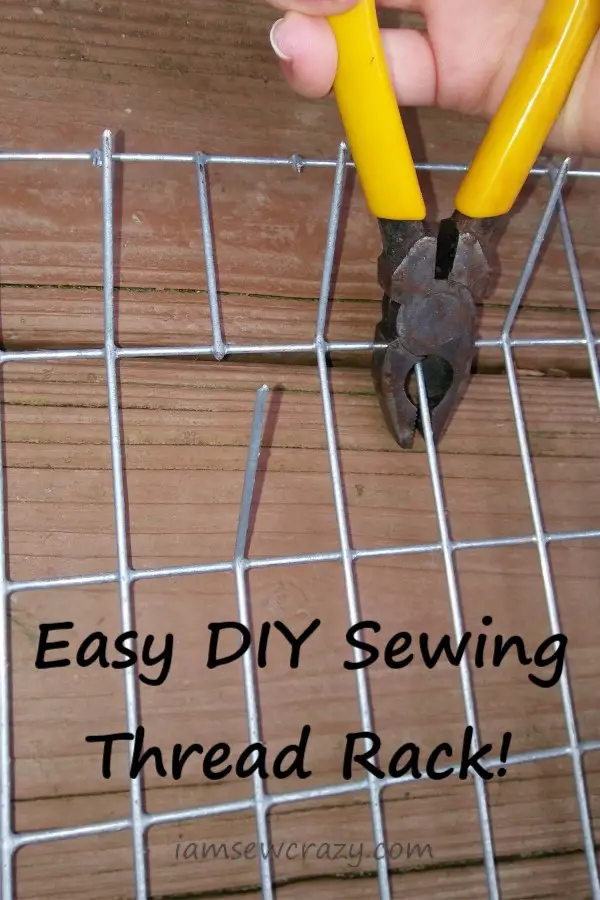
- Welded wire: This is made of a series of wires that have been welded into a grid. It makes a beautiful DIY sewing thread rack!
- Aviation snips or tin snips: A lot of my more structural projects, like these DIY fairy wings, need tough tools to get the job done. I have used tin snips to cut old vinyl records, heavy-duty cardboard, thin wood, plastic, and of course sheet metal.
- Washers: This one doesn’t count, because I don’t personally use pattern weights, and the title of the post is unusual tools I have in MY sewing room. But I know that a lot of people make pattern weights out of washers, so I’m including the idea in the list.
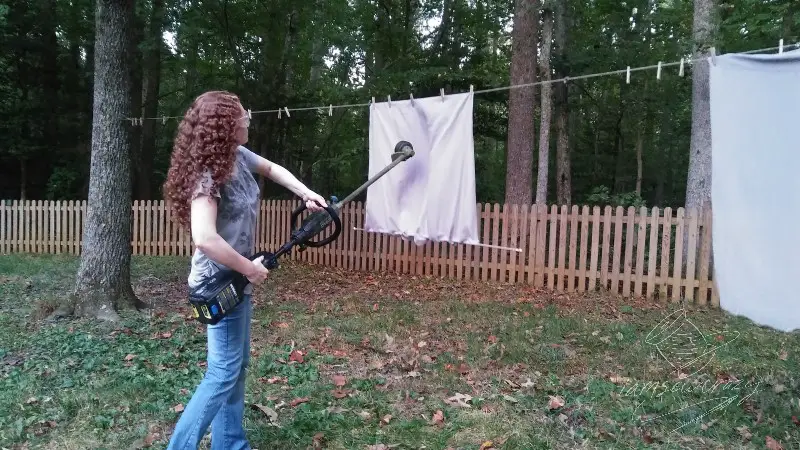
- Weed whacker: The weed whacker was a one-time thing, so it doesn’t count as one of the 50 unusual sewing tools. But when I was making my Phoenix dress, I wanted some tattered and burnt gray fabric at the bottom of the dress to resemble ashes. One of the ways I “distressed” the fabric was with a weed whacker. Which brings me to one more unusual sewing tool from the hardware store: a good pair of safety glasses. 😉
Sewing Accessories From: The Beauty Aisle
- Acetone, AKA nail polish remover:
- I use it to clean metal before I paint it, like I did when I made my DIY thread rack, and this wall hanging using ashes.
- I also use it sometimes to help me determine what a particular fabric is made of: acetate fabric will dissolve in acetone.
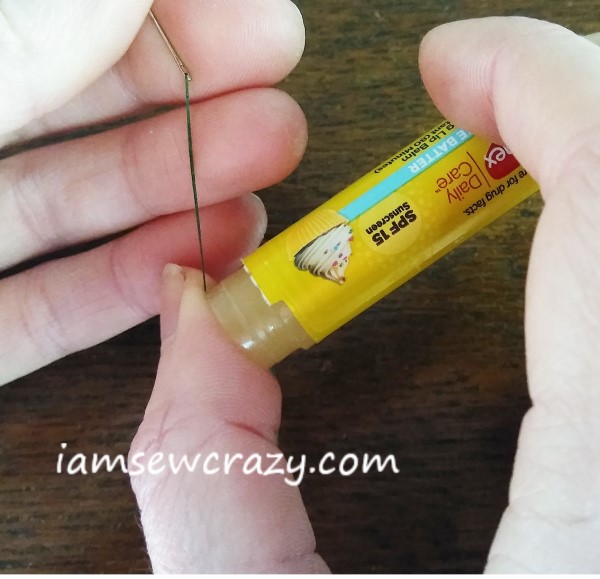
- Lip balm: A lot of tailors run their hand-sewing thread through beeswax before they sew, to coat the thread and make it sew more smoothly. I keep tailor’s beeswax around for this purpose. If you do a lot of sewing, then you might want to get some, too. (It comes in a case that has slots to run your thread through, which keeps it really tidy and handy.) But you probably already have lip balm on hand, and it works pretty well for this purpose. Be sure to use an extremely thin coating on your thread to avoid staining the fabric. Wipe off excess lip balm by running your thread through a paper towel if you need to.

- Eyebrow trimmer: I saw a guest on Quilting Arts use an eyebrow trimmer as a seam ripper. I thought it would make a great fixed thread cutter because it’s safe to touch (unless you’re a piece of thread). It’s much less hazardous and pokey than attaching a traditional seam ripper to the machine. But if you’d prefer a more attractive solution, this thread cutter is pretty enough to hang around your neck.
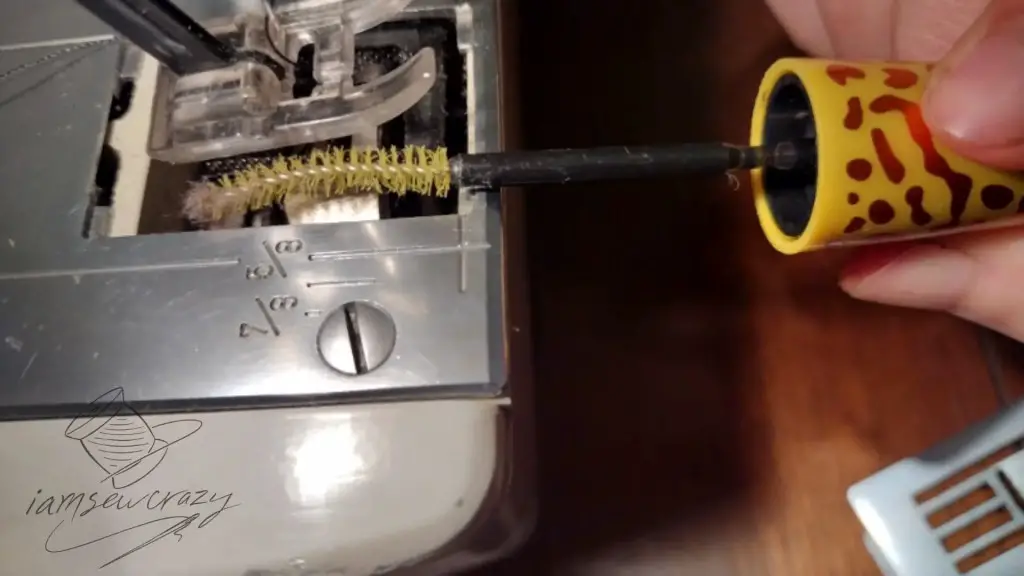
- An empty mascara tube:
- I use a clean mascara brush to get lint out of the feed dogs and bobbin case.
- When I have dull or broken sewing machine needles, I don’t like throwing them in the trash can where they could poke their way out of the trash bag and end up hurting someone. So I keep a small container like a mascara tube around, to hold them safely for disposal. You could also use an empty Tic Tac box or something similar.
- Bend and snap hair clips:
- These are a great alternative to pins for bulky seams, quilt binding, or items like leather that will end up with permanent holes if you use regular sewing pins. They come in a few different sizes, and there’s a good chance you already have some on hand.
- If you get an assortment of different colors, like this, you can use them to color-code which rows of a quilt get sewn first, or which seams join to which, or what fabric has already been prewashed, etc.
- Tweezers: Tweezers have a hundred uses in crafting, but you might find them especially useful for snatching rogue threads out of the bobbin area, or threading your serger.
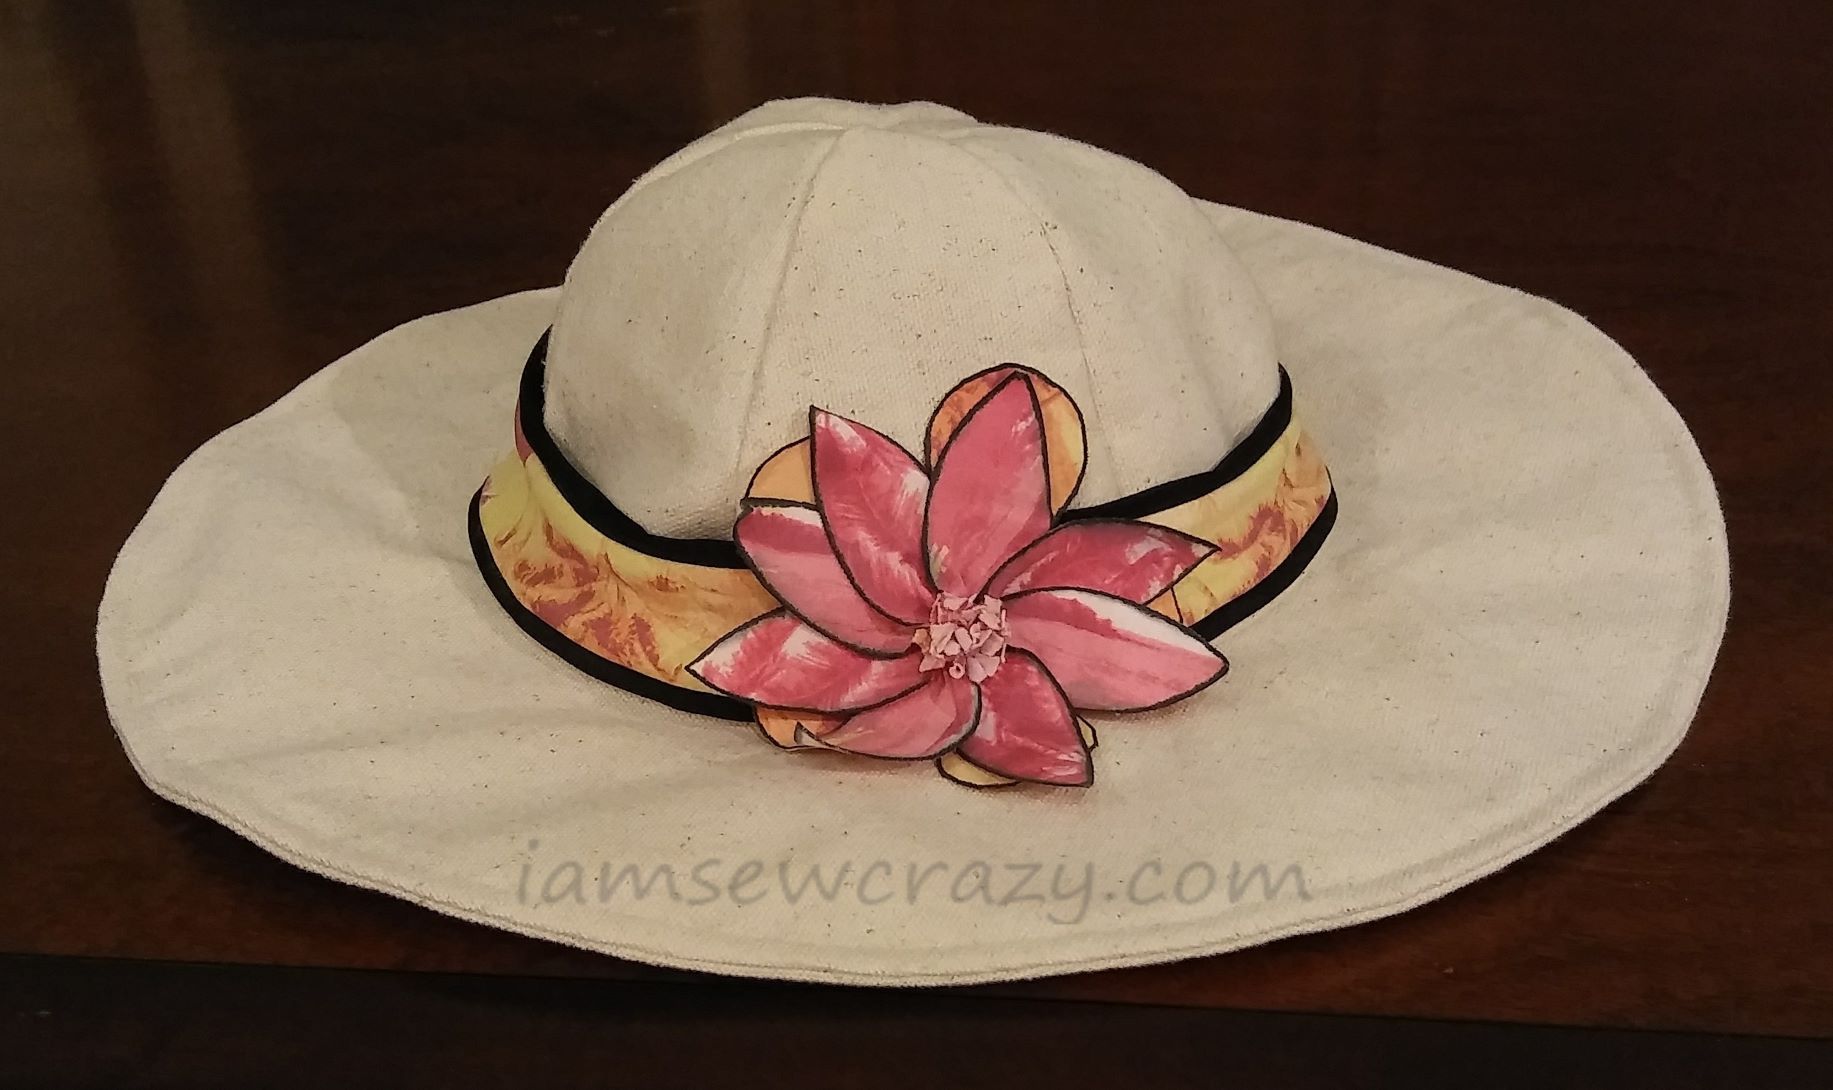
- Hairspray: I use a can of cheap hairspray to make fabric embellishments behave during fashion shows. It’s great to spray on things like hatband decorations that want to flop or bend the wrong way. You might find it helpful if you’re making a fabric flower, wreath, bow, or other home decor item. But it will wash out, so it’s not a permanent solution for a garment.

- Styrofoam Mannequin Head: They’re made to store and display wigs, but I use a styrofoam head to help me shape and hold hats while I’m making them. I also use them to design and construct other headpieces, like this crown I’m working on. I prefer Styrofoam because I can stick pins directly into it.
- Curling irons: I use a couple of different sizes of curling irons in my sewing and crafting.
- I use curling irons to shape and curl feathers for making hat decorations and fascinators.
- I also use them to shape fabric flower petals and other shapes that have Heat ‘n Bond holding them together. Flower petals always look better with a bit of curl to them! Petals made with Heat ‘n Bond will keep the shape you give them while they are warm.
Using Crafting Tools From: The Office Supply Store
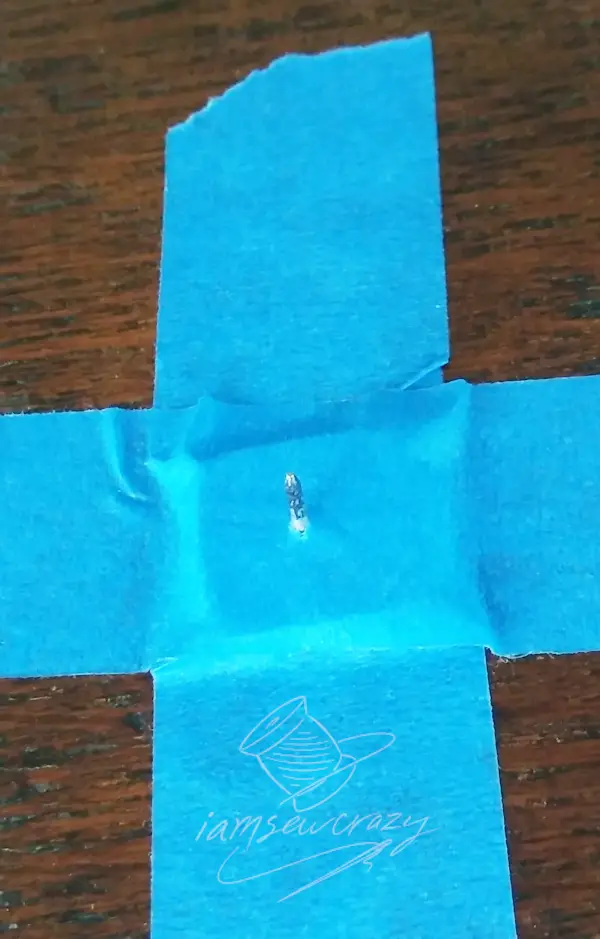
- Thumbtack: A thumbtack (or lapel pin) is an essential component of this easy method to sew perfect circles!
- Sheet protectors for three-ring binders: This one is probably a no-brainer! Plastic binder pockets like these are a great way to hold PDF patterns that I’ve drafted and printed for testing.
- Glue stick: I think I got this idea from Nancy Zieman. You can use a regular school glue stick for basting or holding applique pieces in place until you sew them securely. It washes out later when the item gets laundered.
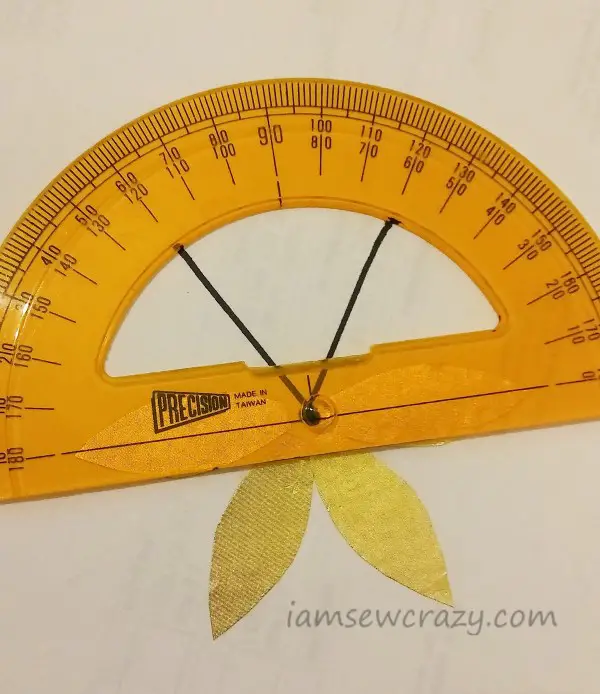
- Protractor: If you want to evenly space items in a circle (such as flower petals) when you’re drawing or appliqueing, a protractor like this can help you get them all the correct distance apart. Check out my tutorial for the full story.
- Stapler: You can actually use staples in the seam allowance instead of pins. I saw a guest on Sewing with Nancy use this trick when she was sewing with kids, because the staples were safer and easier to use than pins. It’s also really easy to put them in with one hand! Remove the staples before you wash or wear the fabric, and do not sew over them.
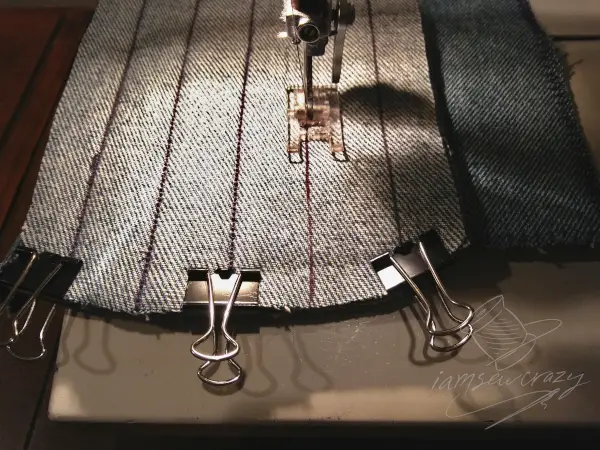
- Binder clips: These handy little clamps are great for holding a bunch of layers of fabric together, like when I sew a Swiffer pad out of old jeans. Or use them for securing materials that will get permanent pinholes, such as leather.
- Binder clips also make a good third hand. For example, when you want to attach the ends of cords to a steady surface while you’re braiding them.
- Or use them to hold the end of the elastic while you’re using this trick to space buttonholes evenly.
- They can help separate one side of a seam when you’re ripping out the stitches.
- You can also use your sewing machine’s presser foot as a third hand, but the binder clips are a lot more portable, and it’s easy to grab more than one if you happen to need a fourth and fifth hand.
- Paper clips: Aside from the obvious tasks like keeping the different sheets of PDF patterns together, paper clips can be used to “pin” things like leather when you don’t want to end up with permanent pinholes.
Unusual Sewing Tools From: The Kitchen
- Produce bags: Yep, this one is a little bit odd.
- I save produce bags made of softer netting to use in hats and fascinators. Here’s a mermaid fascinator that utilizes a green avocado bag. And here’s a glowing fire fascinator that uses a red onion bag. (Both of those examples happen to be made by my sister Nichole.)
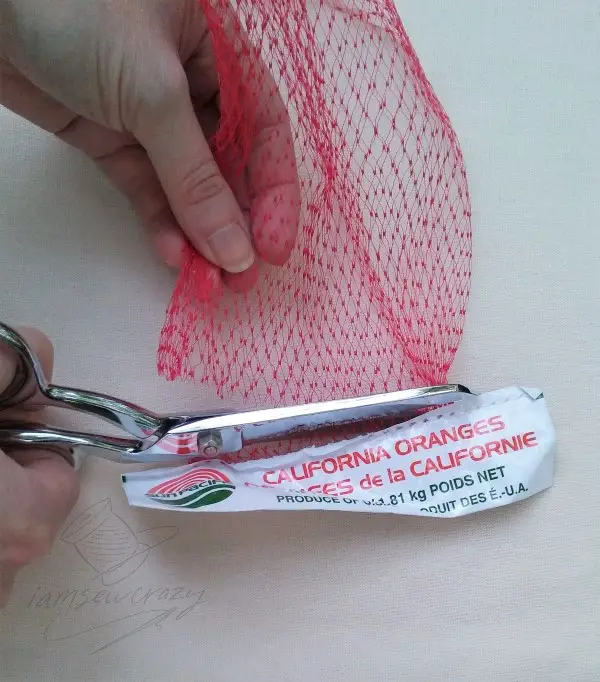
- You can use the produce bags made from stiffer netting to sew your own dish scrubbers. The scrubbers are great for cleaning pots and pans, and a variety of other surfaces. They take less than 5 minutes to make, and they’re even dishwasher-safe!
- Similarly, mesh produce bags are good for rinsing off seashells, rocks, or other found objects before giving them a final scrubbing and using them in craft projects. Just fill the produce bag up with sandy or muddy objects, hang it up, and spray it with the hose.

- Dinner plates, lids, and cans: I used the lid from a can of beans as the base for this light-up Phoenix fascinator!
- Plates and lids make really quick templates for drawing circles or rounding corners. I can usually find something in the kitchen that’s just the right size.


- Forks: I used a fork to make the teeny tiny tassels on the bottom of these earrings! Wind the thread around the fork tines, and then tie the tassel together through the middle tines.
- You can use a fork to make even pleats in fabric.
- Or to make small pompoms out of yarn.
- A fork can also help you to make tiny, perfect bows.
- Flexible cutting boards: These can be cut with a pair of sturdy scissors to make your own templates. If there’s a certain shape you need to cut out a lot, or if you’re designing your own quilt block, you can cut the flexible cutting board to the correct shape, and then mark that shape onto the fabric repeatedly by marking against the edge of the cutting board. You can also use a worn-out rotary cutting mat to make cutting templates.
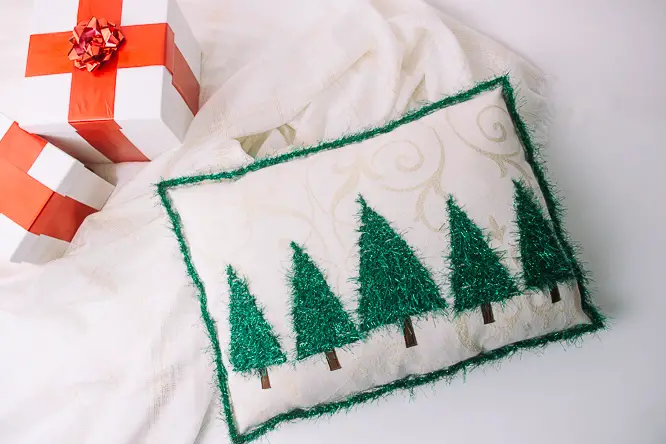
- Drinking straw: This is a really great tip, and especially useful if you want to add text or writing to a wall hanging or pillow. You can use a short section of drinking straw to help you couch yarn or cording to fabric. I demonstrated the entire process in the latest article I wrote for We Like Sewing magazine! I created a Christmas pillow with couched eyelash yarn forming evergreen tree branches. But couching is such a fun and versatile technique that lends itself well to many different styles. Check out the tutorial if you’ve never couched before, and add it to your bag of artistic sewing tricks!
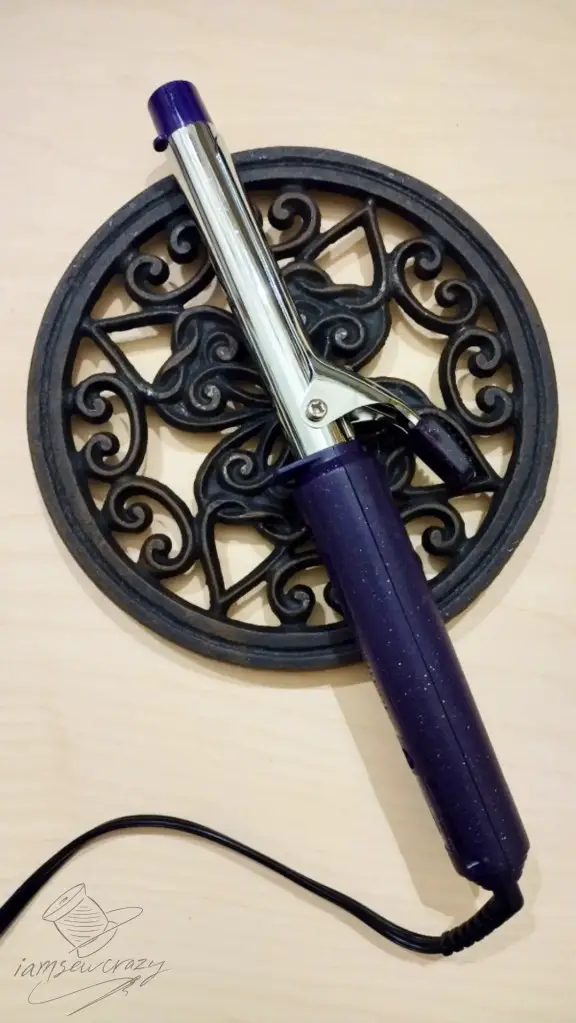
- Trivet: I always have a cast-iron trivet in my sewing room. I use a lot of tools that heat up, like curling irons, a mini torch, wood burner, soldering iron, etc, and the trivet gives me a safe place to set them. I also use it as a coaster because I bring drinks into my workspace all the time. I love the look of metal scrollwork, and it fits right in with my decor.
- Freezer paper:
- You might already know that you can iron the shiny side of freezer paper to fabric and it will temporarily adhere. This is very useful for making patterns and templates for applique, or helping you place designs exactly where you want them. You just peel the freezer paper off when you’re through. You can also use this method to make stencils or resists for decorating t-shirts with paint or bleach.
- If you cut a piece of freezer paper that’s 8.5″ x 11″ (21.5 x 28 cm), you can feed it through your inkjet printer to print templates on the paper side. The printed template can be ironed onto fabric (use a press cloth) for cutting or spacing designs.
- I bought this enormous roll of freezer paper because I draft patterns directly onto it. I hung it under a shelf so that it’s easy to unroll a piece when I need one. I can draw on the paper side, and it’s wide enough for almost any pattern piece I make. It’s also a lot more durable than pattern tissue, and sometimes I mark lines by perforating the freezer paper with my needlepoint tracing wheel instead of drawing on it.
- Freezer paper holds up great to heavy use. You might consider transferring a pattern you use a lot from the original tissue paper to freezer paper, to keep it from falling apart.
- You can also use it to protect your table from messes, or as a throwaway paint palette.
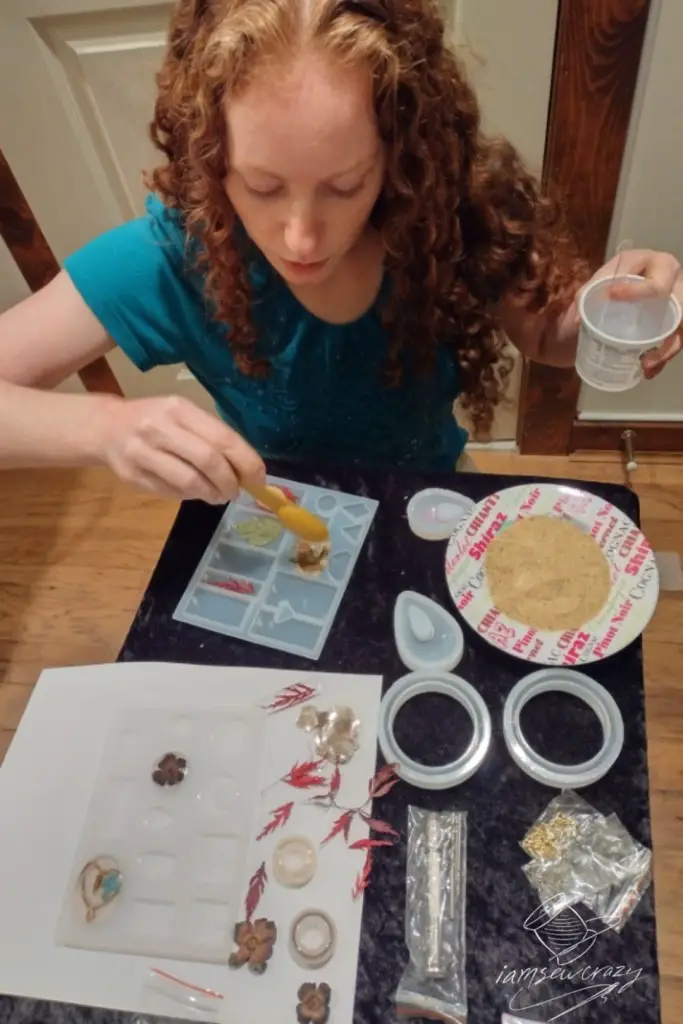
- Random yogurt cups and other disposable containers: So important! I always have a stash of washed-out cups, bowls, and other containers. It’s great to be able to mix resin, dye, etc. in them and not worry about cleaning them out or ruining my good containers. Here, I’m pouring resin out of a yogurt cup, and using a plastic plate to hold some of my materials.
- Foil candy wrappers: I use these sometimes in decoupage. Have you seen my tutorial about how to space items evenly in a circle? The flower petals in my example were actually made from a chocolate wrapper! If you’re crafting something that could use a touch of metallic sparkle, check out the candy aisle.
- You can usually find chocolate bars wrapped in gold foil at any time of the year.
- Some wrappers are more like paper on the back and foil on the front, and some are foil all the way through. The half-paper wrappers don’t rip as easily, and I like them better for decoupage. The solid foil ones can be crumpled up tighter, and hold the crumpled shape better. This can be more useful for 3-dimensional crafts and collages.
- Hershey’s Kisses and Reese’s mini peanut butter cups come wrapped in pastel pink, blue, and green foil in the springtime. You can find the kisses in red and green around Christmas.
- Of course, you’d have to eat all of that chocolate. But that’s the price we have to pay to use this great craft material!
- Distilled water:
- I think my mom taught me this one: only use distilled water in your iron. If you use tap water, you will have a buildup of minerals and impurities in your iron over time, as the water steams away and leaves them behind. But distilled water has basically already been steamed once! So you can use it in your iron without having to deal with the residue.
- I use distilled water mixed with rubbing alcohol in crafts that are kind of like snowglobes. It’s important for crafts such as my Shifting Sands kinetic art, or my Shipwreck in a Bottle. It keeps water spots off of the inside of the glass where the water has flowed away.
Miscellaneous Sewing Tools:
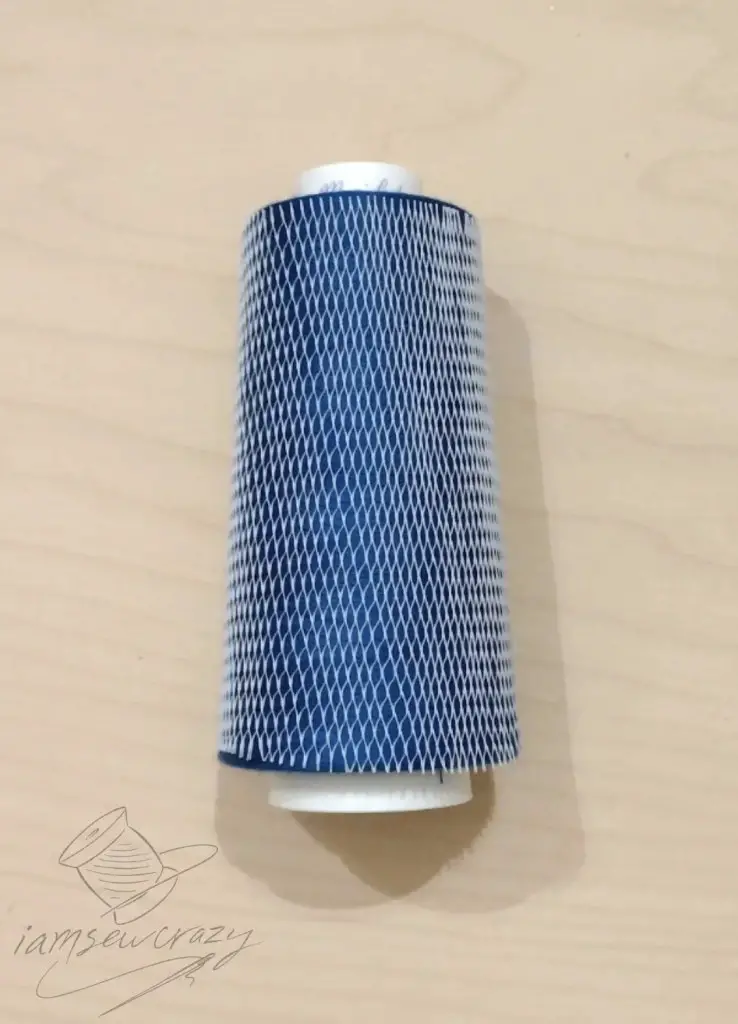
- Bud nets: Their original purpose was to protect delicate flower petals during shipping. But if you pop one over your serger cones, you have a great way to keep the thread from unraveling! You may be able to get some for free by asking your local florist. (If you can’t find any from a florist, you can buy them here.)

- Mini torch: I always have a torch in my sewing room! Mine is a Turbo Blue mini torch, which is very powerful (you can even solder with it)! It works at any angle, even upside-down, which is really helpful for the resin projects. The flame is adjustable, and the fuel is refillable. How do I use it?
- I use a flame to pop the bubbles in my DIY resin casting projects. A heat gun or torch is pretty much essential for resin projects, as you’ll see in my beginner’s guide to pouring resin.
- I burn fabric to find out what it’s made of. It’s a trick I first saw in a Singer sewing book I found at the library as a kid. A surefire way to tell the difference between real silk and a convincing imitation is to light a scrap of it on fire. Real silk smells like burning hair, whereas a synthetic imitation will turn into little melted plastic beads when you burn it. (Be safe, use tongs, and always torch things over a non-flammable surface.)
- I also use a flame for heat-shrink tubing. When I’m making wire jewelry or adding millinery wire to the edge of a hat brim, I often join the two ends of the wire using heat-shrink tubing.
- Here’s another millinery-related use for fire: I used a lighter to bend a vinyl record to make the brim of this top hat for a giant bunny sculpture!
- I also used a lighter to burn the gray fabric at the base of my Phoenix dress. I wanted it to be tattered and reminiscent of ashes, with the red feathered dress rising up from the “ashes”. I wet the top of the piece of gray fabric with water, so that only the bottom edges would ignite. It was definitely not something I do all the time, but it was super fun!
- Rare Earth magnets, AKA neodymium magnets: I have so many uses for these! Neodymium magnets are very strong, much stronger than regular refrigerator magnets. You don’t necessarily have to buy the magnets themselves, though! I have some that came from discarded computer hard drives. I also popped a few out of a home security system that had magnetic alarms for the doors and windows. But you can definitely get them on Amazon if you want to.
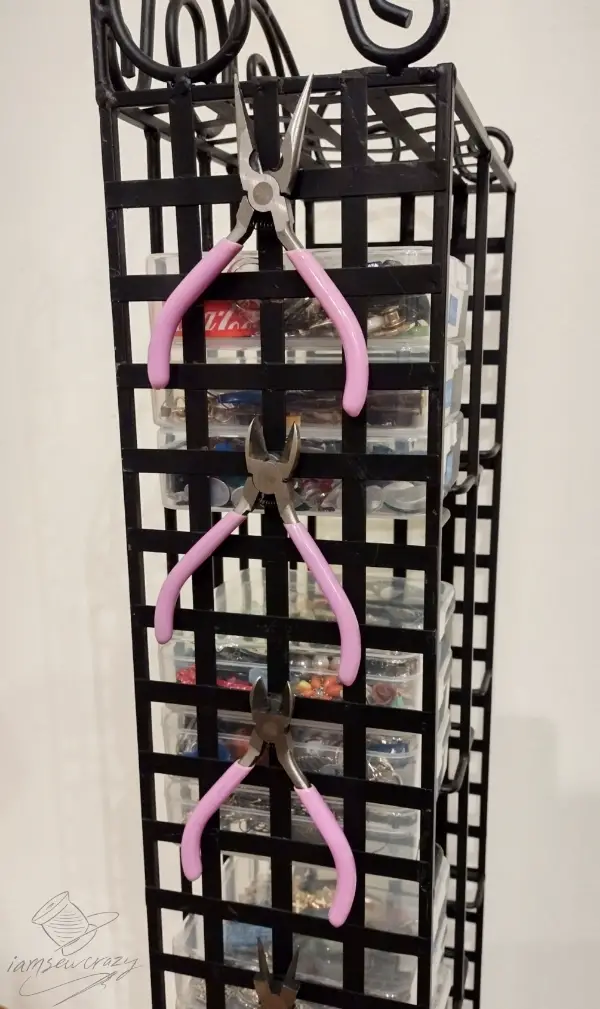
- I hang all my jewelry pliers on the side of a metal shelf using magnets. If you don’t have a metal shelf, you can attach some magnets to a board, or sew them inside a strip of fabric. Hang it on the wall, and you have a quick way to hang up metal tools. Decorate it to make it totally “you”, and it’s a beautiful way to keep your sewing room more organized!
- You can use magnets to add a guide to the edge of your scissors. I stick a bobbin or other metal object to the blades of my scissors. Then, when I cut my materials out, I follow the cutting line with the edge of the bobbin. This is extremely useful for adding seam allowances to a pattern that doesn’t include them. Or, for cutting perfectly even strips of fabric without a rotary cutter.
- Glue seashells or other decorative items to the magnets to make your own custom refrigerator magnets. Use them to attach inspiration photos, fabric swatches, sketches, and project ideas to a magnetic memo board.
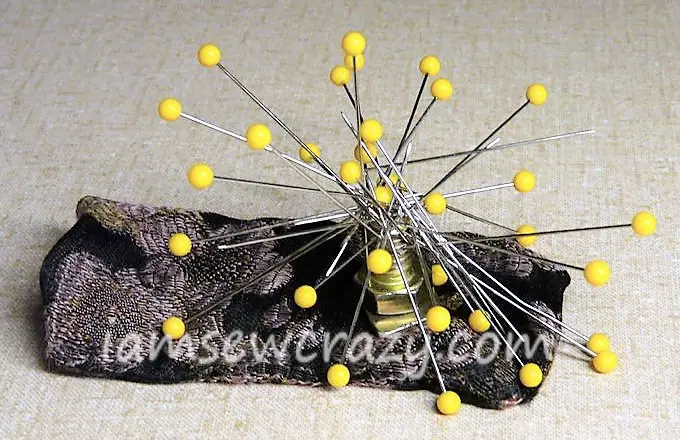
- A rare earth magnet is an essential component in my favorite DIY magnetic pincushion that I came up with a few years ago!
- And you can buy magnetic purse closures to use in bags and totes that you make.
- (Note: If you’re sewing a neodymium magnet into something, you need to pick one that’s coated and designed to be used in a purse, or else it will rust. And it’s very important that you keep all magnets away from children who might swallow them.)
- Fishing equipment:
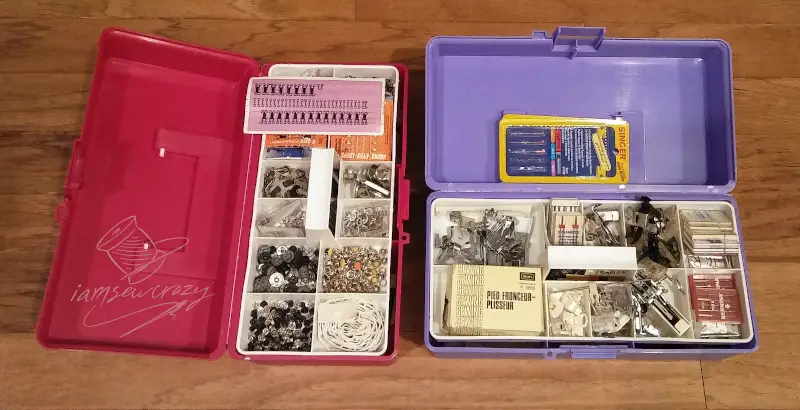
- I love storing needles, presser feet, snaps, grommets, jewelry supplies, and all sorts of little notions in the compartments of tackle boxes. You can find similar boxes sold as craft organizers or jewelry boxes. But tackle boxes come in some really creative styles (such as a backpack with compartmentalized boxes that slide inside). You may find these options particularly useful if you travel a lot. Or, if you go to a lot of classes and crafting meetups, or paint outdoors.
- It’s kind of a splurge, but if you do a lot of jewelry-making or incredibly detailed work, you might be interested in a fly-tying vise. I don’t have one now, but I think it would be useful for all sorts of tiny jewelry crafts.
- I’ve used fishing line to cut bars of homemade soap, and as a heavy-duty invisible thread. Monofilament fishing line is a lot like invisible thread from the fabric store, but you can buy it in different thicknesses.
- You can find spools of metallic tinsel, feathers, tiny swivels, little crimp tubes for joining filament, this strangely beautiful multicolored braided fishing line, 3-way connectors, metal rings, and sturdy clasps in the fishing section that would all be great for crafting. The supplies sold for fishing seem to be less expensive than the ones sold for jewelry or crafts. They are a little less delicate-looking, but they are generally quite sturdy.
- The pliers they sell for fishing are super cool! Like this pair that unfolds to become a screwdriver, cutter, file, etc. It’s another thing that might be useful if you craft on the go a lot.
- You could also use fishing line storage products to keep large amounts of cording or embroidery floss under control.
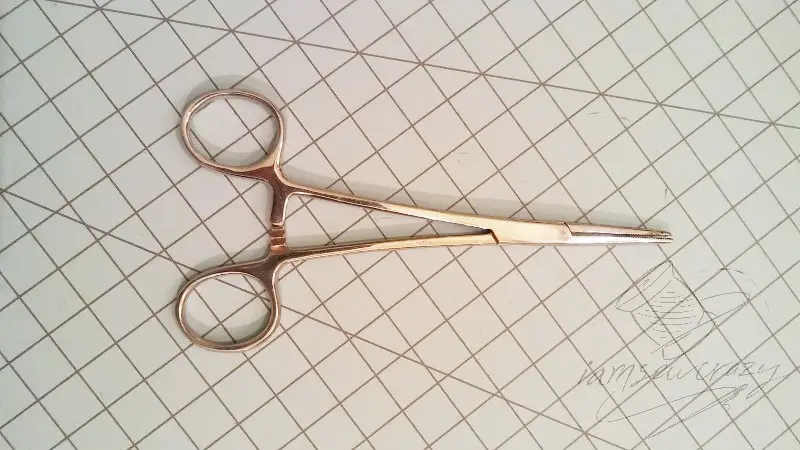
- Hemostats: These little forceps/clamps are like light-duty precision pliers that clamp shut, and they’re designed to be used during surgery. Imagine if tweezers, pliers, and clamps all had a baby. I just have plain silver ones, but I ran across this pair that I think is really pretty.
- They’re great for turning small pieces right-side out after you’ve sewn them.
- Hemostats work really well for grabbing bits of stuffing and poking it into the smaller areas of a stuffed toy, doll, or other 3D soft sculpture.
- You can use them to pinch and clamp small, thin items until the glue dries.
- They can help you tie finicky knots in thread or cords.
- Use them to get a handle on smaller wires and jewelry findings.
- Hemostats are what I use to hold a scrap of fabric safely while doing a burn test.
- If you get a pair of hemostats, I’m sure you’ll find even more uses for them. I know I always have them close at hand.

- Rubber gloves and finger protectors:
- When you have a lot of hand sewing to do, you might want to try using some finger protectors. Sometimes called “office fingers”, these items will help you grip the needle and pull it through the fabric. They aren’t tough like a thimble; they are for pulling the needle (not pushing).
- You can also wear them if you are using hot glue and are worried about burning your fingers.
- When you’re working with fabric dyes, resin, or other chemicals, you’ll want to protect your hands with the appropriate gloves.
- Clothespins: You can obviously use them to hang fabric to dry after washing, but also…
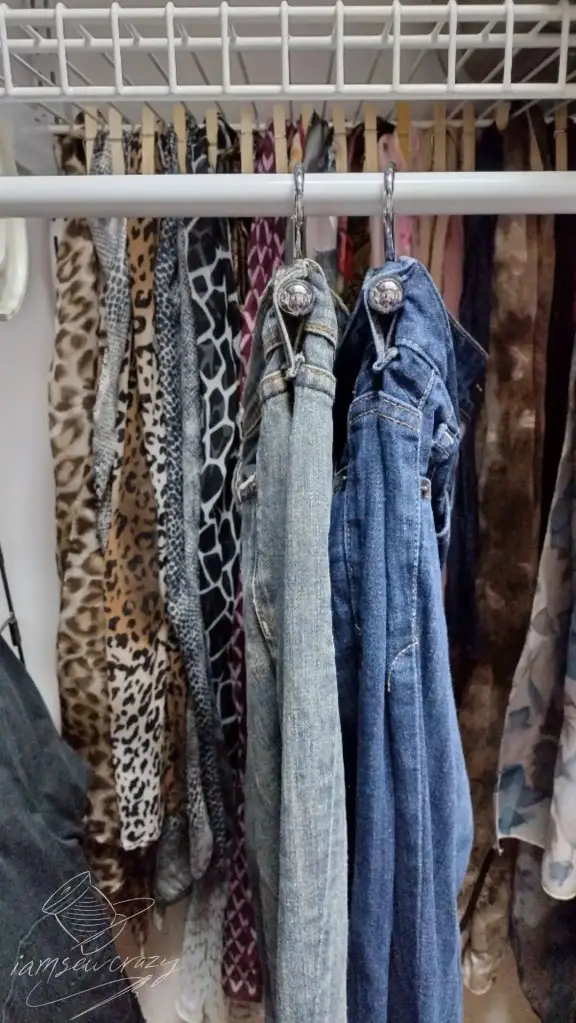
- I use clothespins to store scarves in my closet. I clip each scarf to the back of the wire shelves, so they all hang in a row behind my jeans. When I need to see the scarves, I move the jeans aside, and I can see my full selection!
- I use clothespins to pair up different materials when I’m playing around with matching fabrics to make an outfit.
- You can glue a line of clothespins to a board and hang it on your wall. Now you have a quick-change design wall for swatches, articles, sketches, pictures, or inspiration photos.
- When I don’t have a skirt hanger, I use clothespins to attach a skirt to a regular hanger.
- Some people use clothespins as a clever way to organize hand embroidery thread and keep it from turning into a tangled mess. (I use cardboard floss bobbins like this, because someone gave me a pack, and I like them. But the clothespins seem like a really good idea too.)
- I’m always using clothespins as random little clamps. For example, when I was making resin ceiling fan chain pulls, I used clothespins to clamp one end of a ball chain to a taller item. The other end of the chain could dangle down into the resin. When the resin was cured, I had some DIY ceiling fan chain pulls all ready to go, with their chain pieces attached!
- Large glass vase: Another millinery tip! Sometimes I turn a large glass vase upside-down and use it to hold up a hat I’m working on. It’s a great way to raise the brim of the hat up off the table so I can shape it. A glass vase is also a nice display stand for the finished hat, so I can take a good picture. This particular hat is one that I made using twisted strips of fabric. Check out the tutorial if you’d like to make your own sunhat!
- Credit card: There is the obvious use of buying more fabric, lol.
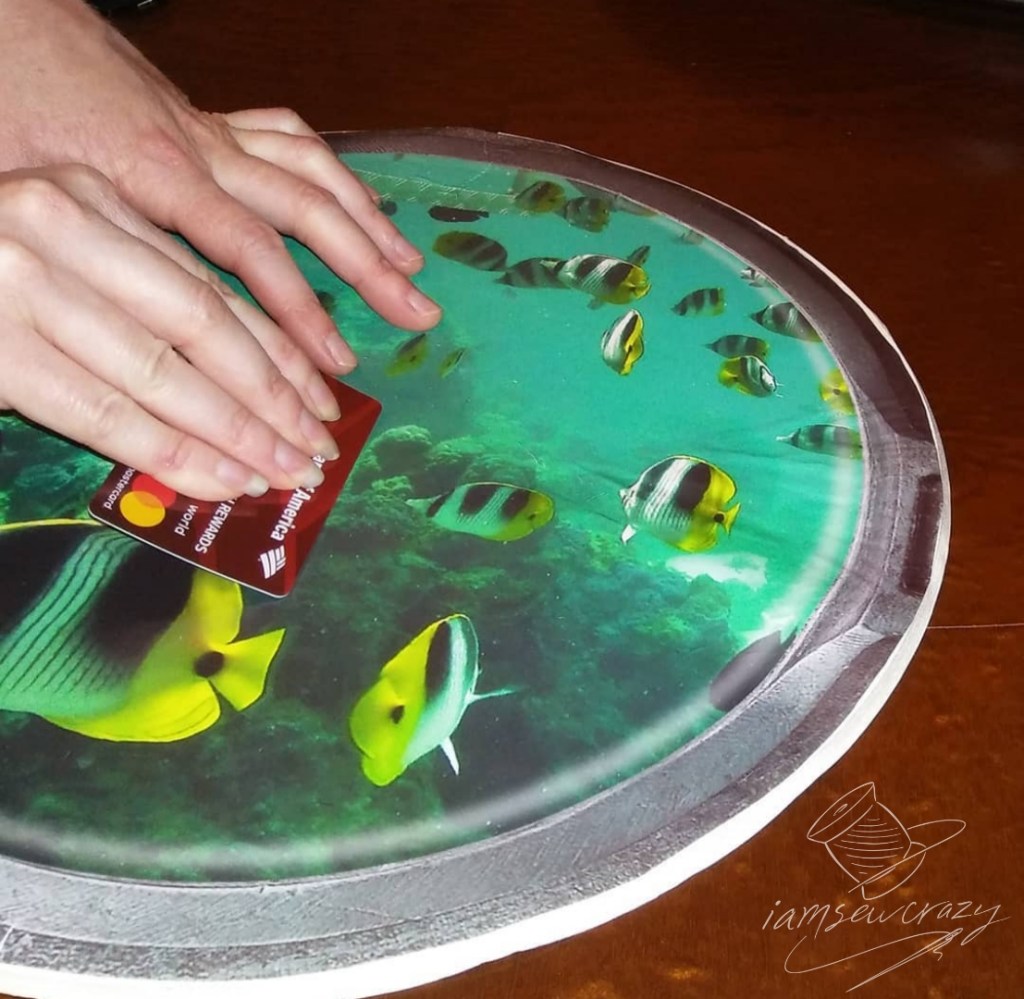
- You can use an old credit card to spread glue or ink onto a surface for decoupage or screen printing. Then, use it to smooth down the items you are decoupaging to the surface.
- You can use a credit card as a tool to make pompoms, tassels, or this adorable monster pen topper.
- A credit card will scrape off renegade bits of dried glue or paint that landed in the wrong spot.
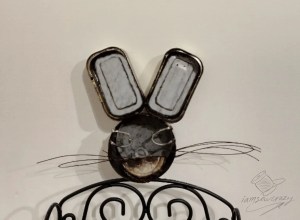
Can bunny: I know it’s not exactly a tool, but I always keep some little thing in my sewing room just because it makes me smile. Maybe it’s a letter from a friend, or a Mylar balloon shaped like a Minion. Or chocolate (okay, chocolate is in my sewing room quite frequently).
Right now it’s this can bunny. My younger brother Cory randomly welded it out of nails, wire, and tin cans, and gave it to me. Can Bunny is a little rusty by now, as I’m sure you can see on his poor whiskers.
I also keep my guitar in the sewing room, and I can pick it up and make some noise when I want to. Even back when I didn’t have much room to sew, I still found a spot for Woody and Jessie from Toy Story on my pegboard. The sewing space needs to be my happy place, no matter what else is going on in my life.
And most important of all, my Bible is nearby. There’s absolutely nothing that improves my mood like telling Jesus about my problems!
Remember not to get too tense about a project, even if you’re getting frustrated. It’s only fabric, after all! Martha Pullen once said not to stress about making things perfect, because “we sew for fun, not heart trouble.” And I agree! I’m all about the happy sewing!
I hope you’re adding some of these unusual sewing tools to your own sewing room! Be sure to share this article with others who might be interested in odd techniques and sewing hacks. We could all use a little more whimsy and sewing outside the box!