


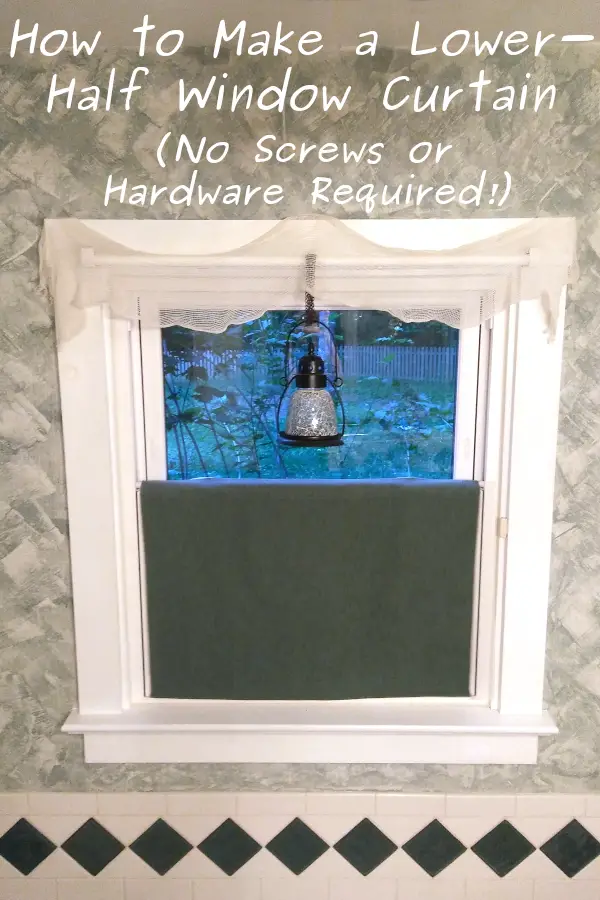
When you have a window in the bathroom, privacy is obviously a concern. But my houseplants and I love the natural light that comes through the window. My favorite solution is simple: make a lower-half curtain! This is a very easy curtain to make, since you don’t need to install any hardware at all. That makes it a great window treatment for renters, too. I actually have one of these curtains in every bathroom in my house! So follow along, whether you’re an experienced sewist or not. (Psst, it’s okay to use glue to make a no-sew window curtain!) I’ll show you how to make a lower-half curtain of your own.

Make sure your window has tracks on the sides
To make this style of lower-half window curtain, your window has to be a standard window that raises and lowers, with tracks on the sides. If you have a wildly different window, like a louvre, then you will need to pick a different style of curtain to use.
If your window has no tracks, then you might consider using a curtain rod like this instead. It’s a blackout tension rod, which means it causes no damage to the window frame or wall. But it looks nicer than a plain tension rod, and it still offers wide coverage for complete privacy. You can easily position it halfway down the window frame in order to have both privacy and natural light.
If that doesn’t work for your window either, then consider the curtain rod hooks made by Command. I really love their products; they hold tight and have never damaged my walls.
Decide on a style for your lower-half curtain
You have the option of a sleek, flat curtain, or a softer ruffled look. They are equally easy to make, so pick a design and fabric that suits your style and looks great in your room!
If you want a ruffled curtain, then you will need to cut the fabric much wider than you would for a flat curtain. A good rule of thumb is to cut the fabric twice as wide as you would for a flat curtain. You can trim a bit off the sides later on, if you decide that the curtain is too full or doesn’t drape the way you want it to. For a thicker fabric, you may want to start with one and a half times the width of your window frame. However, it’s so much easier to cut the fabric a little smaller than it is to make it bigger! So if you have enough fabric, I’d start with twice the width.
Supplies you will need to make a lower-half curtain
- Fabric (I’m using a thick, textured doubleweave)
- If your curtain is for privacy, like mine, then the fabric that you choose should (obviously) be thick enough that it can’t be seen through. Test this at night with the bathroom lights on, just to be sure that you can’t see into the house.
- Rod or dowel (I’m using a 1/2″ diameter wooden dowel)
- Scissors
- Tape measure or yardstick
- Sewing machine with needle and thread appropriate for your fabric


Note: This would be a fine place to use fabric glue, if you want to make a no-sew curtain. There are no heavy-wearing or complicated seams to worry about, so fabric glue will work just fine. This fabric glue is my favorite because it has a tenacious hold, dries quickly, and doesn’t easily seep through the fabric. It’s my go-to for things I can’t really sew, like when I’m attaching feathers to a dress or fascinator.
If you want to, you can also use a UV-repellent spray like this on your curtain, to control fading. But this curtain is so easy and low-stress that I don’t worry about this, either! Only the back side is going to fade, and I might be ready to update the room again by then.
Cut the dowel

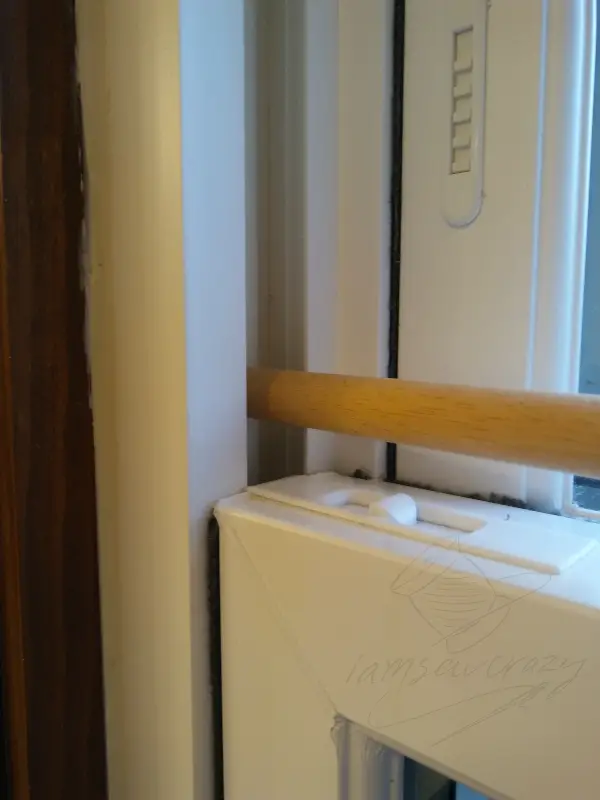
The curtain will be held up by a dowel that sits in the window tracks and spans the window frame, on top of the lower window. I’m using a 1/2″ dowel, but the exact thickness doesn’t matter… just make sure that the dowel you choose is thin enough to fit into the window tracks.


This part is pretty easy. You won’t see the ends of the dowel, so your cuts don’t need to be very tidy. And there’s a pretty wide margin of error before the dowel is actually in danger of falling out of the window tracks. So you can eyeball the width, and cut the dowel to length with a sturdy pair of garden pruners. Cut the dowel a little on the long side, and drop it into the tracks at an angle. Trim it down (if necessary) so that it fits nicely into the window tracks. If the dowel can fall out when you slide it from side to side, then you have cut it too short.
For example, the width of my window frame was 20 3/4″. The window tracks were each 5/8″ deep. I cut the dowel 21 3/4″ wide, which was a perfect fit. It can’t fall out, but the 1/8″ of extra room on each side makes it easy to lift the dowel in and out of the window frame.
Measure your window frame


Now you need to measure how wide and long you want your curtain to be. Measure the width of the window frame in between the two tracks. Then, measure from the top edge of the dowel down to the windowsill (or wherever you want the bottom of the curtain to be).
For my window, the width came to 20 3/4″. For the length, I decided that I wanted the curtain to cover the little handle at the bottom of the window that lets you open and close it easily. This meant that the finished curtain needed to be 20 3/4″ wide, by 19″ long.
Cut the curtain fabric

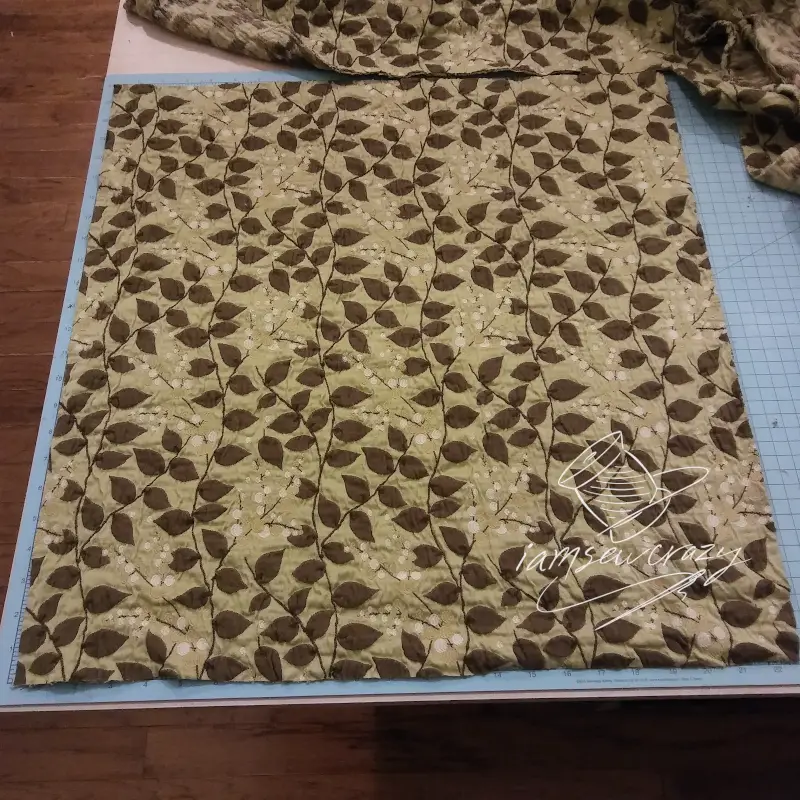
I chose a textured doubleweave fabric with a vine pattern to go in the upstairs bathroom. Doubleweave is actually two separate layers of fabric that are woven together to form a pattern. The intentionally crumpled texture of this fabric made it tricky to iron. So, I held the edges down with my long ruler and made sure the grainlines were straight before I cut it. I’ll have enough fabric left over to make a matching fuzzy textured bath mat!
When you cut your fabric, take your desired finished curtain measurements and add 2″ to the width, and 5.25″ to the length.
That meant in order to make my curtain 20 3/4″ wide by 19″ long, I need to cut my fabric 22 3/4″ wide, by 24 1/4″ long.
Sew or glue the curtain fabric


Fold under 1/2″, then fold under 1/2″ again on each side. Stitch down the edge of the folds to secure them in place. Do the same thing on the top and bottom of the curtain, tucking in each corner as you come to it. This will ensure that the seam allowance on the corner doesn’t stick out and show on the right side of the curtain.


Now fold the top 2″ to the underside, pin it in place, and stitch that down. This will create a pocket for the dowel to go through.
Paint the dowel (optional)
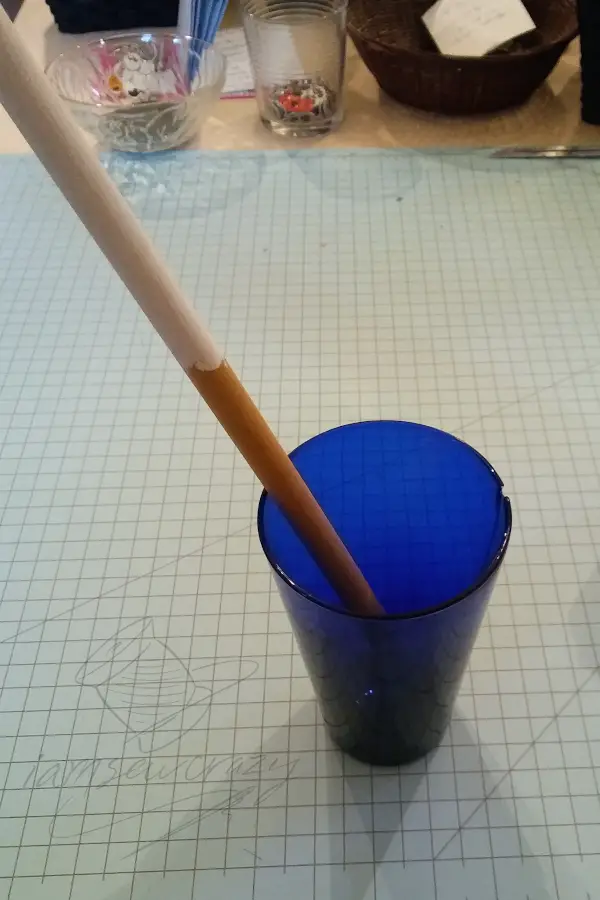
I have chosen to paint the dowel white, to match the window frame. But you can hardly see the dowel when the curtain is finished, so that part is up to you. It’s easiest to paint half of the dowel at a time, leaving it sitting in a cup so the paint can dry.
Slide the dowel into the pocket you made at the top of the curtain. Drop the dowel into the window tracks so that it sits on top of the lower window. Ta-daa! You have a spiffy, custom, handmade curtain that gives you privacy but doesn’t block all of your light. It’s a very easy, inexpensive, or temporary window covering that’s great for renters!
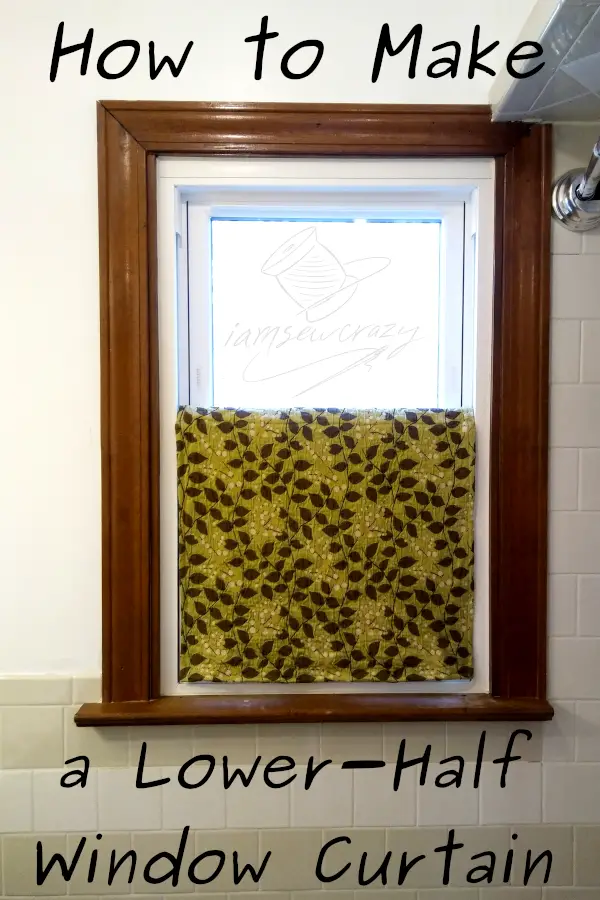
The window with the leaf-patterned curtain is right next to the shower, so privacy was a huge concern. (You can see the shower curtain rod at the corner of the window frame.) Since only the lower half of the window is covered, the curtain works very well to block only what’s needed for privacy. It doesn’t leave you feeling like you’re in a dark cave with no light.
Now you know how to make a lower-half window curtain! You should totally use the leftover fabric to make a matching bath mat.
Happy crafting!

