


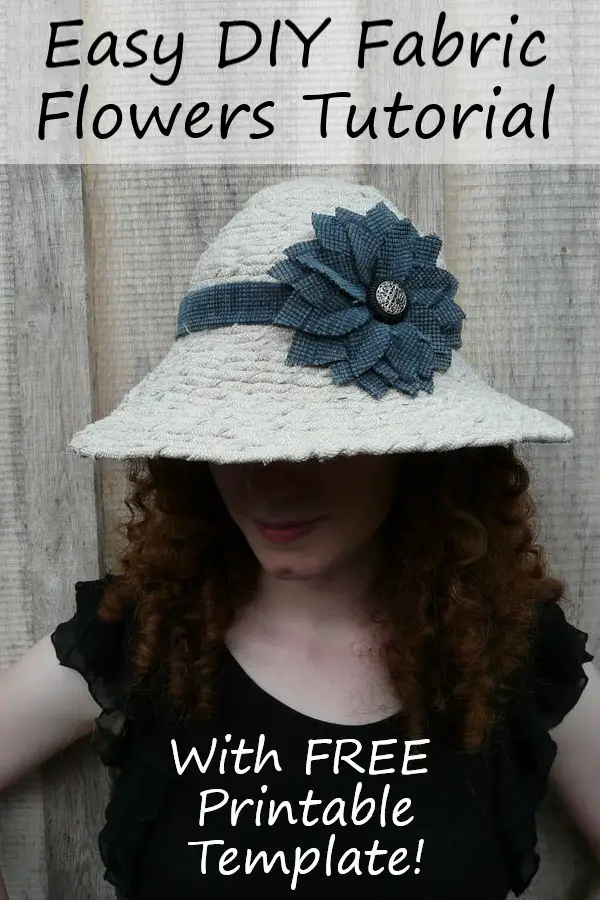
Aren’t these fabric flowers adorable? They are very easy to make, and can be made in many different shapes, sizes, and colors. They can make use of even the tiniest scraps of leftover fabric, and they will never wilt! You can use them to decorate hats, wreaths, tote bags, flip flops, headbands, pillows, and many other items. You can also attach them to stems or branches and display them in a vase.

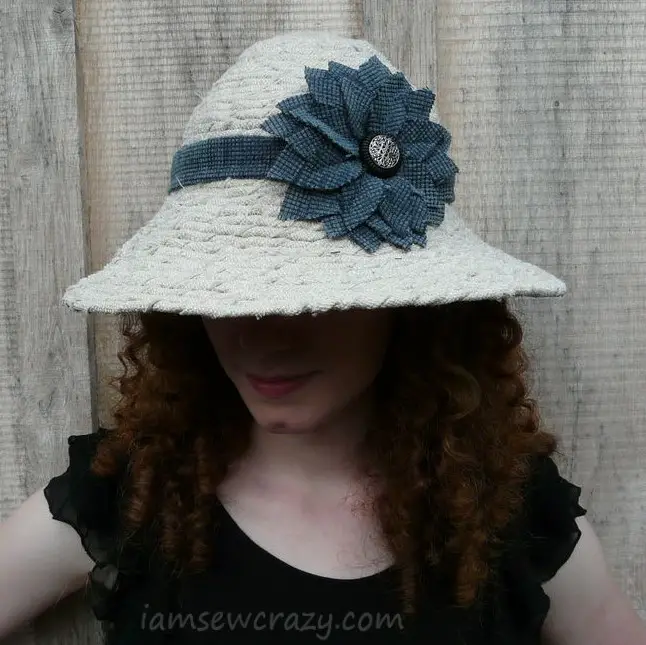
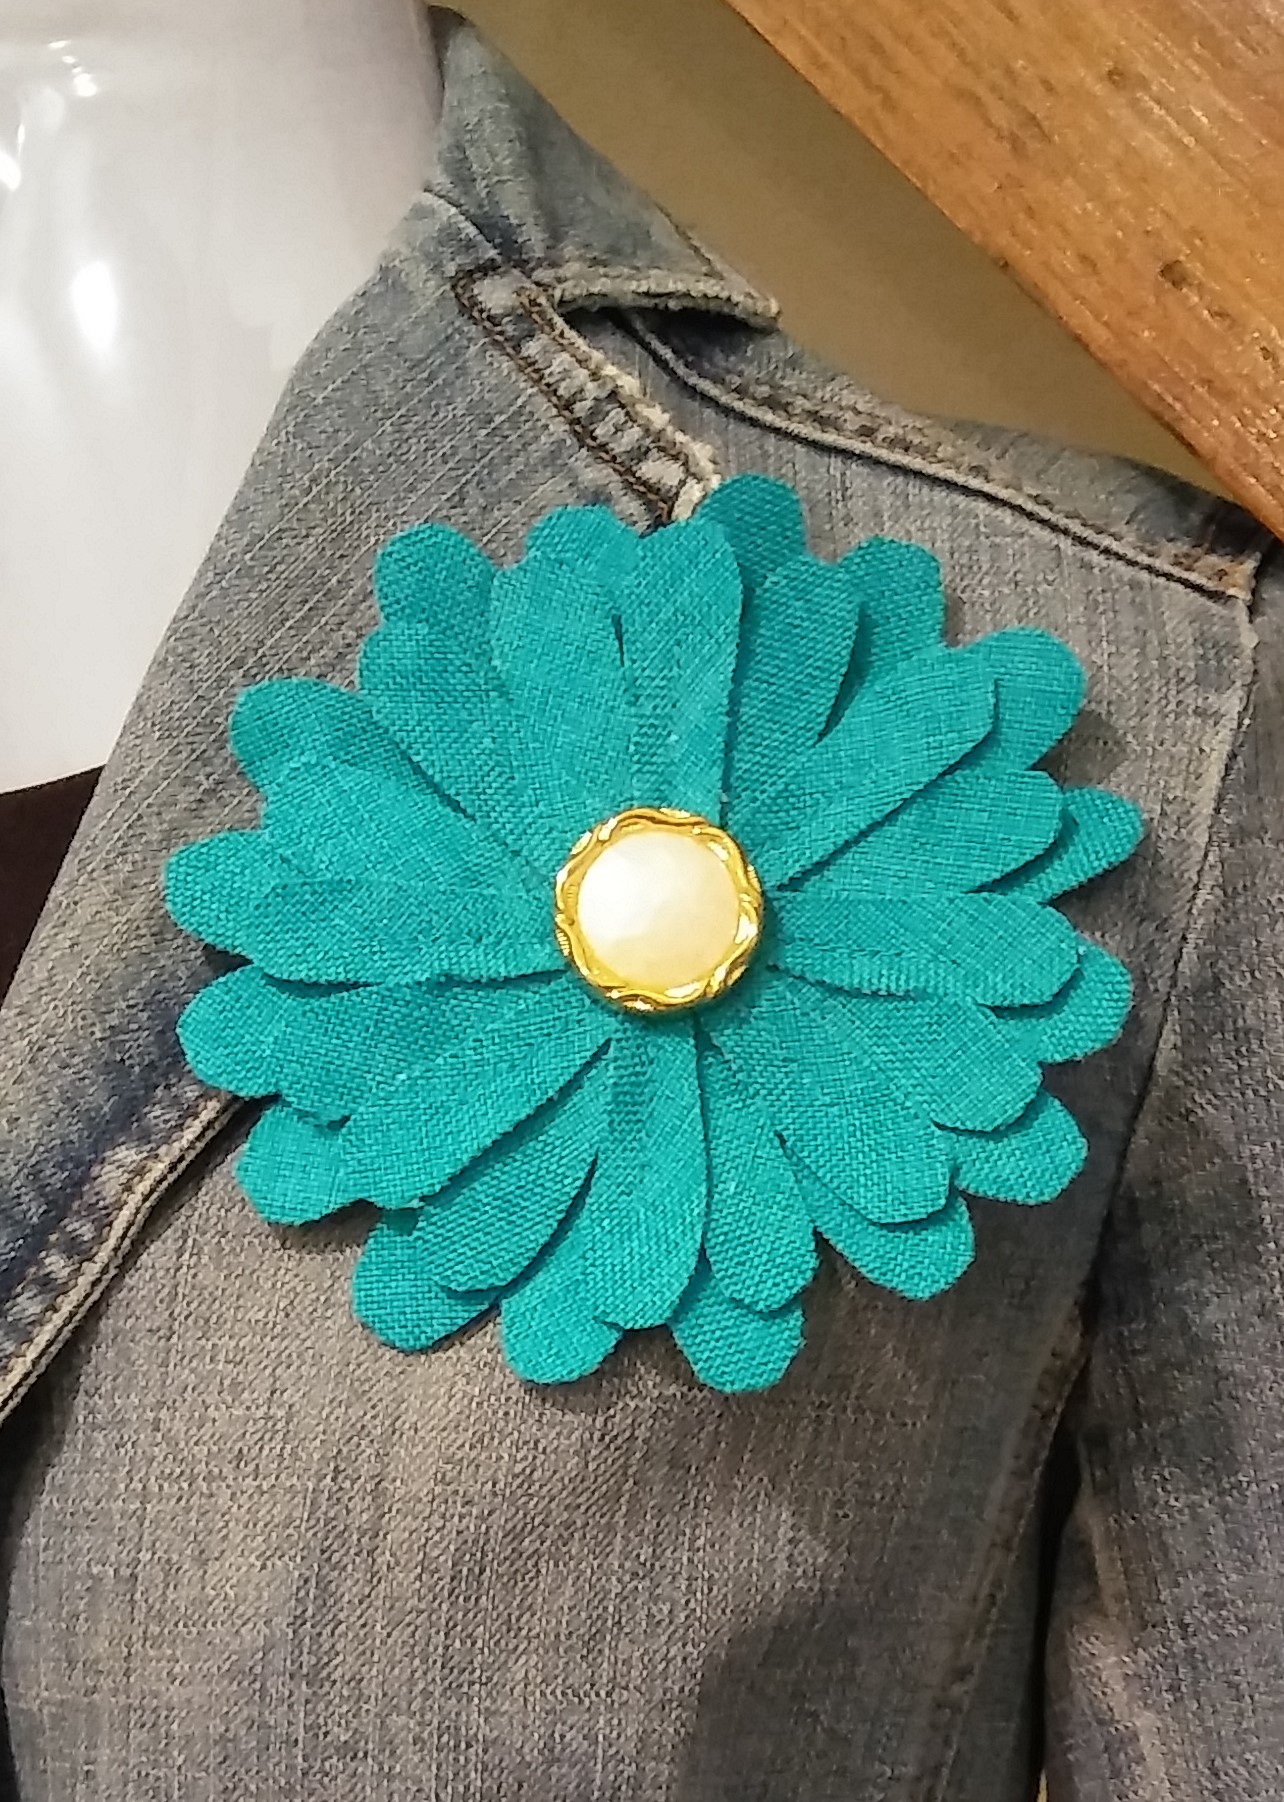
I promised this fabric flower tutorial in my post about the DIY convertible sun hat. The hat band has a button on it, and I can button on a different flower to match my mood or outfit. The button becomes the center of the flower, and holds the flower on to the hat band.

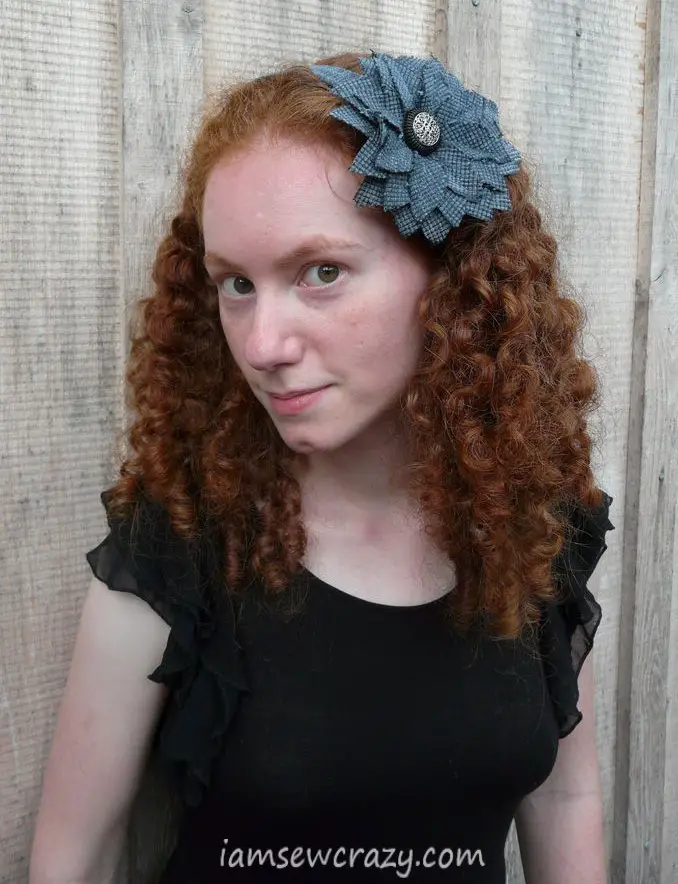
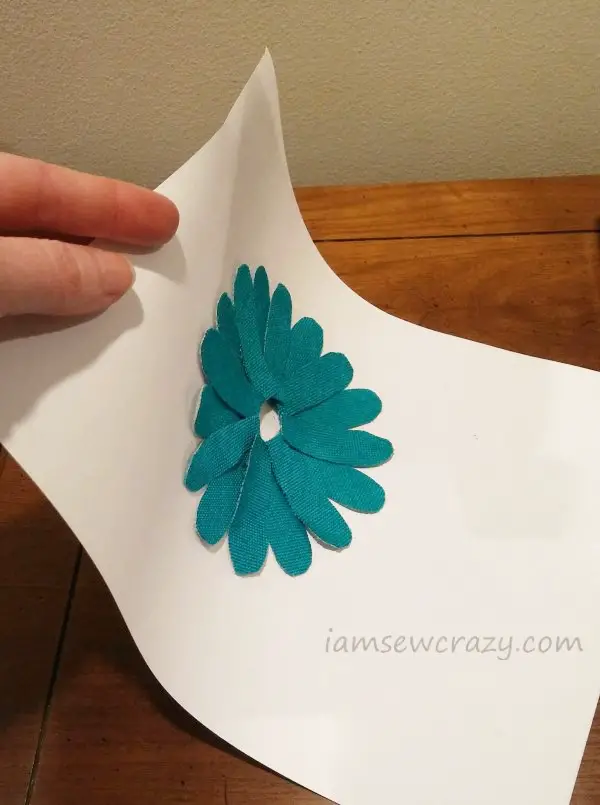
In this picture, I’m wearing the hat band as a headband. (Check out the tutorial if you’d like to make your own summer sun hat!)
You can get creative with mixing and matching fabrics, and you can use the tiniest scraps of fabric from your stash. All of the flowers in this tutorial (as well as the entire hat!) were made with scraps from an upholstery shop, so it’s a great thrifty reuse/upcycle craft. You can even make flowers out of old denim jeans!


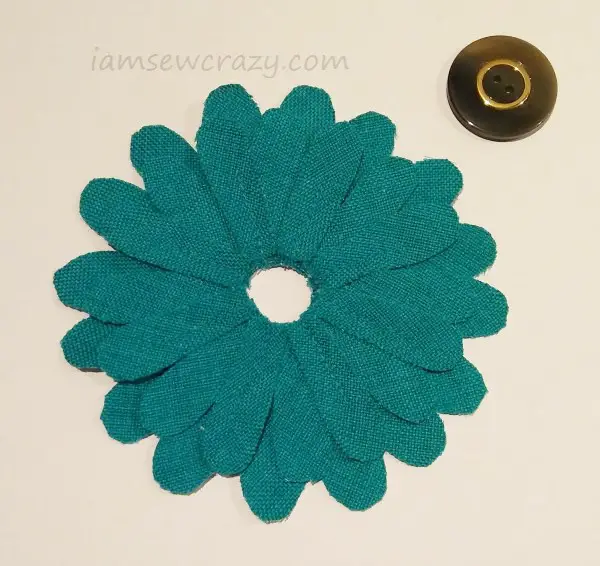
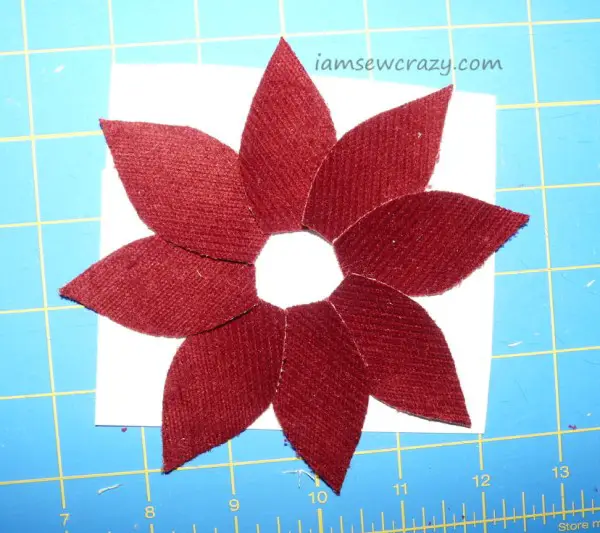
I’m making two different styles of flower in this tutorial: the teal flower on the jacket has rounded petals (I call that one a daisy style) and the one on the hat band has pointed petals (I’m calling that one a poinsettia style). I included both styles on the printable template.
Choosing and Stabilizing Your Fabric
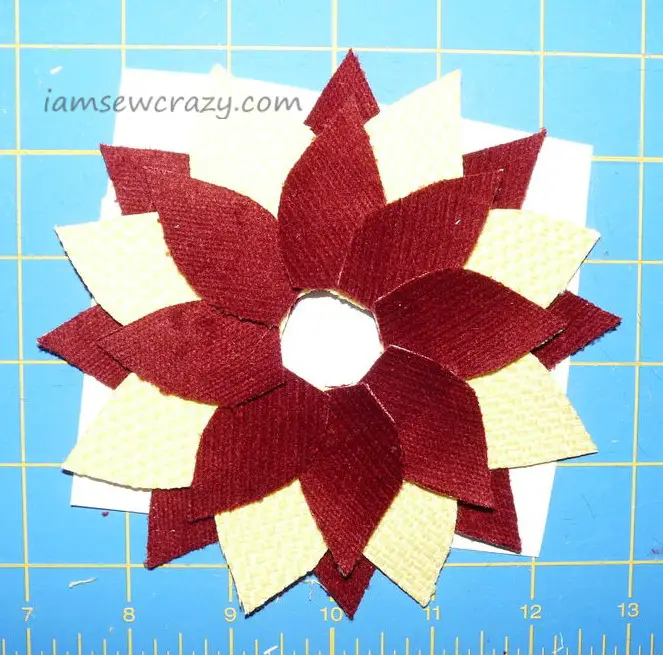
Sometimes I alternate the petal colors for high contrast, and sometimes the flowers are completely monochromatic. Sometimes I make just the center petals a different color.
I usually use stabilized fabric to make these flowers, but sometimes I go for the raw-edge look, especially if I’m going to use the flowers on projects that are more casual. But even then, I always choose thick fabrics (like the upholstery fabric) that don’t fray super badly, and I also cut the petals on the bias, which minimizes the fraying.

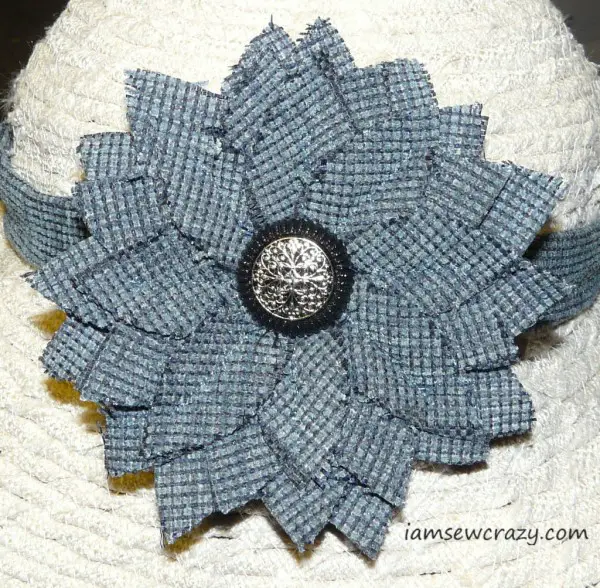
The dark blue poinsettia on the hat band isn’t stabilized at all, and you can see that the edges are definitely raw.
If your flowers are going to see a lot of wear, if your fabric is thin and floppy, or if the flowers will need to be machine-washed, you will have much better results if you stabilize the fabric to keep your flowers crisp.


An easy way to stabilize the fabric is to press some fusible interfacing to the back of the fabric before you cut the petals out. The red, yellow, and teal fabrics in the demonstration are stabilized on the back, and they really won’t fray at all.
Cutting the Petals
I usually cut 16 larger petals and 16 smaller ones, but you can obviously use more to make your flower fuller and puffier, or fewer to make a flower that’s thinner and flatter. I think it looks nice if all of the petals in each layer are the same size and shape, but that’s up to you! You can start out with larger petals on the bottom layers, like I did, or make them all the same. You can also cut a couple of large leaves to use as the very bottom layer, and you’ll be able to see them sticking out from under the petals when your fabric flower is done.

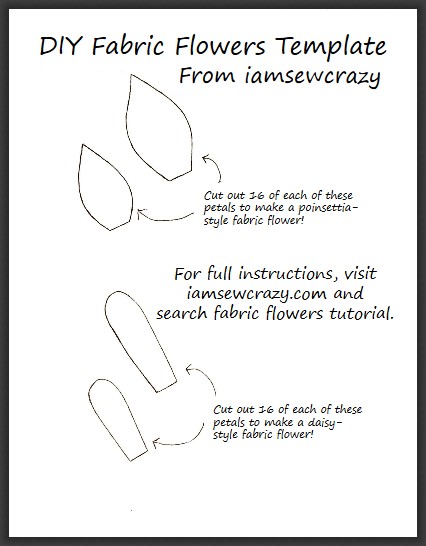
Just to make things easier, I have created a printable template in case you’d like to use the exact petal sizes and shapes that I used. Just download the PDF file above, print it out at 100% (no scaling), and cut out the petal shapes. Of course you could scale it if you wanted larger or smaller petals than I used. You may want to reduce the size for a headband or sandal decoration, and maybe even increase the size to decorate a large tote bag, pillow, or wreath.

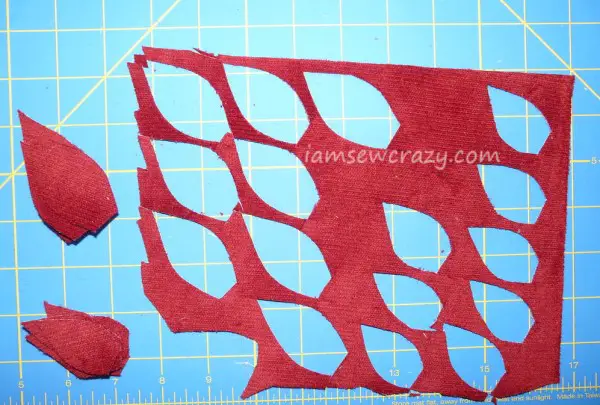
I cut the petals out on the bias (oriented diagonally on the fabric), like you can see in the picture above. This isn’t mandatory, but it makes sure the petals will all drape the same way as each other, and (if your fabric is not stabilized) it will cut down on fraying. But don’t freak out over getting the angles and shapes perfectly even – trust me, it will look great when we’re done.
Placing the Petals
I like to arrange the flower petals on a piece of paper. The paper will be torn away when you’re done, but until then we need the paper so we can shape the flower, carry it to the machine, and position it under the needle without the petals going everywhere.

It really, REALLY helps to spray the paper with this temporary spray adhesive before you lay the petals down. The spray temporarily turns surfaces tacky, like the sticky part of a post-it note, which will make it a lot easier to position and sew everything.

You can sew through the adhesive without worrying about it being gunky or gumming up on your needle. And it lets you pick up the paper and take it over to the sewing machine without the petals going everywhere!


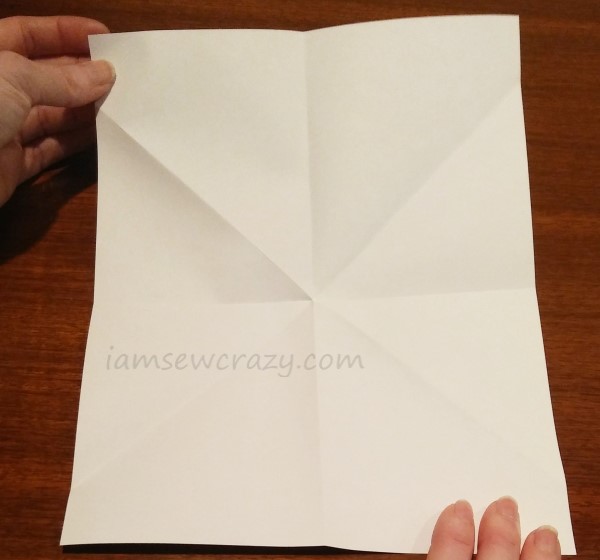
It’s perfectly fine to just eyeball the placement of the flower petals. (Remember how wonky real flowers can be?) But if you want to get everything exactly even, you can start by folding or marking your piece of paper to give you guide lines for placing the petals. If you have an odd number of petals in your bottom layer, or want an alternative to folding the paper, check out this method for how to evenly space flower petals.

If you will be making interchangeable flowers with a center button to attach them, like I did for the hat band, then you need the center hole of your flower to be one third to one half as wide as whatever button you are using. Make the hole about one third as wide as the button, because you can snip the hole a tiny bit larger afterwards if your button is very thick and you have trouble buttoning it through the hole. But if you make the hole too large to begin with, you’ll find that the flower hangs down too low on the button shank, and the center won’t quite be the center anymore. It’s much easier to snip the hole bigger later on, than to try and make it smaller after the flower is constructed. You may find it easiest to arrange the petals around a coin or similar round object that’s about a third as wide as the button you’ll be using.
Instead of using a button, you can choose to ultimately cover the flower center with a pompom, fabric yoyo, pendant, medallion, brooch, crystal, etc. It’s a good idea to place your center object on top of the flower periodically as you arrange the petals, to make sure that the hole will be covered by the center object. You can still scoot the petals closer together at this stage if you want the hole to be smaller (the spray adhesive is repositionable).
Set your flower center aside, to be attached after the flower is sewn (it would just get in your way at this point).

I like to spray the paper, then spray each layer of petals just before it’s covered with the next layer. So spray the paper, and lay down one layer of eight large petals.

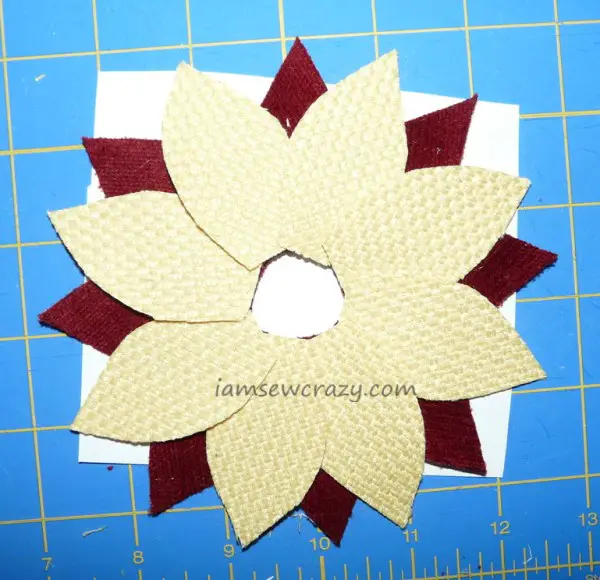
Spray the petals, and lay down another layer of eight large petals.

Spray one more time, and lay down eight small petals.
Sewing the Flower

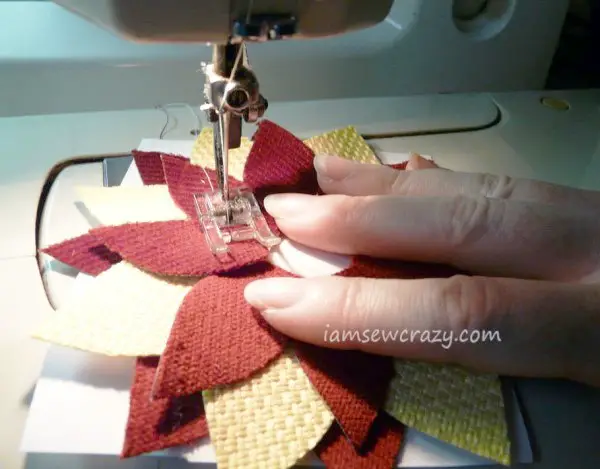
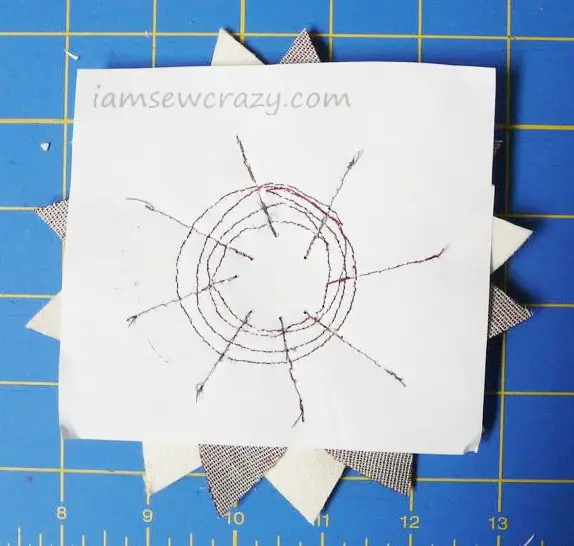
Since you’ll have a few layers to sew through here, I recommend using a size 14 or 16 sharp sewing machine needle.
Take the paper over to the sewing machine, and place the flower under the needle. Make sure that you’ll be sewing in the direction that the petals are lying, like it shows in the picture above. That way, the presser foot smooths the petals down, instead of fighting against them (like petting a cat backwards).

Sew 4 or 5 revolutions around the center hole, catching every petal in your stitching. Don’t sew too close to the petal points, because we want the circular stitches to be covered up by the final row of petals that we will add next.


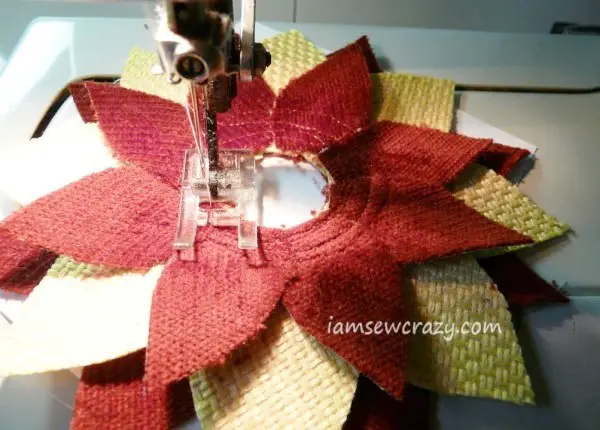
Spray the flower one last time with the temporary spray adhesive, and add your final layer of 8 smaller petals on top of the flower.

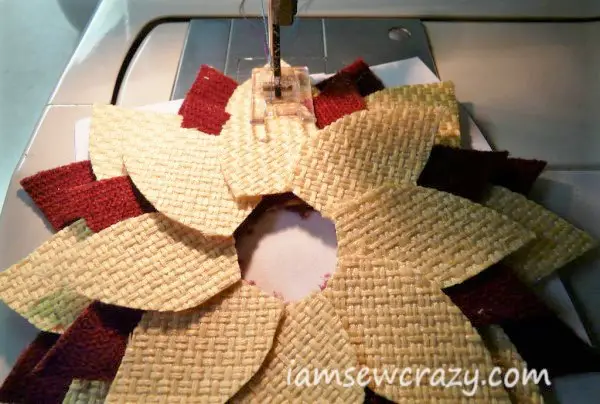
Sew a line down the center of each petal, attaching it to the flower and covering up the circular stitches on the lower layers.

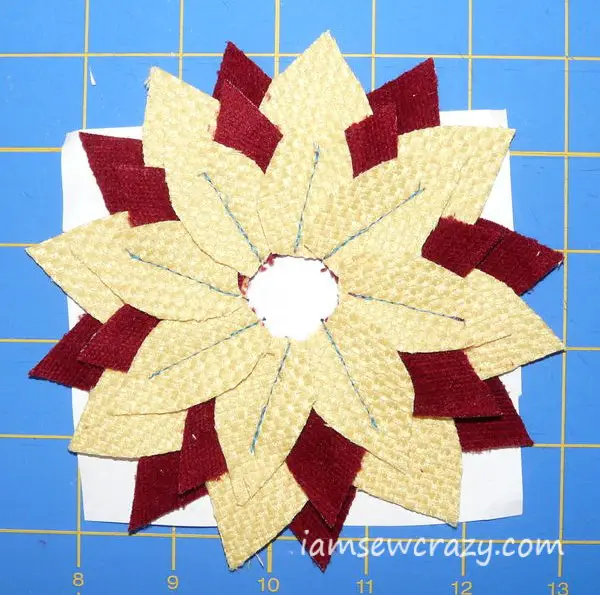

When you’ve done that, this is what the flower should look like on the front and back. (I used contrasting thread so you could see it, but you’ll most likely want to use a matching thread.)

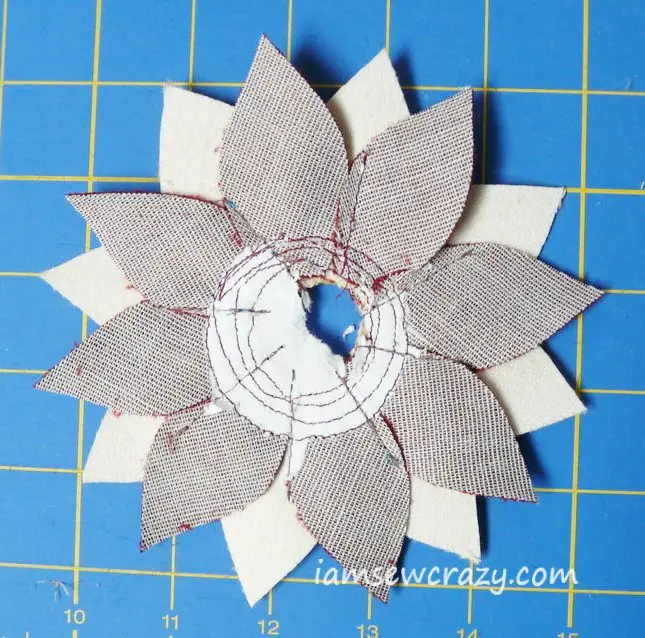
Now you can tear away the paper from the back of the flower. Sometimes it helps to use a pin to score the paper or flick away the smaller pieces. You can also dampen the paper with water and brush it away with an old toothbrush after it gets mushy. Or, you can just leave the smaller pieces there. I won’t tell anyone. 😉
Ta-daa! You’re all done! Use the flowers on wreaths, tote bags, flip-flops, hats, purses, headbands, and centerpieces. Or pin this idea for the next time you need a pretty accent for your newest wreath or pillow!

