

If you’ve never tried couching before, take a few minutes to add this impressive sewing technique to your bag of tricks. Couching is a technique that uses yarn or cording to add writing, texture, or artistic details to your sewing projects. And by using my free printable pattern, you’ll be learning how to couch with your sewing machine in no time!
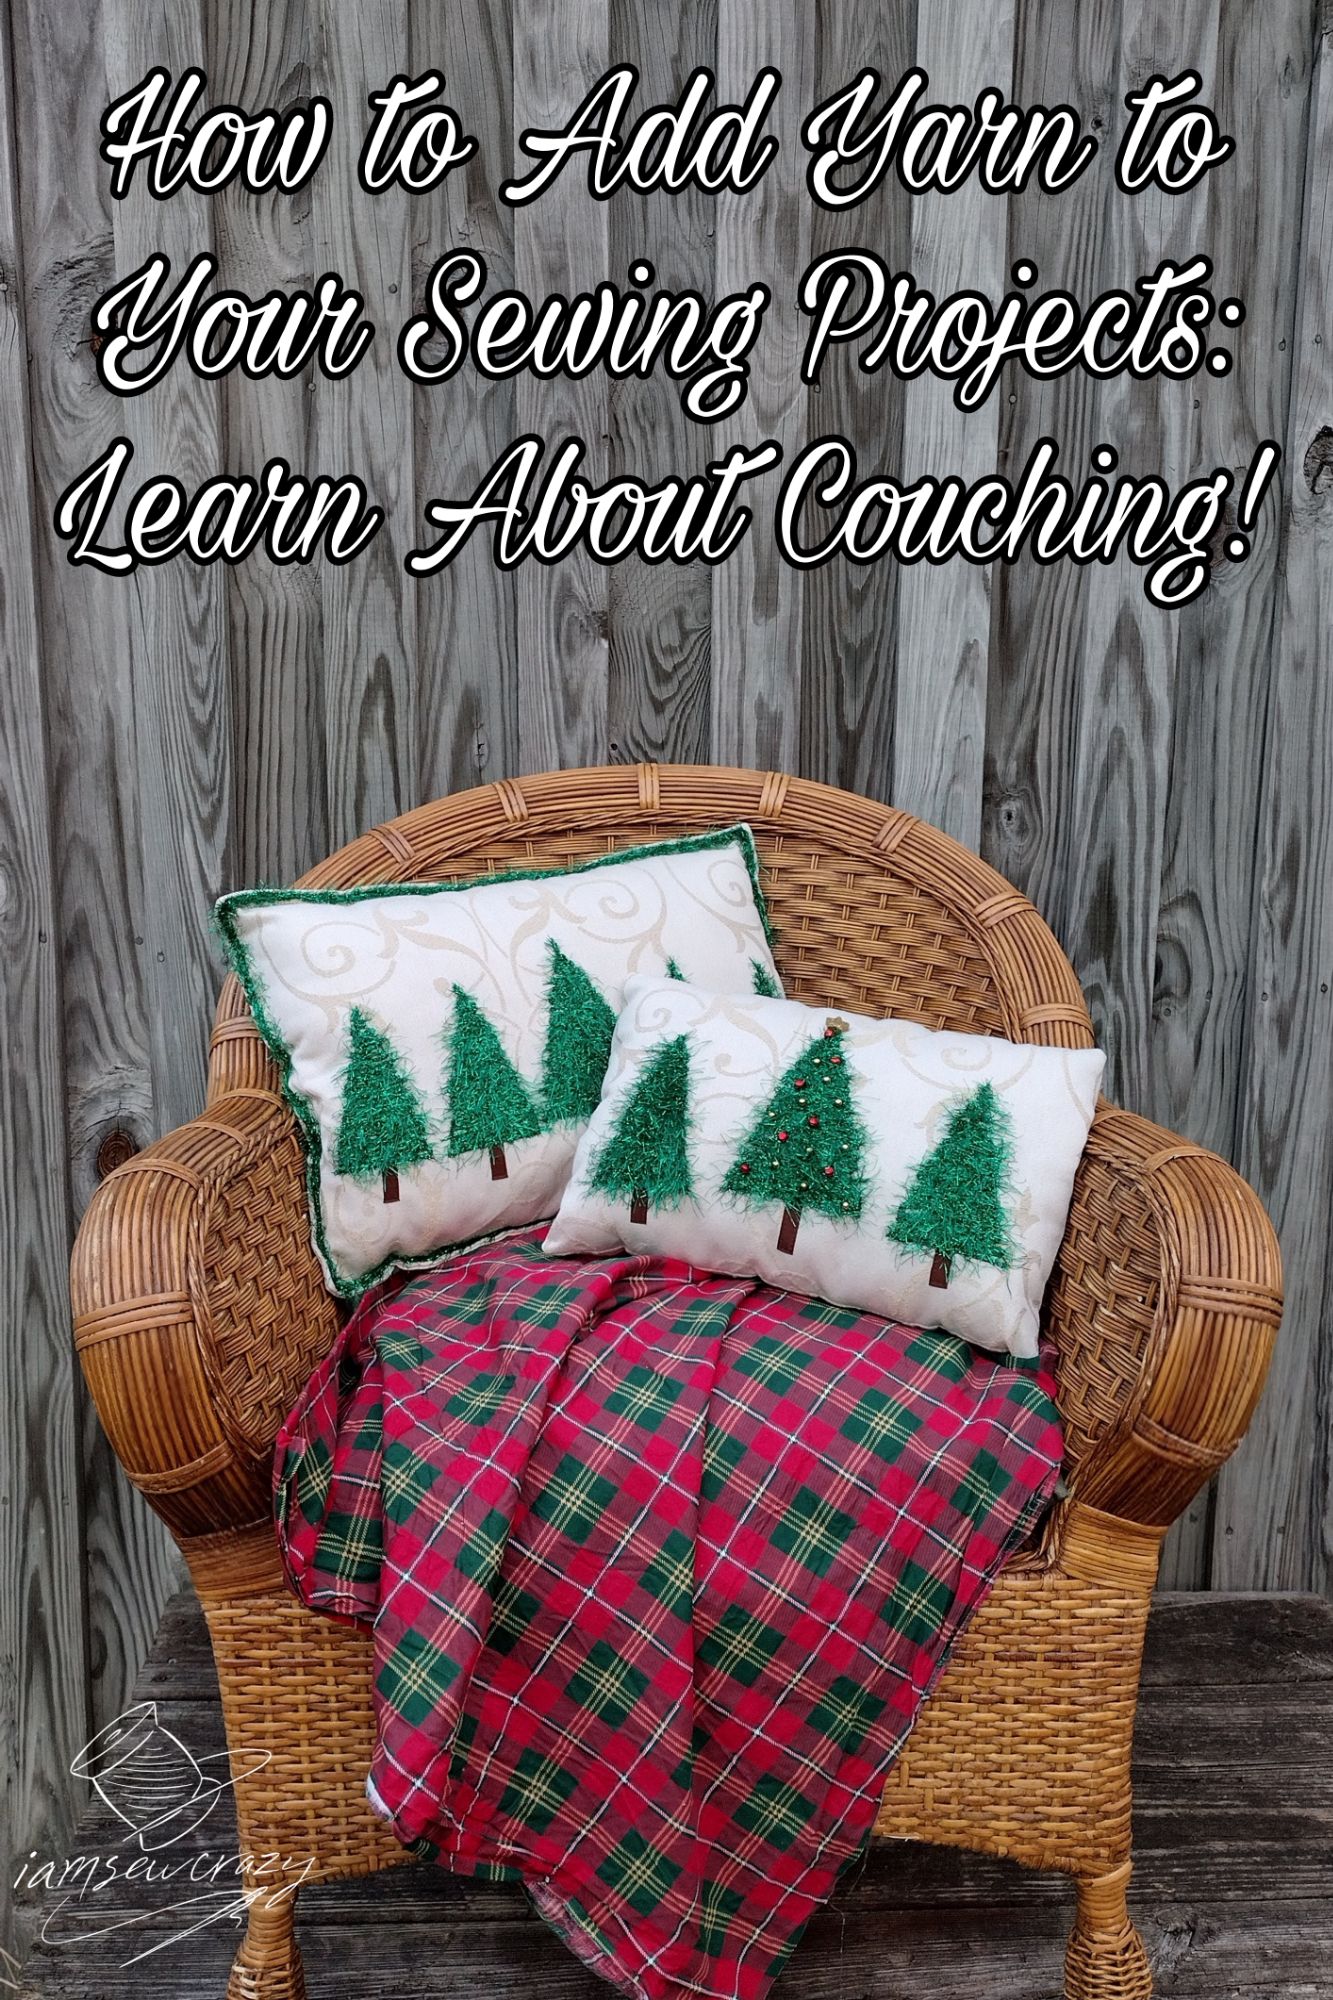
Print out the templates I’ve made for you, and follow along with my couching tutorial as I show you how to make these DIY Christmas tree pillows!

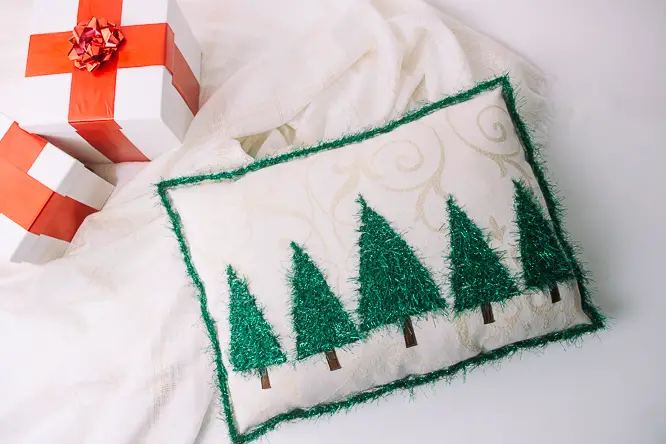
Fuzzy eyelash yarn and a drinking straw are used to form these evergreen trees, which results in an impressive textured finish that looks like it took hours to achieve. But as you’ll see in the video tutorial, these Christmas tree pillows take very little time to make.
I’ll even show you a scented version of the pillow that uses cinnamon sticks!
I originally created this easy couching tutorial for We Like Sewing magazine, and now I’m sharing it with all of my readers. It’s a fun and fabulous way to learn how to couch with a sewing machine.
Supplies needed to make DIY Christmas tree pillows:
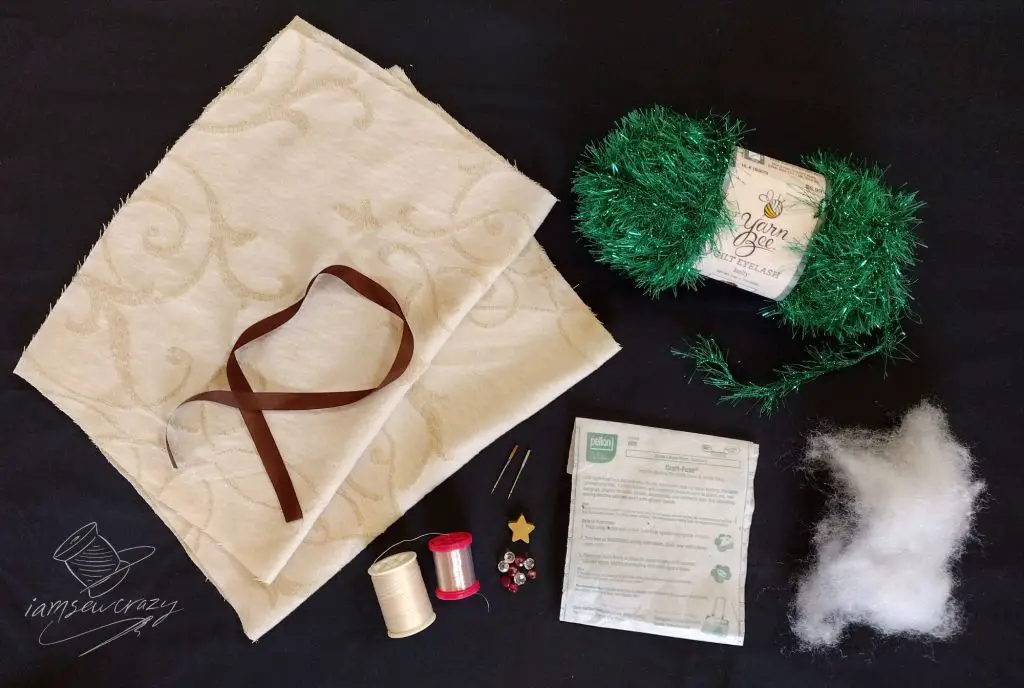
- 1 18″ x 24″ pieces of light-colored medium to heavyweight home decor fabric
- Fusible stabilizer that is compatible with the chosen fabric
- 1 skein of green eyelash yarn (I’m using metallic green)
- 1 yard of 1/2″ wide dark brown ribbon, twill tape, bias tape, etc
- 1 plastic drinking straw
- Nylon or polyester “invisible” monofilament thread
- All-purpose sewing thread that matches the chosen fabric
- Fabric marking pen
- Sharp needles in sizes 11 and 14
- 12 ozs. non-bunching poly fiberfill
- My free printable DIY Christmas tree pillow templates
- (Optional) cinnamon sticks to make scented Christmas tree pillows
By the way, as an Amazon affiliate, I earn from qualifying purchases at no extra cost to you. That’s how I keep my site up and running, and can keep making free tutorials and printable patterns!
Cut, stabilize, and mark the pillow fabric
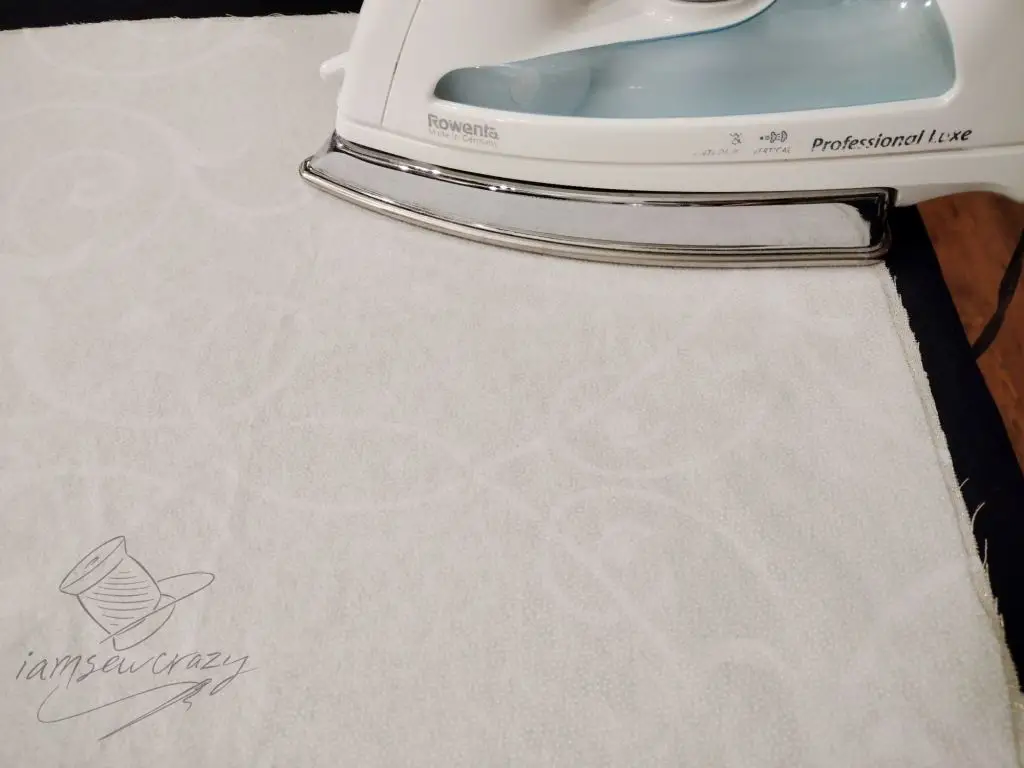
Cut out two 18″ x 24″ pieces each of fabric and stabilizer. Fuse the stabilizer to the wrong side of the fabric, following the package directions.
Print out the free Christmas tree pillow templates, and cut out the tree guides from the pattern sheet.
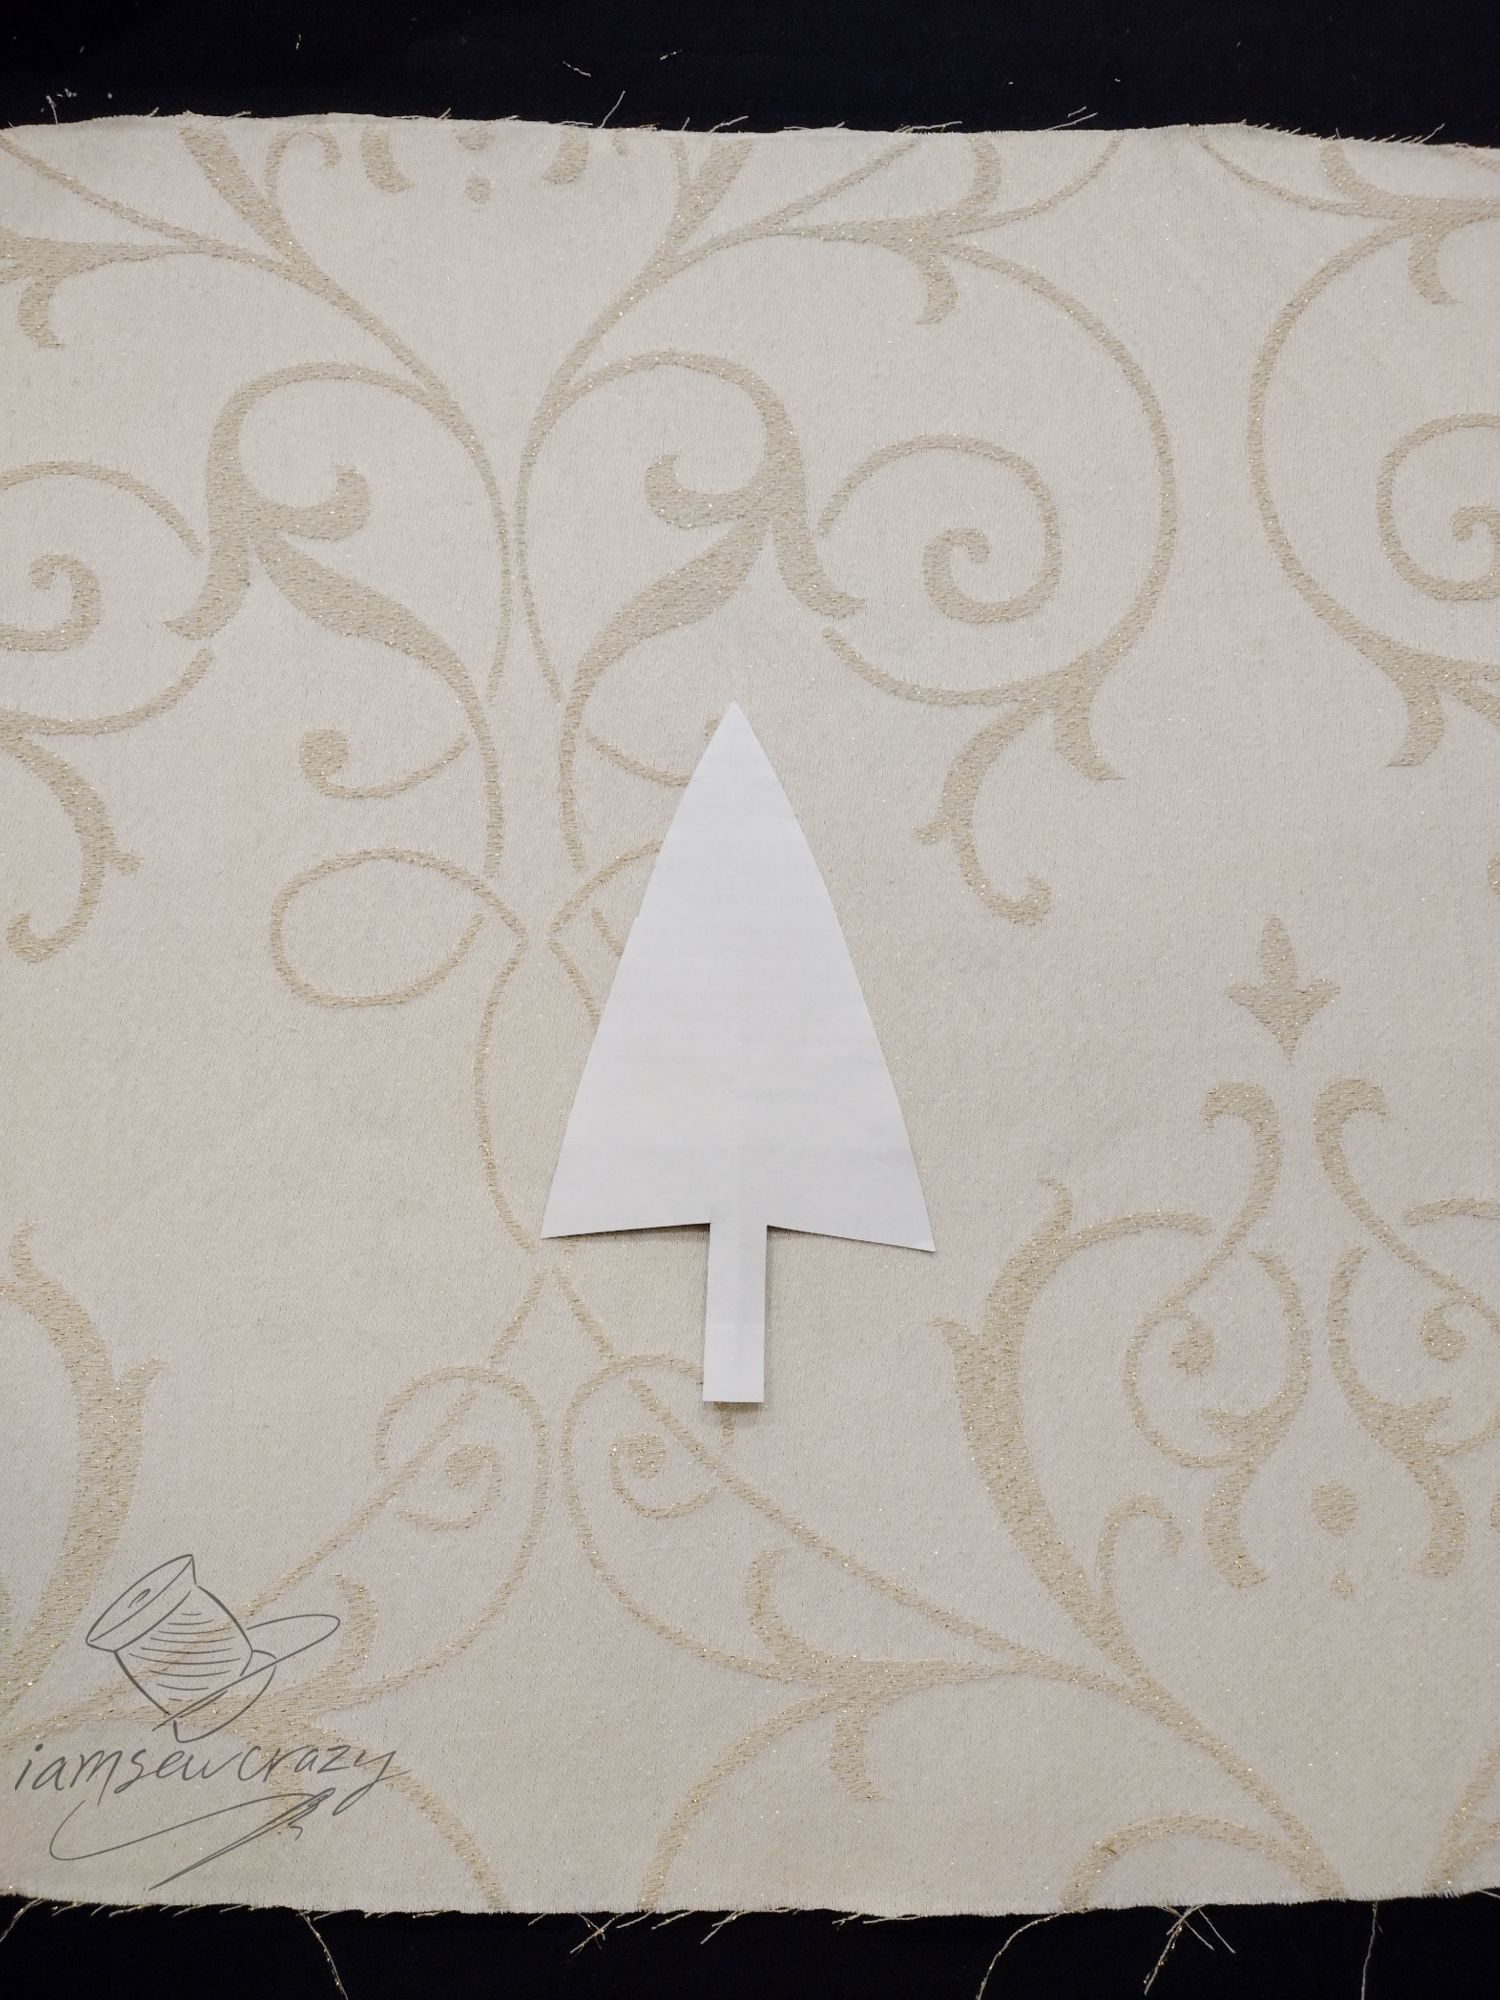
Fold the 18″ sides of one piece of fabric together to locate the center of the fabric. Place the larger tree guide onto the right side of the fabric in the center, approximately 4.5″ from the bottom.
Using a fabric marking pen, mark dots at the beginning and ending points of the tree trunk. Mark along the two solid diagonal lines that represent the edges of the tree branches.
Use the smaller tree template to mark two trees on each side of the center tree.
Sew the Christmas tree trunks onto the pillow front
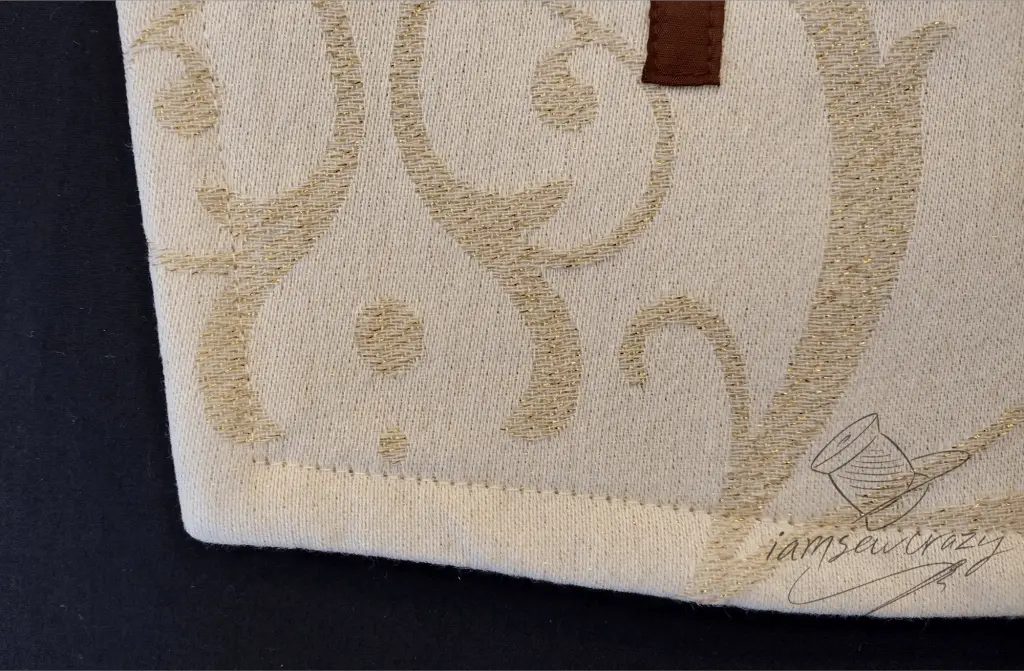
Place lengths of dark brown ribbon onto the pillow fabric, in between the tree trunk dots that were marked onto the fabric.

Fold under the raw edge of the ribbon at the base of the trees. Fold the ribbon into a tapered shape near the tops of the trunks. Pin the ribbons in place.
Install a size 11 sharp sewing needle into your sewing machine. Thread the machine using a monofilament “invisible” thread in the needle, and an all-purpose thread that matches the fabric in the bobbin. Set your machine for a straight stitch with 10 stitches per inch (2.5mm) as the stitch length.
Test the machine’s tension settings using a scrap of stabilized fabric, as monofilament threads often require careful tension adjustment. Ensure that the bobbin thread is not showing on the right side of the fabric, and that the fabric is not being drawn up or puckered by the lines of stitching. Reduce the pressure on your presser foot, if needed. It’s a good idea to make a “practice tree” on a scrap of stabilized fabric, so you can check and adjust all of the machine settings.
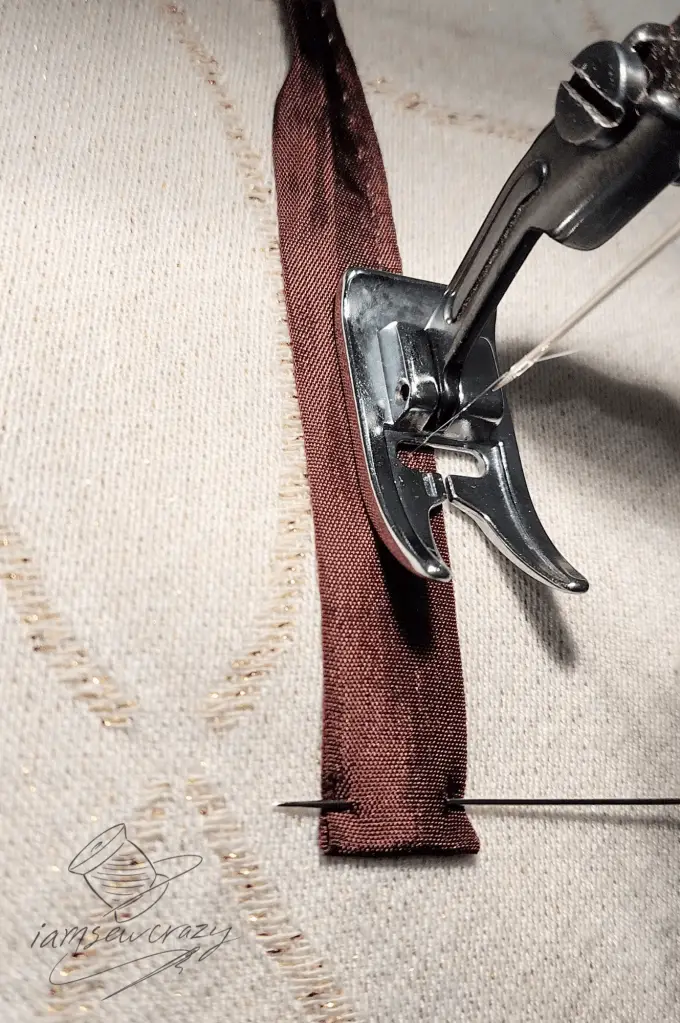
When you are satisfied with your tension adjustments, sew close to each edge of the ribbons to attach them to the pillow front.
Set up your machine for couching
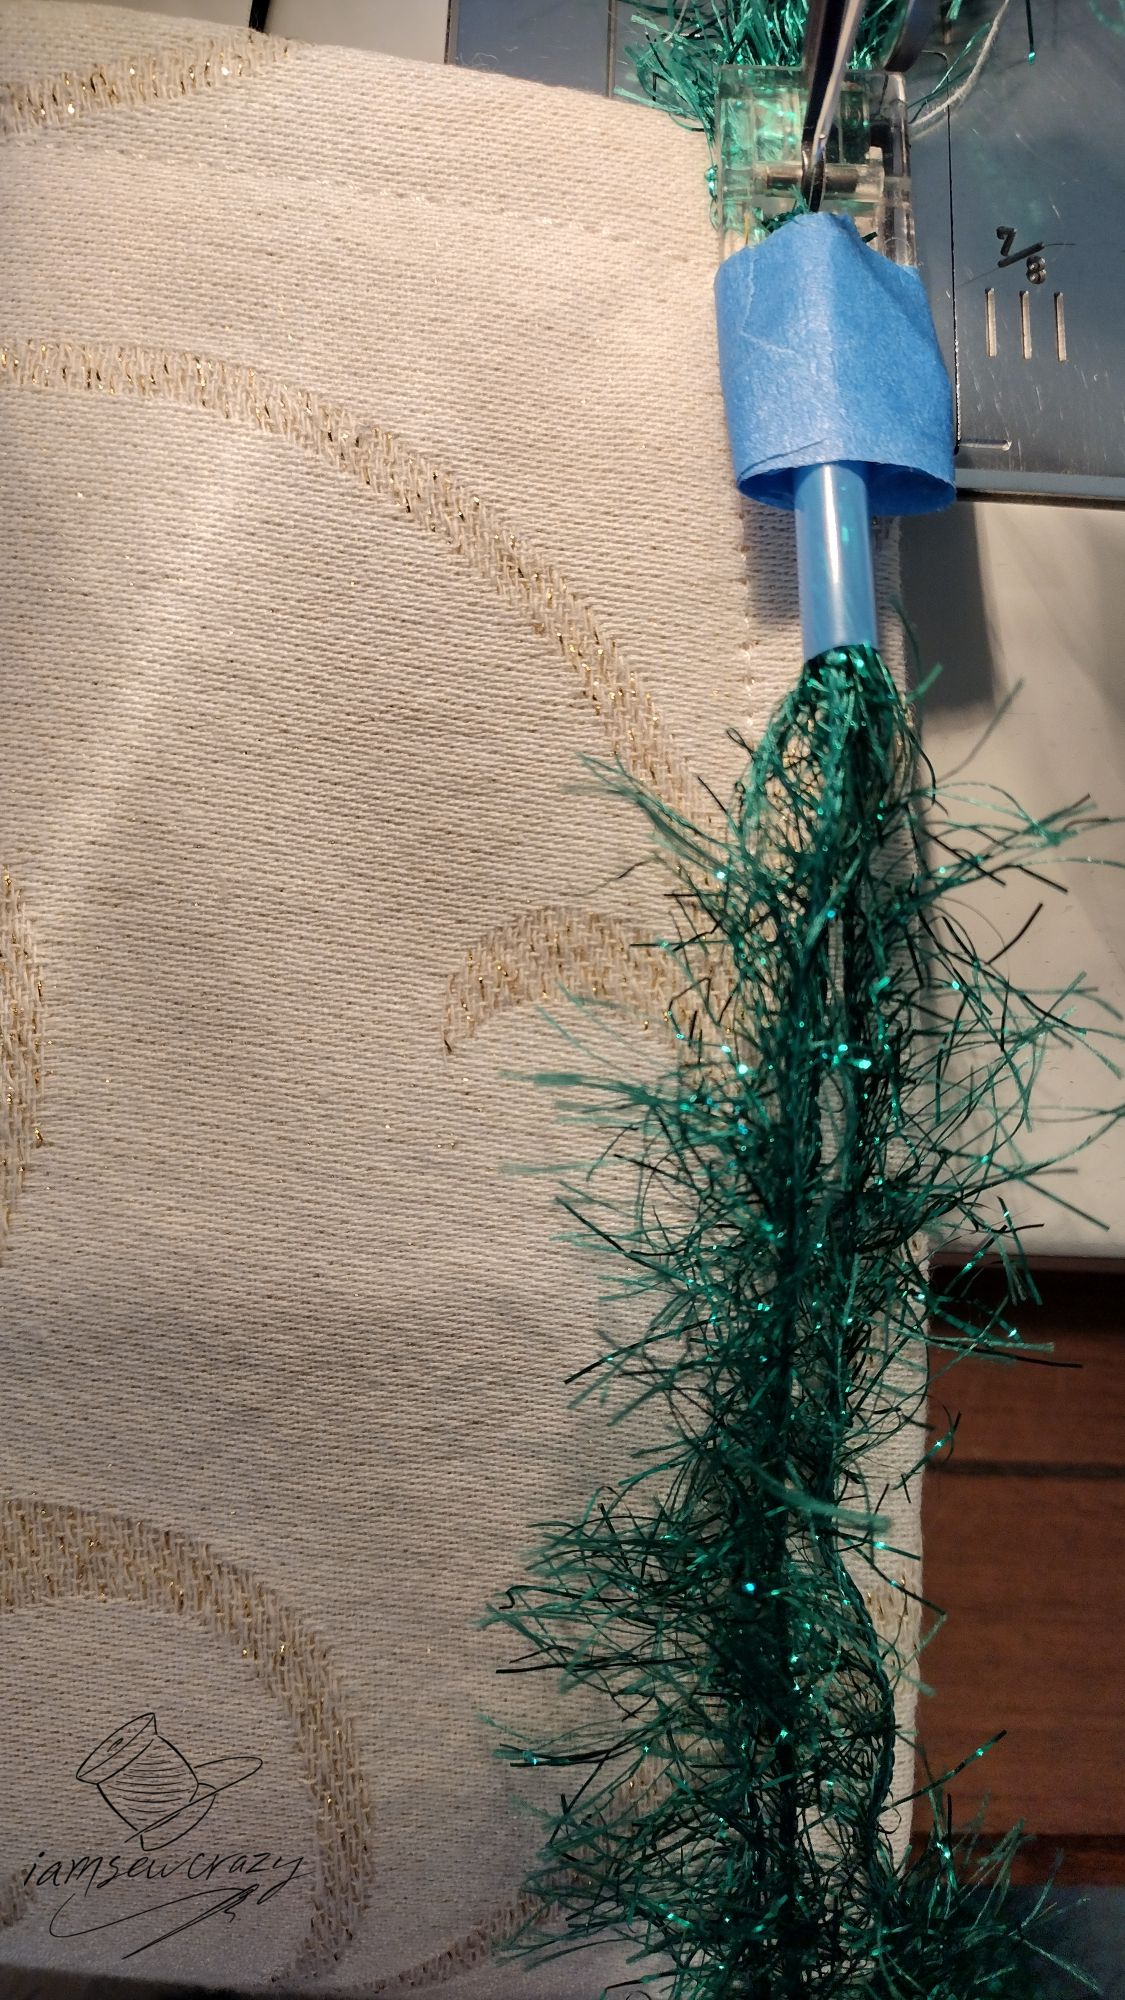
Cut a piece of drinking straw that is 1.5″ long or so. (It should be at least as long as the eyelashes on your yarn.) Tape the piece of drinking straw to the toes of a zigzag presser foot, so that the straw is on top of the foot and directly in front of (but not touching) the needle.
I’m using painter’s tape so that it removes cleanly when I’m done. (By the way, check out my list of 17 Handy Painter’s Tape Hacks for Your Sewing and Crafting!)


Wrap the ends of the tape carefully to avoid exposed adhesive that could grab on to the yarn or fabric.
Set the machine for a long stitch length (6 stitches per inch, or 4mm) and a narrow zigzag (2.5mm wide).
Thread one end of the eyelash yarn through the drinking straw.
Easy couching tutorial: A few important notes about couching
A few things to note about couching: When you are couching, you cannot sew in reverse. Instead of backtacking to lock your stitches, sew a few stitches in place or pull the thread tails to the wrong side, knot them, and trim them off.
If you have a couching foot for your sewing machine, you can try to use that instead of a drinking straw. However, when you are couching eyelash yarn, the eyelashes may get pinched in the slot of the foot, or get drawn towards the needle and become sewn to the fabric before passing through the foot. If you run into either problem, just use a piece of drinking straw instead of a couching foot.
It’s important to pivot carefully as you change direction when sewing the Christmas trees onto the pillow. You won’t be able to reverse your feed dogs, so slow down and pivot right at the line you marked earlier as you sew the Christmas tree branches.
Sew the Christmas tree branches onto the pillows
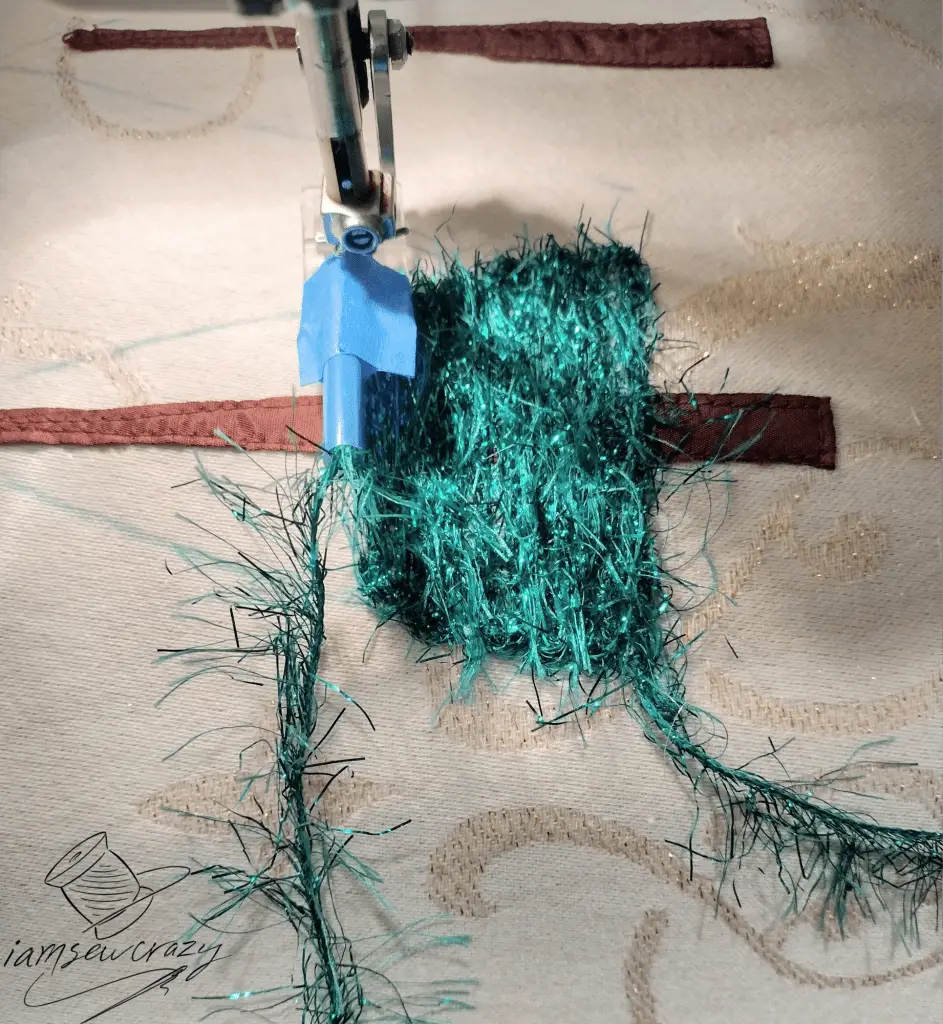
Line up the yarn with the lowest end of one of the tree branch lines you marked on the fabric earlier.
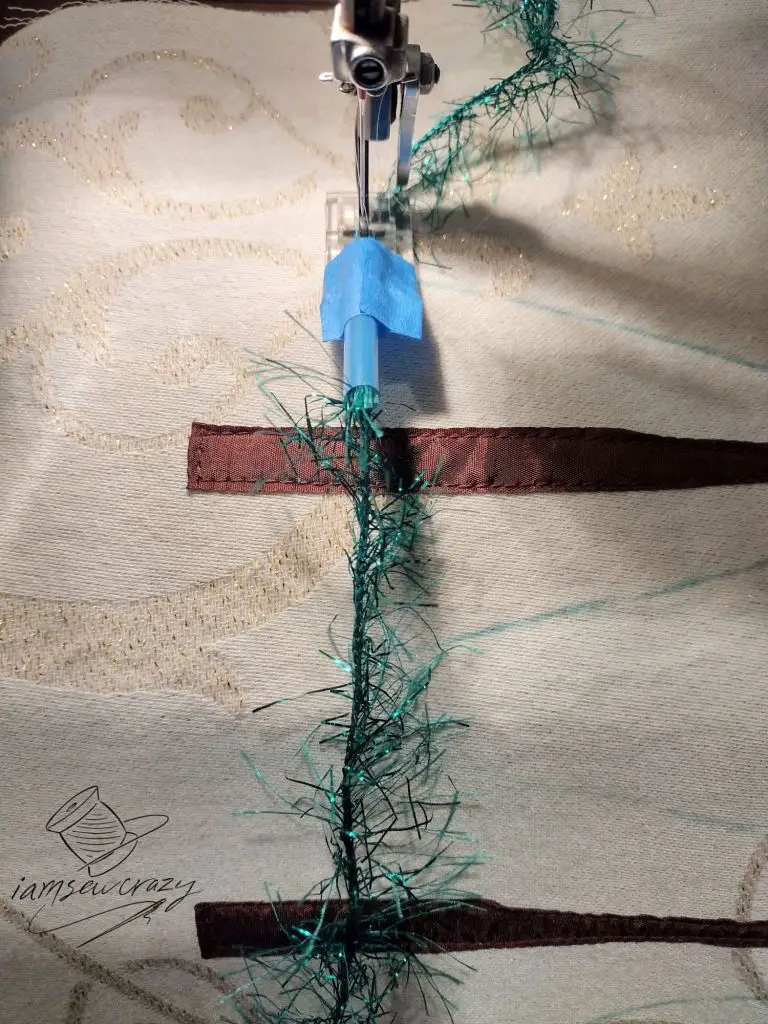
Pull the end of the yarn several inches behind the presser foot, and lower the presser foot to hold the yarn in place. Make sure that the yarn can pull freely from the skein as it feeds under the presser foot.
Sew several stitches in place to lock the thread. Zigzag over the yarn, sewing in a straight line, until the needle reaches the bottom of the opposite tree branch line. The yarn should be feeding through the drinking straw as you sew, and your zigzag stitches should be securing the yarn to the pillow fabric.
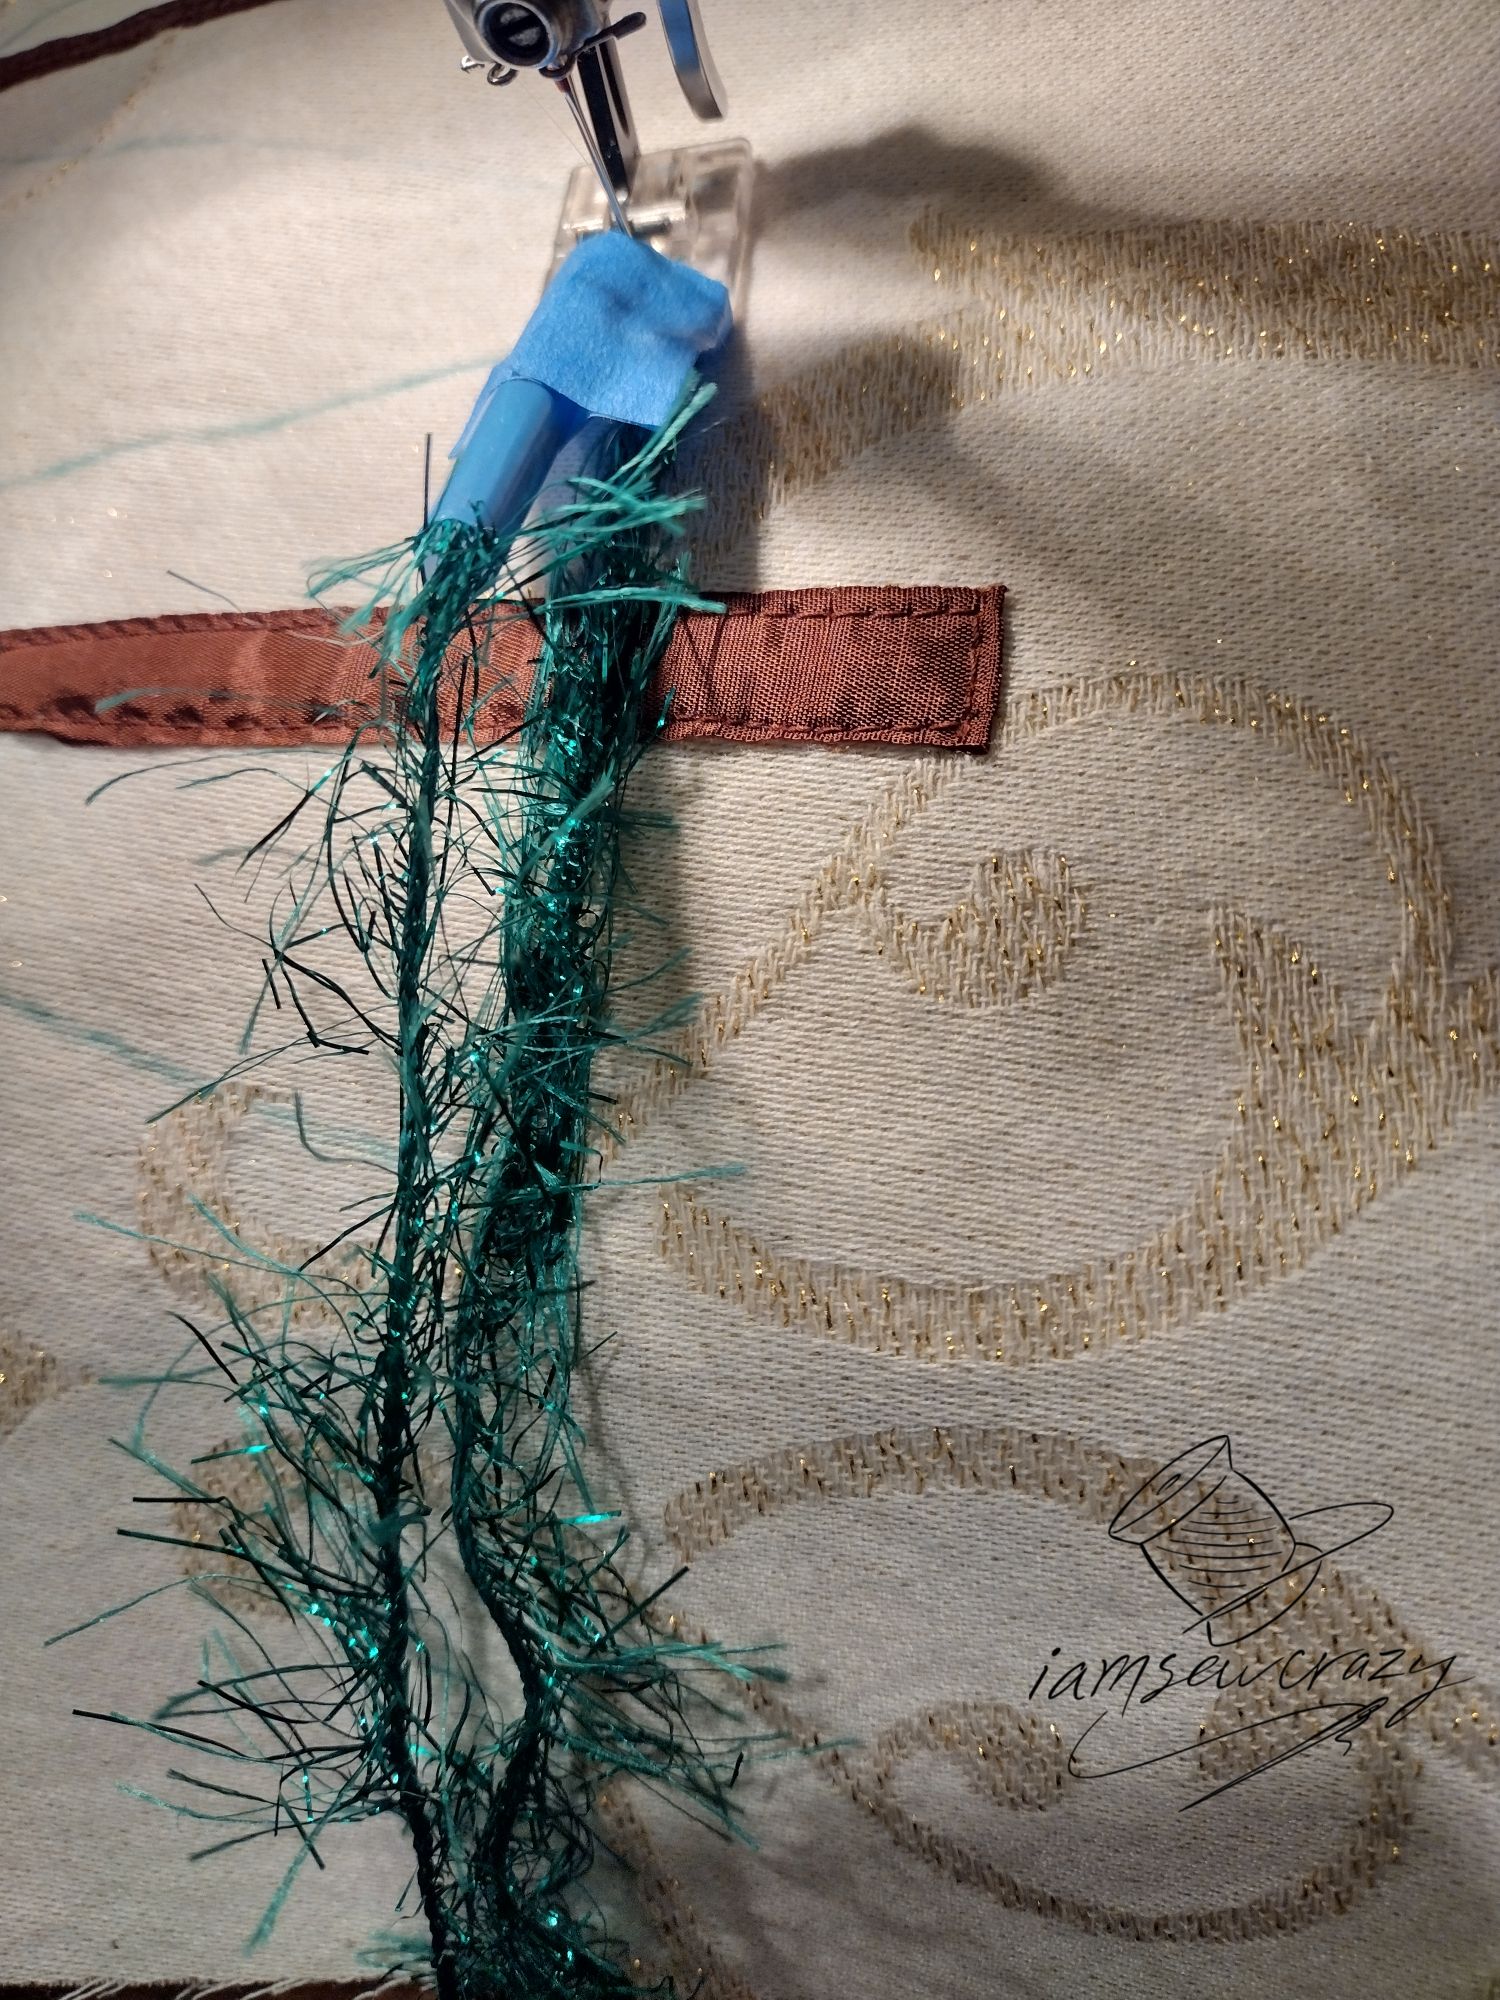
With the needle down, raise the presser foot and pivot the fabric to align the yarn alongside the yarn that was just sewn down. When the needle reaches the right side of the tree, pivot with the needle on the right. When the needle reaches the left edge of the tree, pivot with the needle on the left.
Repeat this process, following the marked lines to create shorter and shorter branches towards the top of the tree.
At the top of the tree, sew a very short line pointing straight up. Lock the stitches by sewing a few stitches in place. Trim the yarn at the beginning and end of the stitching line. Pull the thread tails to the wrong side, knot them together, and trim.
Repeat the process for all 5 trees.
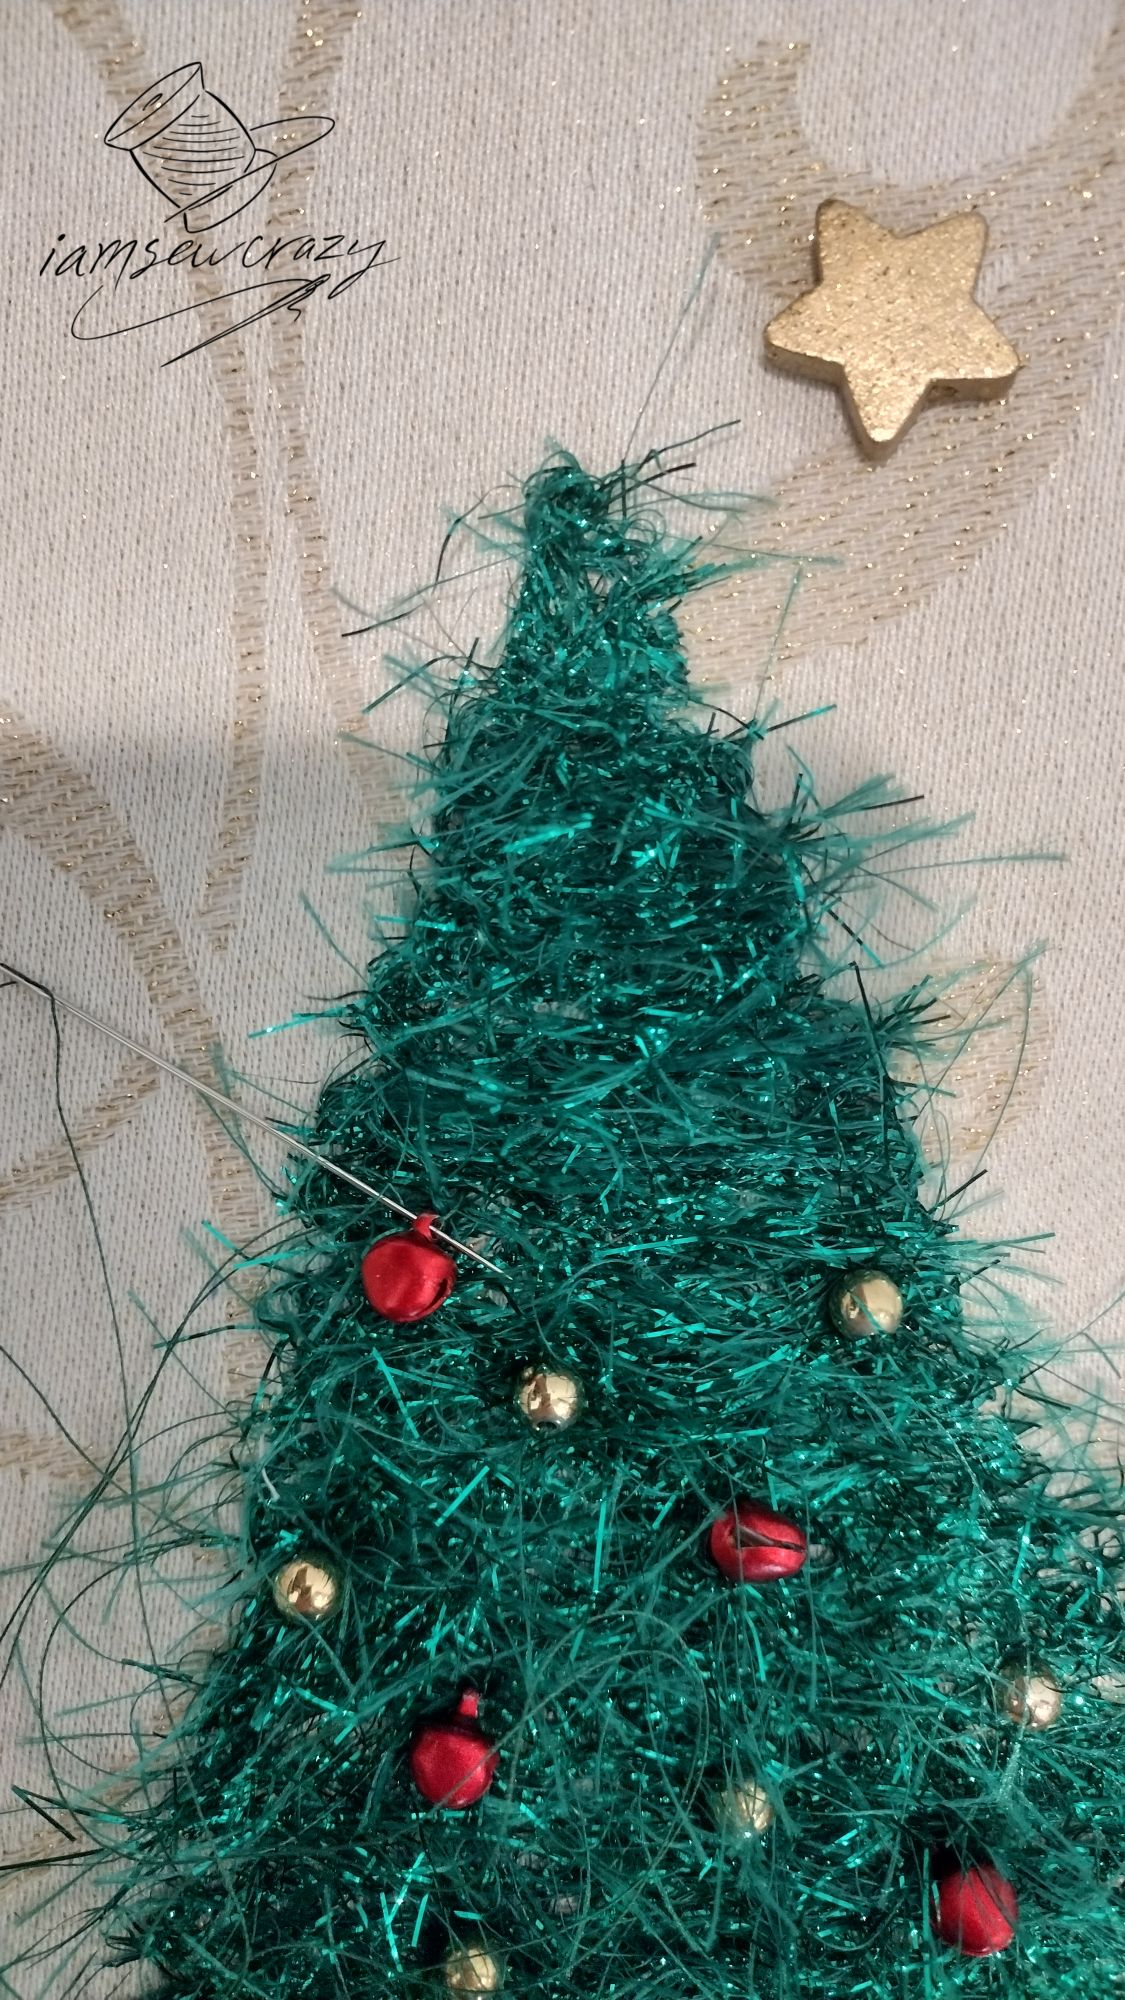
Optional: Use beads, small bells, and a star-shaped bead to decorate one or all of the couched Christmas trees. I’m using a hand-sewing needle and thread to decorate just the center tree of a smaller pillow.
How to sew your DIY Christmas tree pillow together
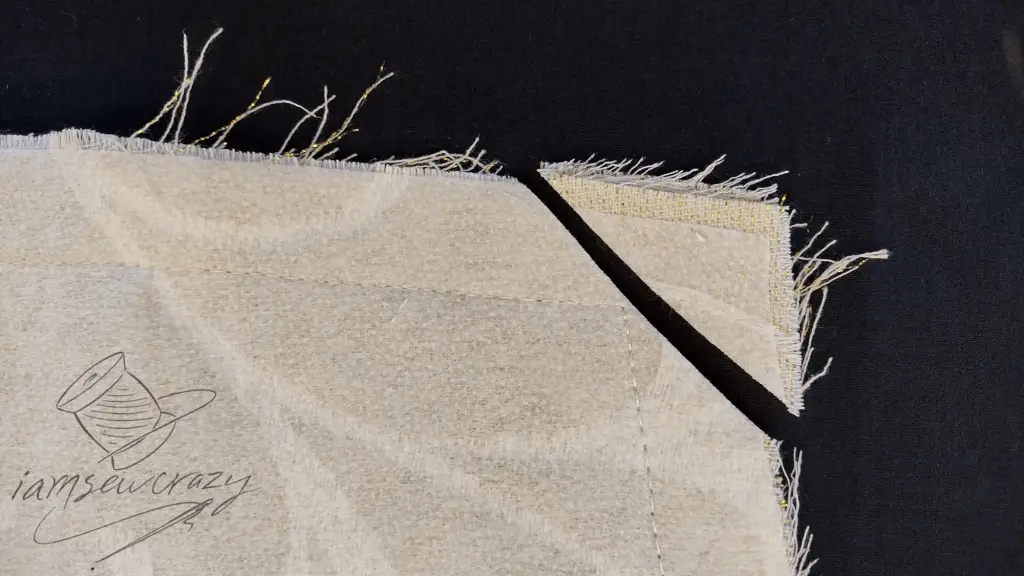
When all of the trees are completed, use the corner trimming guide on the pattern printout to trim all 4 corners of both fabric rectangles.
Or, instead of using the guide, you can mark two points 1/2″ and 5″ from each corner of the fabric. Connect the dots as shown in the image below. Then cut along the marked lines in order to trim two 1/2″ by 5″ wedges from each side of the fabric.

Install a size 14 sharp needle in place of the size 11, and shorten the stitch length to 8 stitches per inch (3mm). Set the machine for a straight stitch. Change the needle thread to an all-purpose thread that matches the fabric.
Place pillow front and back with right sides together, and sew with a 7/8″ seam allowance. Leave a 6″ opening in the middle of one 18″ side for turning.
Trim fabric at the corners, cutting close to the stitching lines as shown.
Press the seam allowances open, including the 6″ section that is not yet sewn.
Turn your lovely Christmas tree pillow right-side out.
Excluding the 6″ opening, sew a line of straight stitching on the right side of the pillow 1/2″ from the edge. This will create a narrow flange.
Optional: Skip the flange and edge decoration, and stuff the pillow at this point. Close the opening by hand with a ladder stitch. This is how the smaller pillow was constructed.
Add trim to the edges of the pillow
Reinstall the monofilament thread in the needle.
Cut 3 pieces of eyelash yarn that are each 7 feet long.
Thread all 3 pieces through the straw at once. Zigzag them onto the pillow flange, beginning and ending at the opening in the pillow.
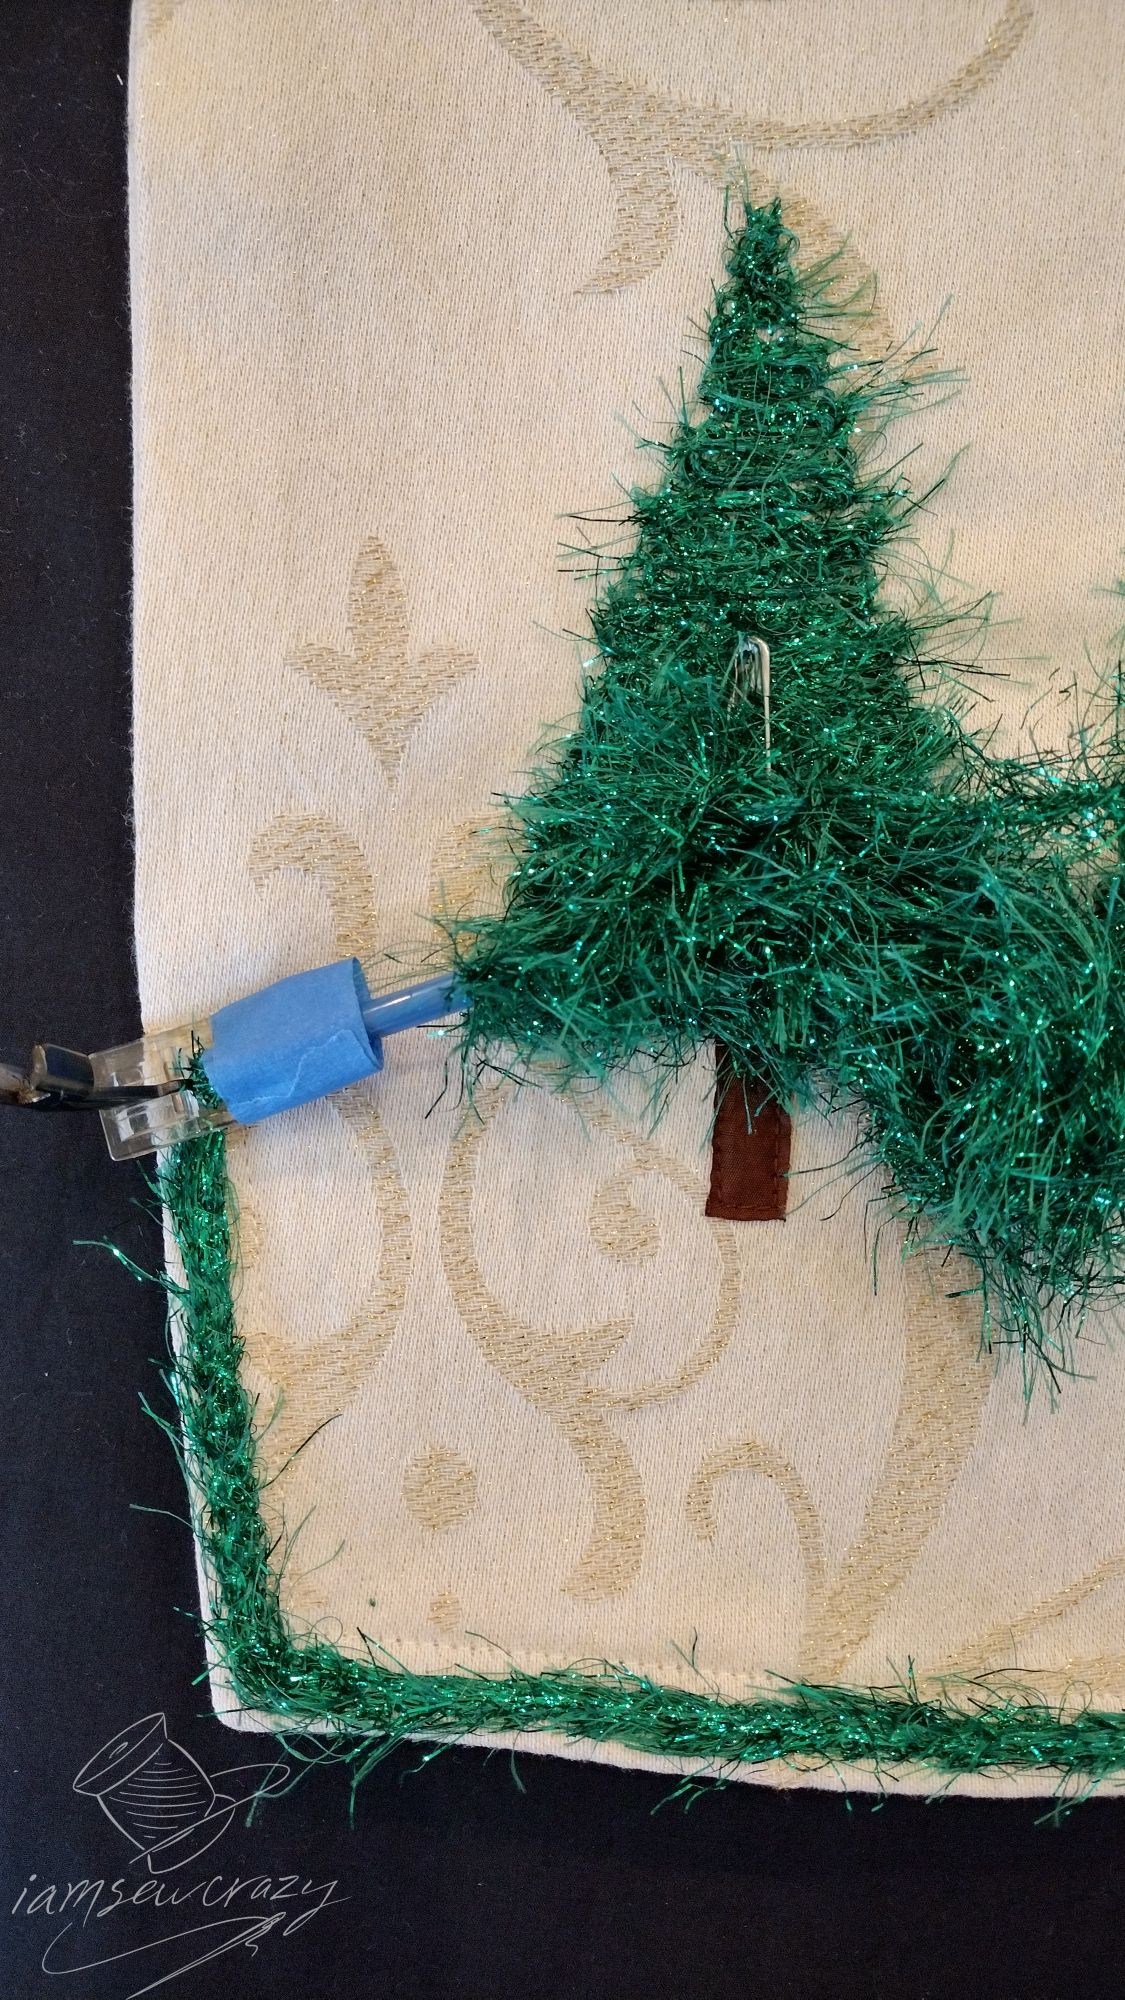
Leave the yarn tails attached, but wrap them around a safety pin to keep them out of the way for now. (Sewing the yarn to the flange in this order is a lot easier than trying to maneuver the pillow edge under the presser foot after it’s been stuffed.)
Stuff your DIY Christmas tree pillow
Stuff the pillow with fiberfill.


Optional: Cut two pieces of tightly-woven fabric that are 5″ x 7″. I’m using scraps of the pillow fabric. Sew around 3 edges, and turn the pouch right-side out. Fill the pouch with cinnamon sticks, then fold the edges of the open end inwards. Sew over the open edge, sealing the cinnamon sticks inside the pouch. Crush the cinnamon sticks lightly and insert the pouch into the pillow.
Sew the opening closed
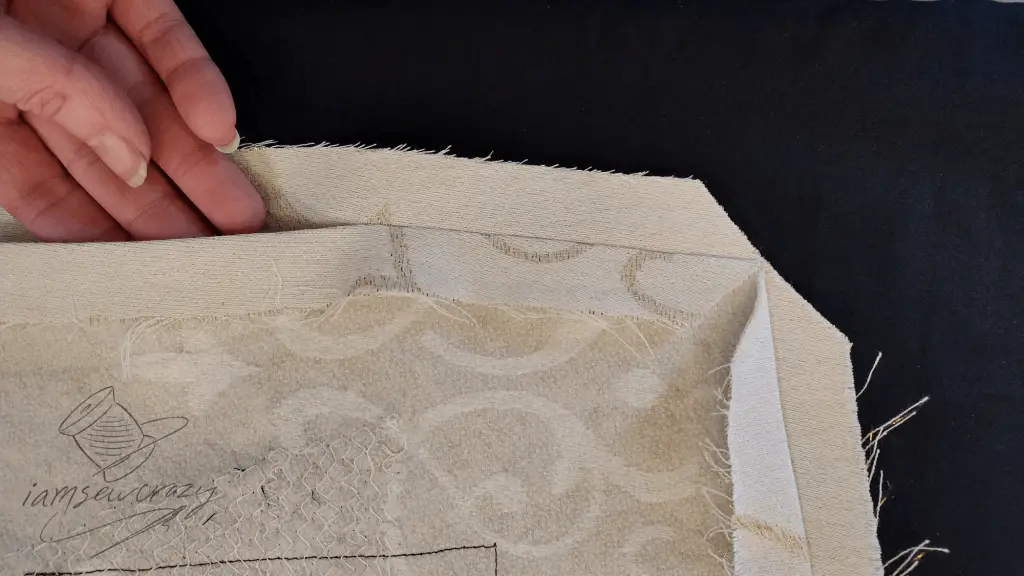
Pack the fiberfill tightly away from the opening in the pillow. Carefully align the edges of the 6″ opening in the pillow. Use pins as shown in the picture below to keep the stuffing out of the way as the opening is sewn shut.
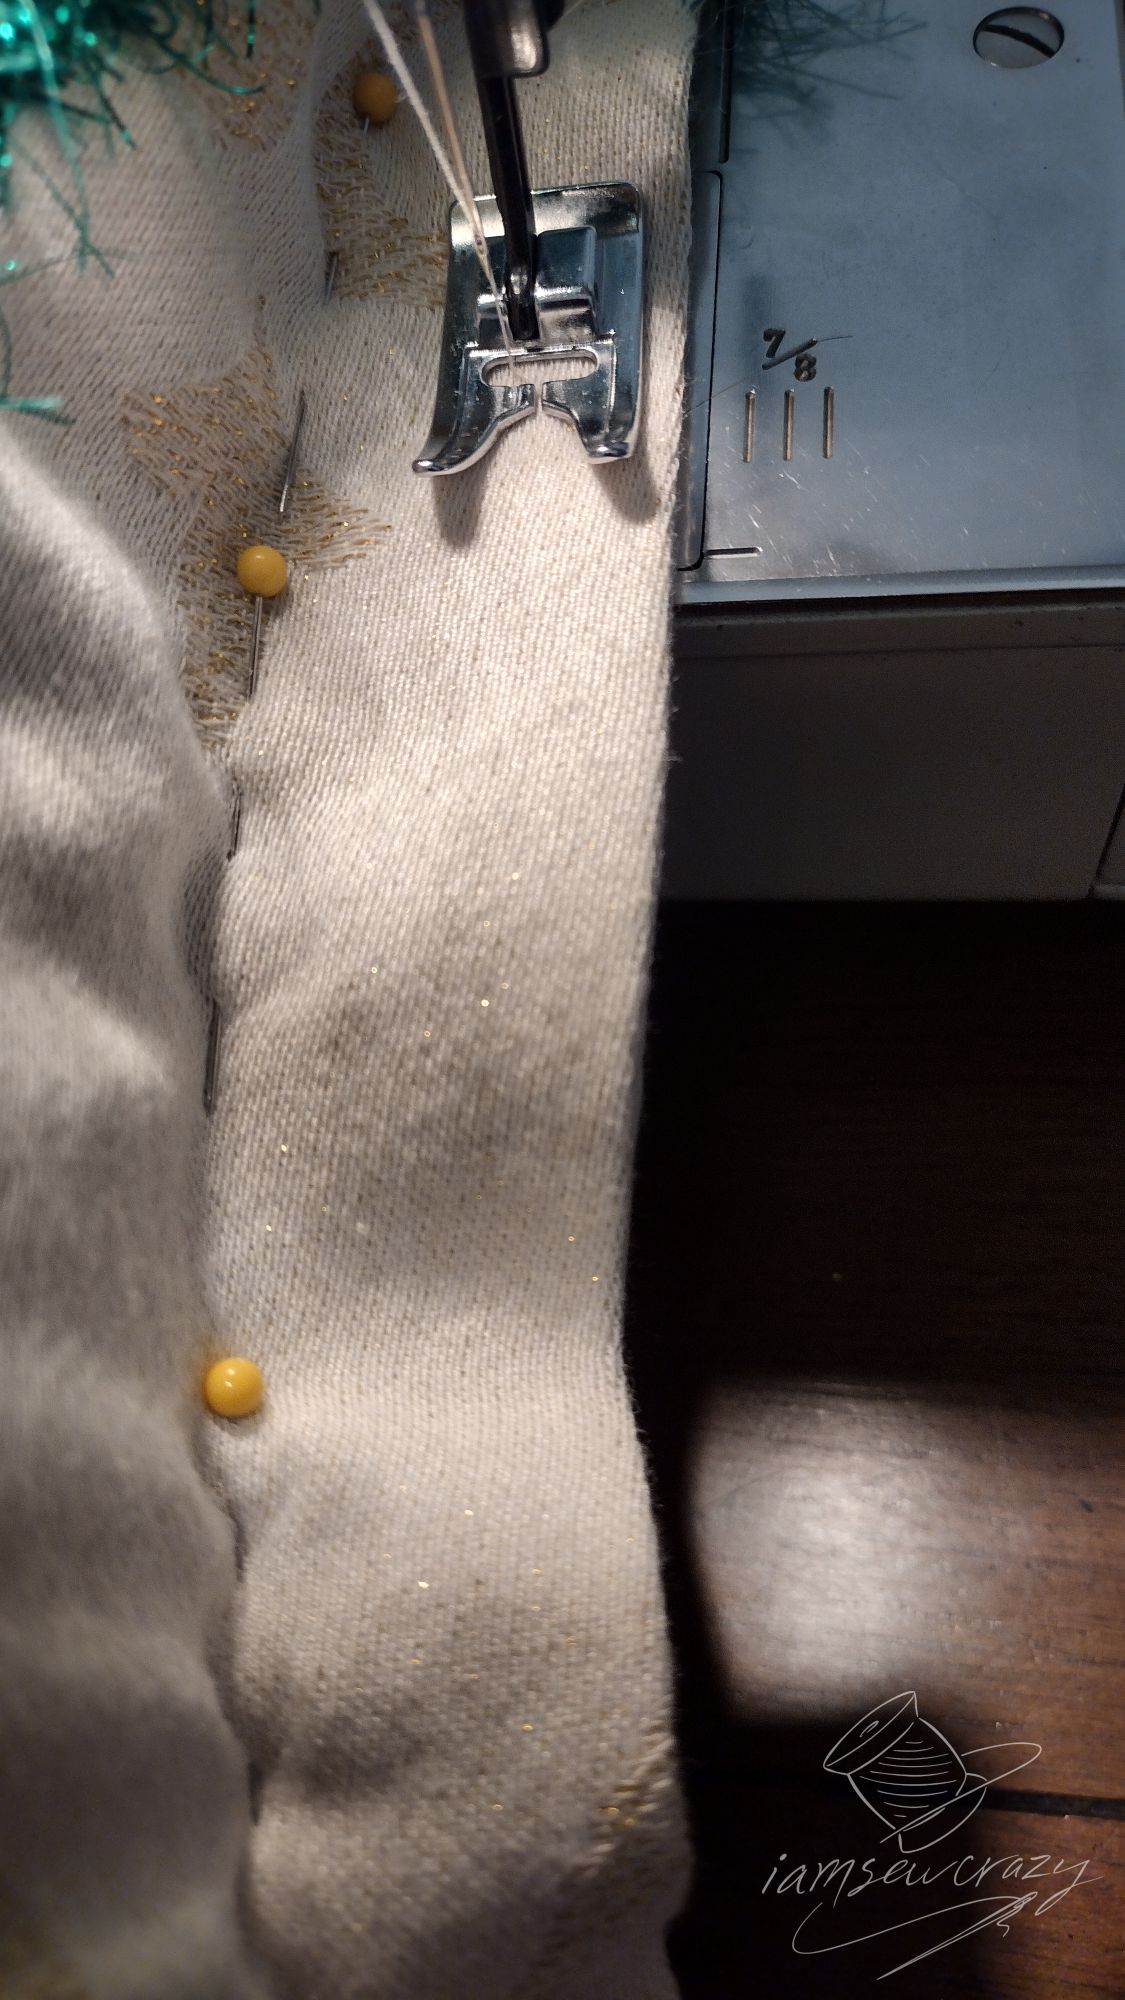
Using the free-arm function of your machine, if available, will help here. Stitch 1/2″ away from the edge to seal the opening in the pillow and complete the flange.
Use the straw to finish attaching the 3 strands of eyelash yarn to the last side of the pillow. Remove the pins, and fluff the pillow to evenly distribute the stuffing towards the section that was sewn last.
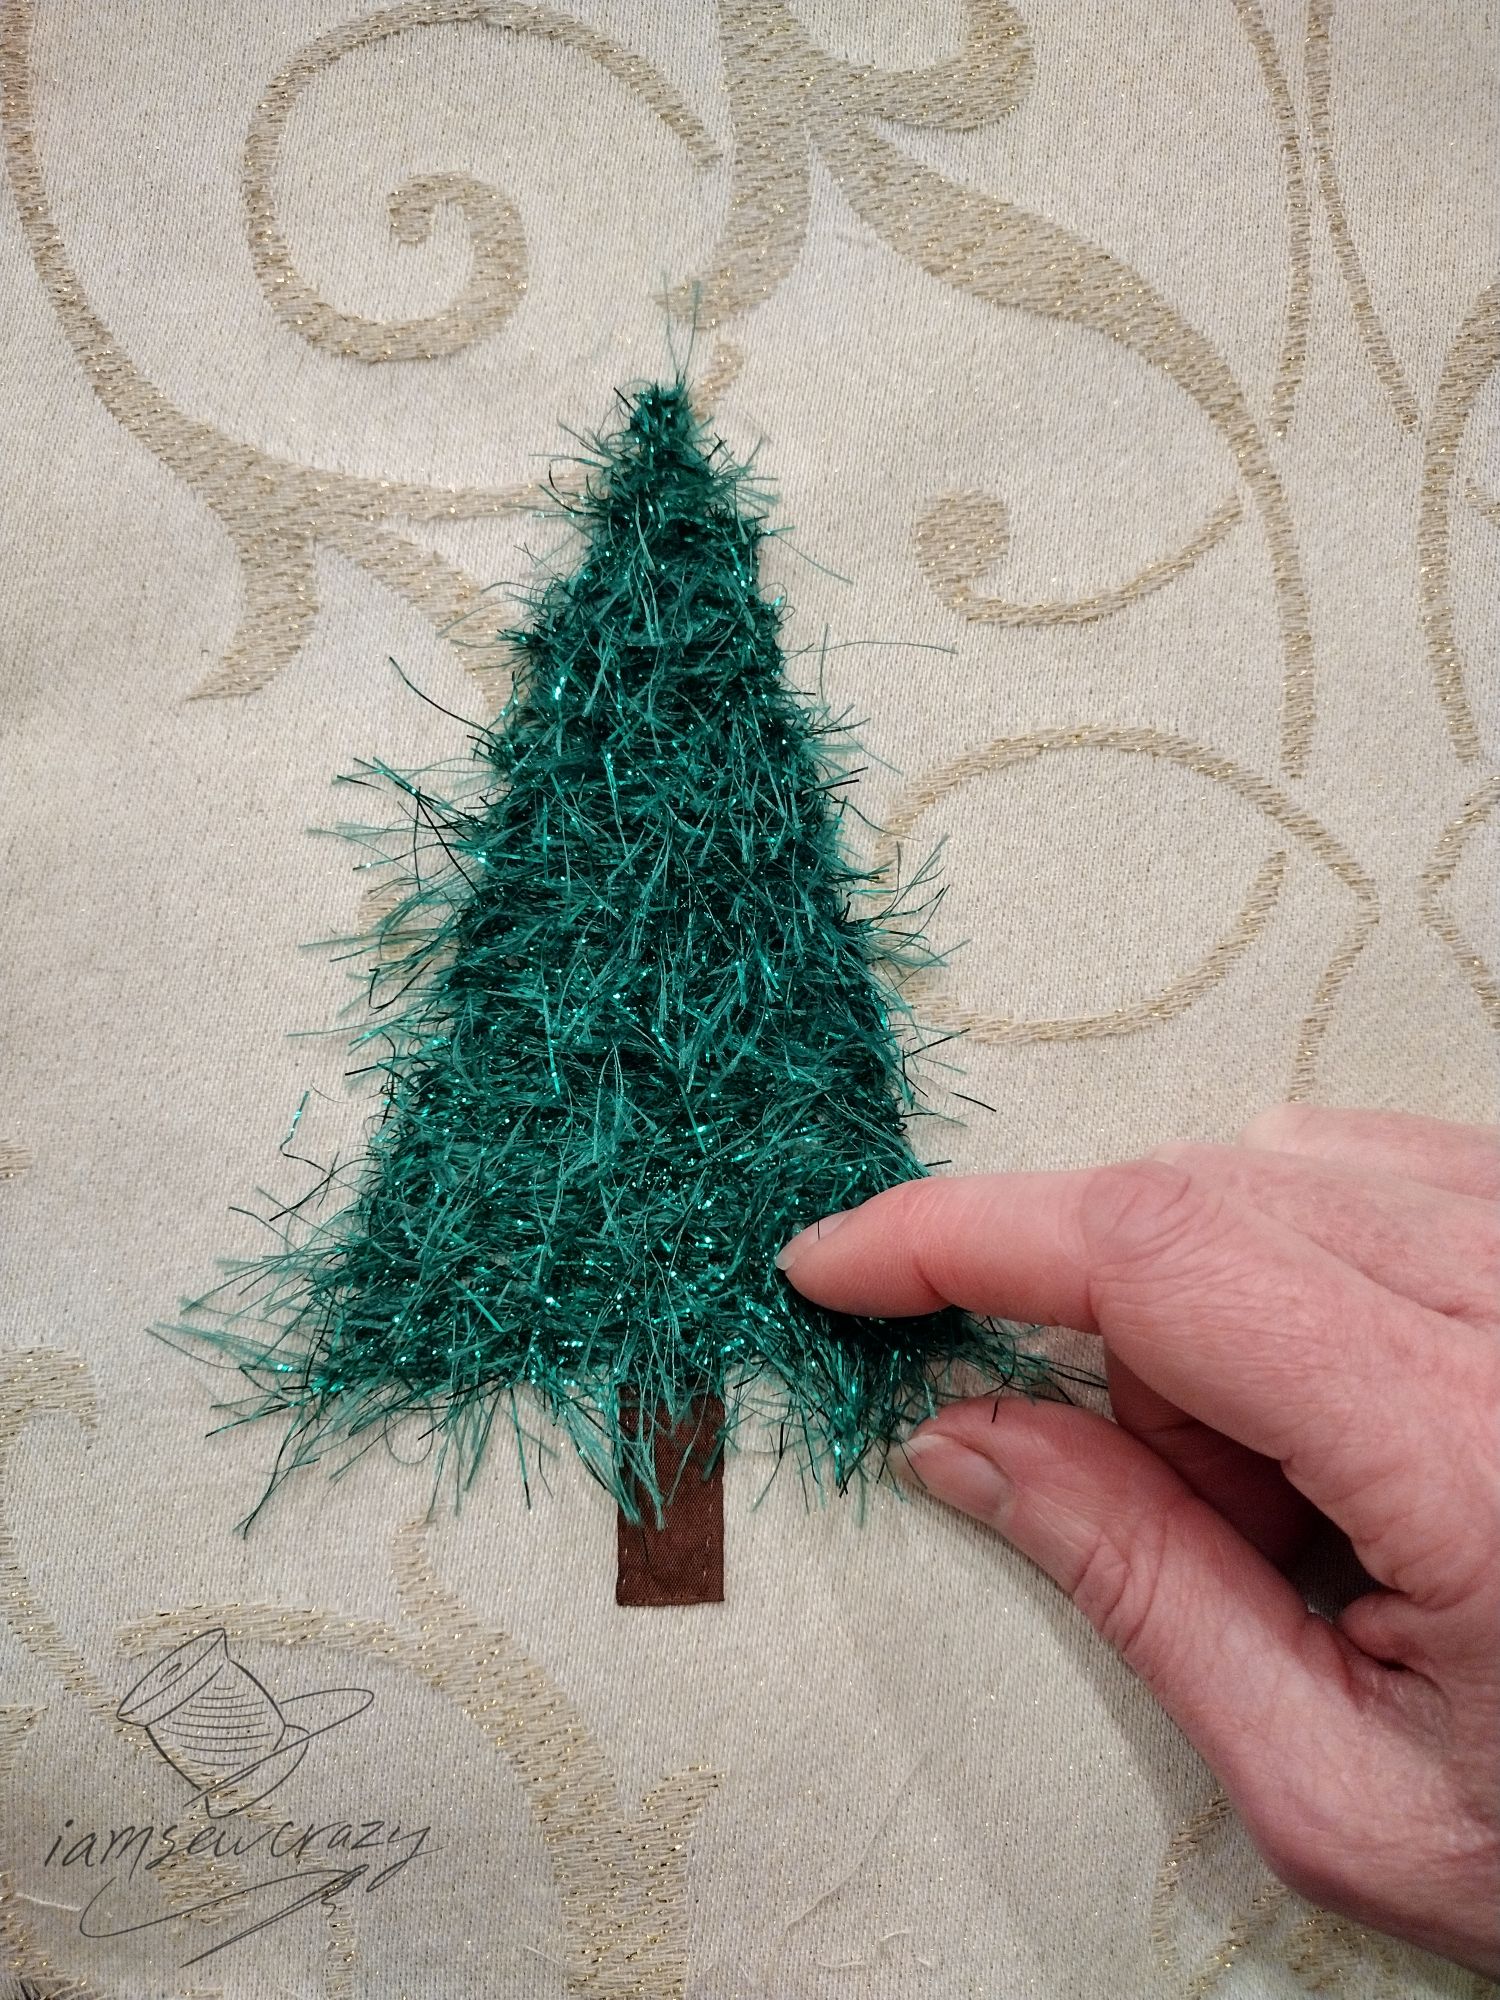
If you want fuzzier Christmas trees on your pillow, then scratch at the yarn gently with your fingernail. This will lift more eyelash fibers from the stitching and add more texture.
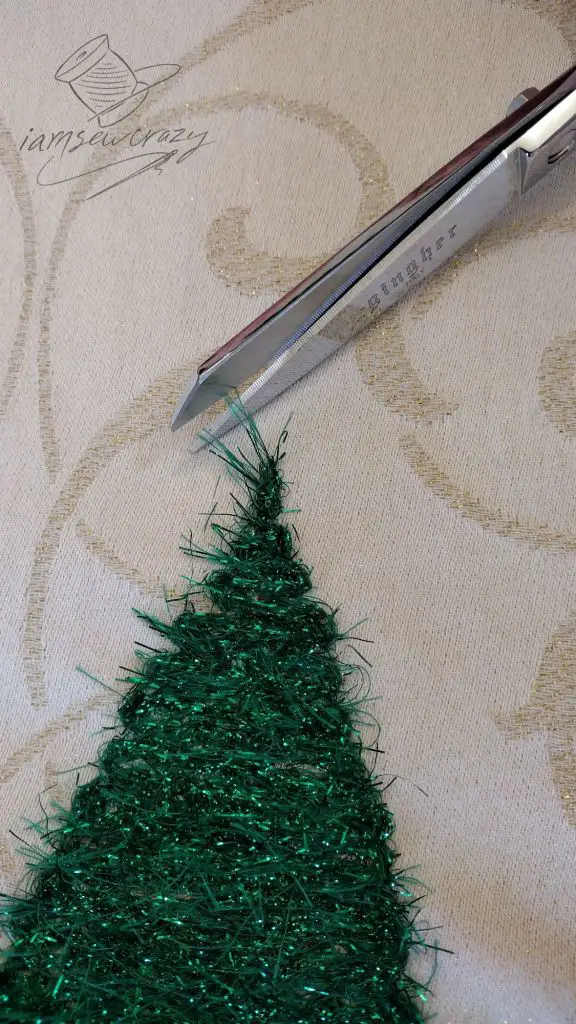
If you want to tone down the texture a bit, you can trim away some of the eyelashes (particularly at the tops of the trees).
You’ve done it! Check out that amazing fuzzy, fabulous, festive pillow that you made all by yourself. The texture on the pine needles looks like it took DAYS to achieve, but with the help of a drinking straw and my easy couching tutorial, you were done in no time! Now you know how to make DIY Christmas tree pillows for all your friends, relatives, neighbors, acquaintances, enemies…
While you’re here, check out my list of some favorite winter sewing projects!
Happy sewing!
Jessie