
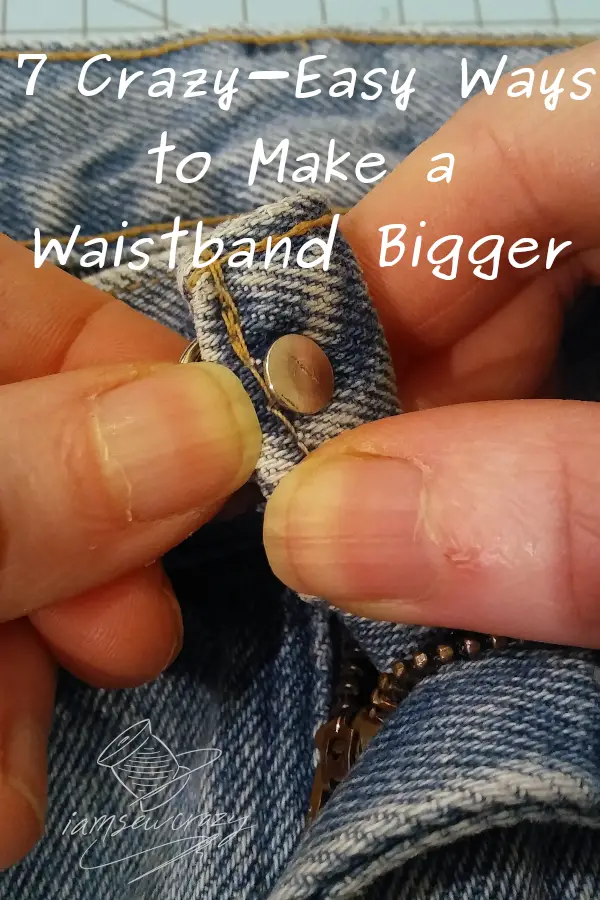
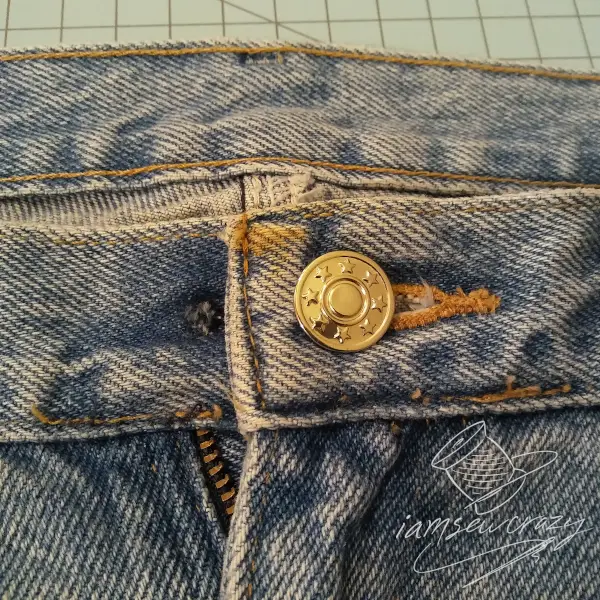
Here are seven different ways to loosen your waistband by an extra inch or two. These waistband extending hacks aren’t just for jeans; they will work on most pants with a button closure. You won’t be able to magically fix jeans that are five sizes too small, but these ideas will give you some extra breathing room on pairs of pants (or trousers, for my friends in the UK) that are a little bit too snug. I’ll show you 4 different DIY ways to make your waistband larger, and I also have a few other ideas at the bottom of the page that you can try if you’re looking for some more options.

(All of the DIY extenders are very simple to make, but if you prefer to save some hassle, you can find ready-made waistband extenders on Amazon.)
Concealing the Waistband Extender
So, obviously a waistband extender should be discreet and not attract attention. If you wear your shirt untucked, then covering the extender shouldn’t be a problem as long as your shirt overlaps the top few inches of your pants. A longer shirt or tunic is a great choice, because it will cover the extender even when you lift your arms or bend to the side.
But what if you want to tuck your shirt in, or wear a shorter top? Here’s a fashion hack that’s super cute, and a great way to hide a waistband extender: Add a belt with an attractive but slightly larger buckle, like this classy one with copper tones, or this silver filigree one! You’ll have a sophisticated focal point to your outfit, and nobody will ever know that you’re hiding a waistband extender.
Now, let’s move on to making the DIY waistband extenders!
Using an Elastic Hairband to Make Your Jeans Bigger
For the first (and simplest) hack, you just need an elastic hair band. (You know, the ones that tie up a ponytail, like these). Stick the ponytail holder through the buttonhole of your pants, and then tuck one end of the elastic band through the other end. You should end up with a stretchy loop that fastens over your button.


With all of these DIY extenders, you will get the best fit by leaving the zipper about one inch (2.5 cm) unzipped. Make sure that you fold the zipper tab down, and a properly-working zipper pull should stay right where you put it, without sliding down any farther.
If this gives you the fit you want, then great! You’re all done! If you want to try something else, then keep reading for a few other ways to make your waistband bigger.
How to Extend Your Waistband with a Cord and Button
If the ponytail holder by itself isn’t making your pants fit right, you can make a waistband extender with a shank button and a custom length of cording.


Find a shank button (a button that has no holes in the top, and a stem on the bottom like a mushroom). The button should be about the same size as the button that is already on your pants, and it should fit easily (but snugly) through the buttonhole. Standard jeans buttons are typically 5/8″, so if you don’t already have a button stash on hand, then buy a 5/8″ shank button like this.
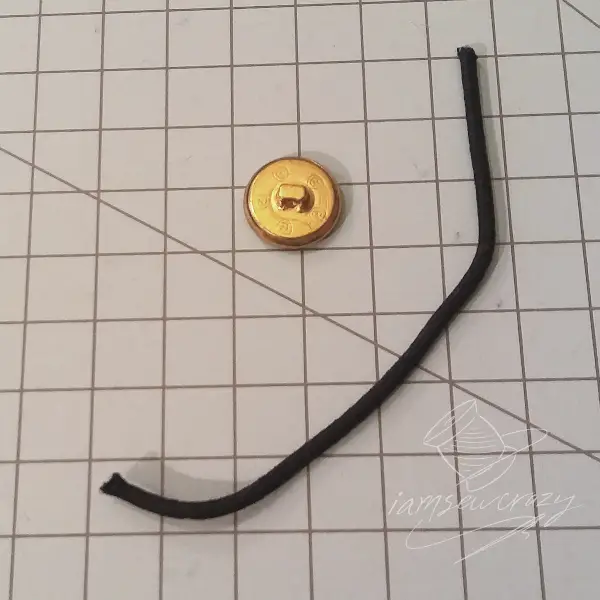
You also need a short piece of cord. Choose something stable, such as a shoelace, if you want to make an extender that doesn’t stretch. Or, choose a stretchy piece of cord, like a hair band, if you want your extender to have some give to it. If your cord is a circle (like a hair band), cut it apart at the joint with a pair of scissors. Now thread one end of the hair band or cording through the hole on the button’s shank.


If you are having a hard time getting the cord threaded through the button, you can wrap the end of the cord tightly with painter’s tape to temporarily stiffen it and help guide it though the hole. (This tip made the list of my 17 Painter’s Tape Hacks to Make Your Sewing and Crafting Easier! Check out the post if you want some more painter’s tape tips and tricks.)


Now you should test out the fit of the extender to see where you want to join the ends. Remember that the hair band is stretchy, so if you don’t plan for this, you might end up adding more room than you’d planned to your waistband!
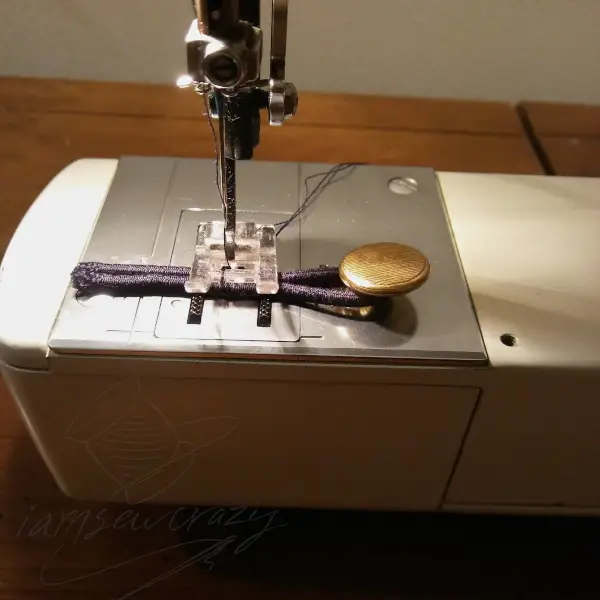
Join the two ends of the cord or ponytail holder together. I’m zigzagging over them with a sewing machine, but you could sew it by hand if you’d like. You could also wrap and tie the ends very tightly together with some strong thread or string. If you wrap and tie the ends of the cord by hand (without sewing through them), then I recommend coating the entire joint with fabric glue after you’ve wrapped and tied it, to keep everything from coming undone.


Now cut the extra ends off of the cord, put the new button through the buttonhole, and loop the cord around the old button. Ta-daa! You’ve got an extra couple of inches to help make you more comfortable in your favorite pants.
How to Make a Waistband Extender Out of an Old Pair of Jeans
This next method of extending a waistband makes use of an old pair of jeans, and it’s a similar method to the one shown in my tutorial about how to fix bra bands that are too tight.


Use a seam ripper to carefully remove the buttonhole side of the waistband on the worn-out pair of jeans. (You can choose to remove the button side of the waistband if you want, but then you’d be adding a buttonhole instead of a button, which is more difficult.)
Cut the waistband piece off. You probably want to cut it right next to the belt loop, but that’s up to you! You can remove the belt loop if you need to make the extender a little longer.


Fold the raw edges in (just a tiny fold is all you need) and then sew with a zigzag stitch along the folded edge. Start from the edge that used to be the top of the waistband, and then turn and sew along the bottom edge to so that all 4 sides of the extender are sewn together.
Now you need a new button. I’m using a jeans button, which are really easy to use. They have one piece that looks like a tack, and one piece that looks like a button with a hollow shank. I’m going to tell you how to attach a jeans button briefly here, but if you need any more help with the button part (or if you want to use a regular button instead of a jeans button), check out my tutorial about how to replace jeans buttons (including a hack that lets you reuse an old jeans button!)


Unlike attaching a regular button, you start by making a tiny hole in the fabric. I’m using my antique leather punch to do this. See the itty bitty hole?


Now push the tack through the hole. (There’s really no front or back to the extender, so just pick a side to put the tack through.) Put the button half over the pointy end of the tack.


Place the piece button-side down on some scrap wood. (If you use your nice tabletop, you might end up with a button-shaped divot in it!) Now whack the tack with a hammer. Try to strike it straight up and down, not at an angle. If you can still get your fingernail in between the tack and the fabric, then you need to smack it again.


You can also use a pair of slip-joint pliers to join the two pieces together. Take a look at the pictures to see the correct type of pliers to use. You want the tack to be pressed straight down into the button, like the picture on the right.
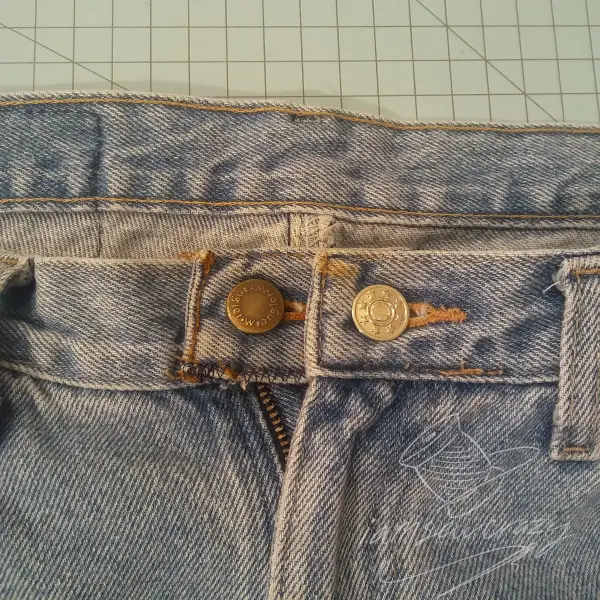
Now attach the extender’s button and buttonhole to the too-small waistband. That’s it! You’ve made your waistband a few inches bigger!
How to Move a Jeans Button Over
This method is one that will only get you about 3/4″ of extra room on most pairs of jeans. But sometimes that’s all you need! Just add another jeans button on the very edge of the waistband, next to the old button. Punch a hole on the edge of the waistband, making sure that you don’t cut through the stitches, and add a new button just like in the method above.


If you want to be able to adjust your waistband back to the old fit later on, then just leave the original button where it is and you will have two buttons for the price of… I guess technically it’s the price of two. Okay, fine. Whatever.
If the old button bothers you, then you can cut it off with a pair of cutting pliers. There will be a very small hole left behind, where the original button was, but it’s not going to bother anything.
Anyway, hopefully one of these easy DIY waistband-extending methods will be a perfect fit for you! And if not, here are a couple of other things you can try:
Use a Pants Stretcher to Make Your Jeans Bigger

A pants stretcher like this is another option. The pants stretcher is different than all of the other solutions here, because it doesn’t add an extra piece to your waistband, so you can fasten your pants as usual and they will look exactly the same as they did before. You can use it on wet or dry pants and skirts, but damp clothes will stretch farther and keep their stretch better. So use it dry, for just a few minutes, if you’re in a hurry. Or apply the stretcher to a damp waistband when it comes out of the washing machine and hang the garment to dry (with the stretcher in place) for maximum extra room!
(You can also find shoe stretchers, if you have some pinching footwear that you just can’t bear to get rid of!)
Add a Maternity Panel to Your Pants

These pants-extending panels are designed to attach to the button and buttonhole of your pants. They fill in the gap of your fly, so you can leave your pants unzipped and add quite a bit of extra room! The panels were made for maternity wear, but anyone can use them. Worn with a tunic or long shirt, who would ever know they were there?
Add a Waistband Extender to Your Belt Loops

There’s also this type of waistband extender that attaches between your two front belt loops. It’s stretchy, and was designed for maternity wear, but it’s another nice option to try if other extenders aren’t giving you the fit or comfort that you want.
Thanks for stopping by, and now you know how to make your jeans waistband bigger!
Excellent, thank you…
Glad you liked the tutorial!
Fantastic! Thank you!
Glad you liked it!