


Replacing a jeans button can seem kind of daunting if you’ve never done it before. How do you attach a tack button? What if part of the old button is still on the jeans? What if the waistband fabric tore when the old button came off? Can you re-use the button from an old pair of jeans? Can you sew a regular button onto a pair of jeans? Well, you’ve definitely come to the right place! I will answer all of these questions and more as I show you how to replace the button on a pair of jeans.

Replacement jeans buttons are inexpensive and typically require no sewing. To attach them, you use an easy method called “whack them with a hammer”. It’s not difficult at all, and I’ll show you exactly how it’s done. I will also show you how to overcome common problems you might run into, such as a torn waistband or leftover pieces of the old button. And I’m including an easy hack that shows you how to reuse the button from an old pair of jeans! So here’s how to replace the button on your jeans:
How to attach a jeans button:

First, we need our new jeans button. They’re on Amazon, and you can find them in different metal finishes like bronze, silver, and gold. They also come with designs like roses on them, and even in bulk. The buttons for adult jeans are all a pretty standard size. So you shouldn’t have to worry about the new button fitting your pair of jeans.
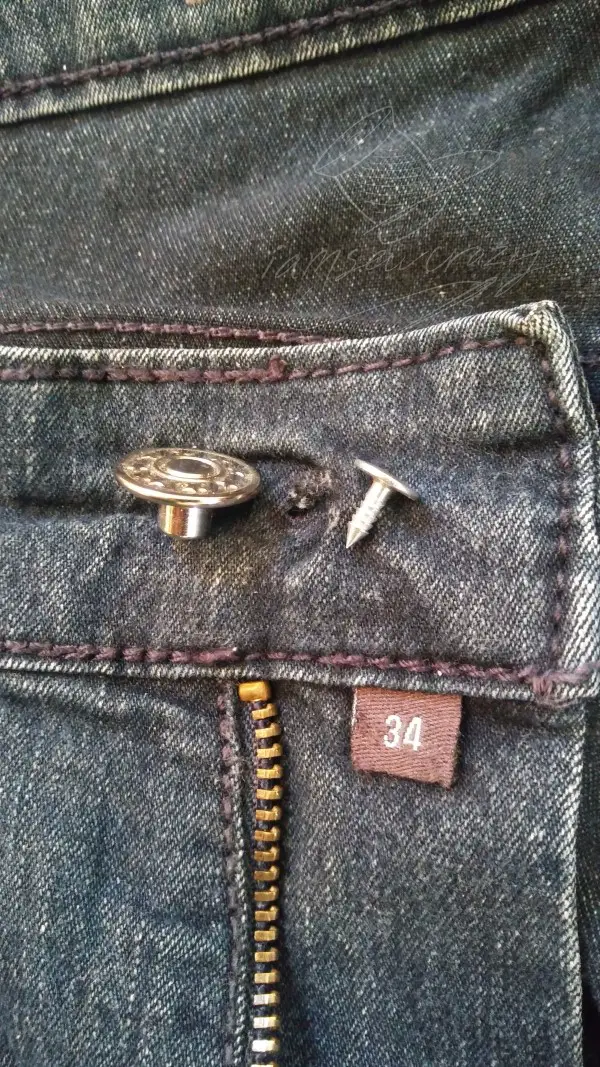
Whichever button you buy, it should have two parts: a tack-shaped pointy piece that goes through the fabric, and a part that looks like a mushroom with a hollow stem.

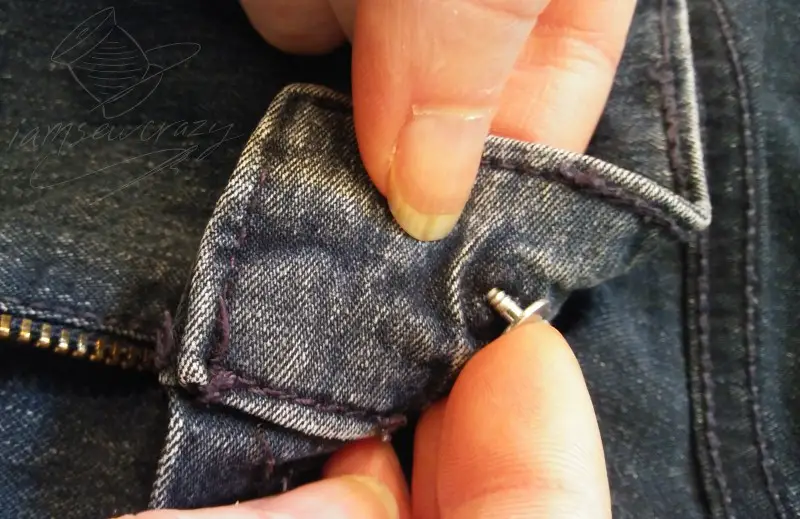
Poke the tack through from the inside of the waistband, using the hole that the old button tack went through.

Now put the other piece of the button over the pointy end of the tack.

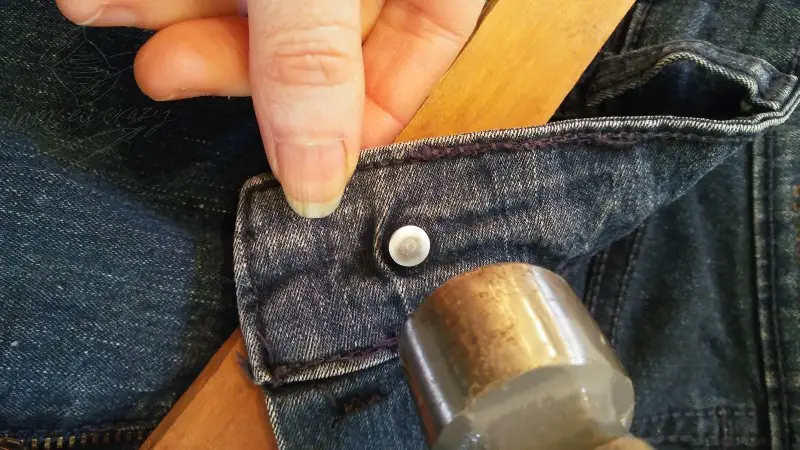
Place the button face-down on a piece of scrap wood. (If you use your nice tabletop, you might end up with a button-sized divot in it!) Make sure that the button is centered on the tack, and then smack the tack with a hammer. Try to whack it straight up and down, not at an angle.


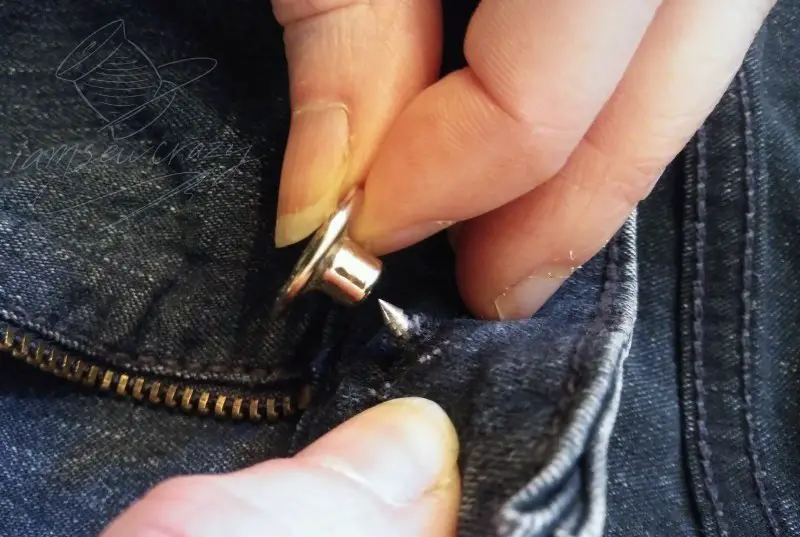
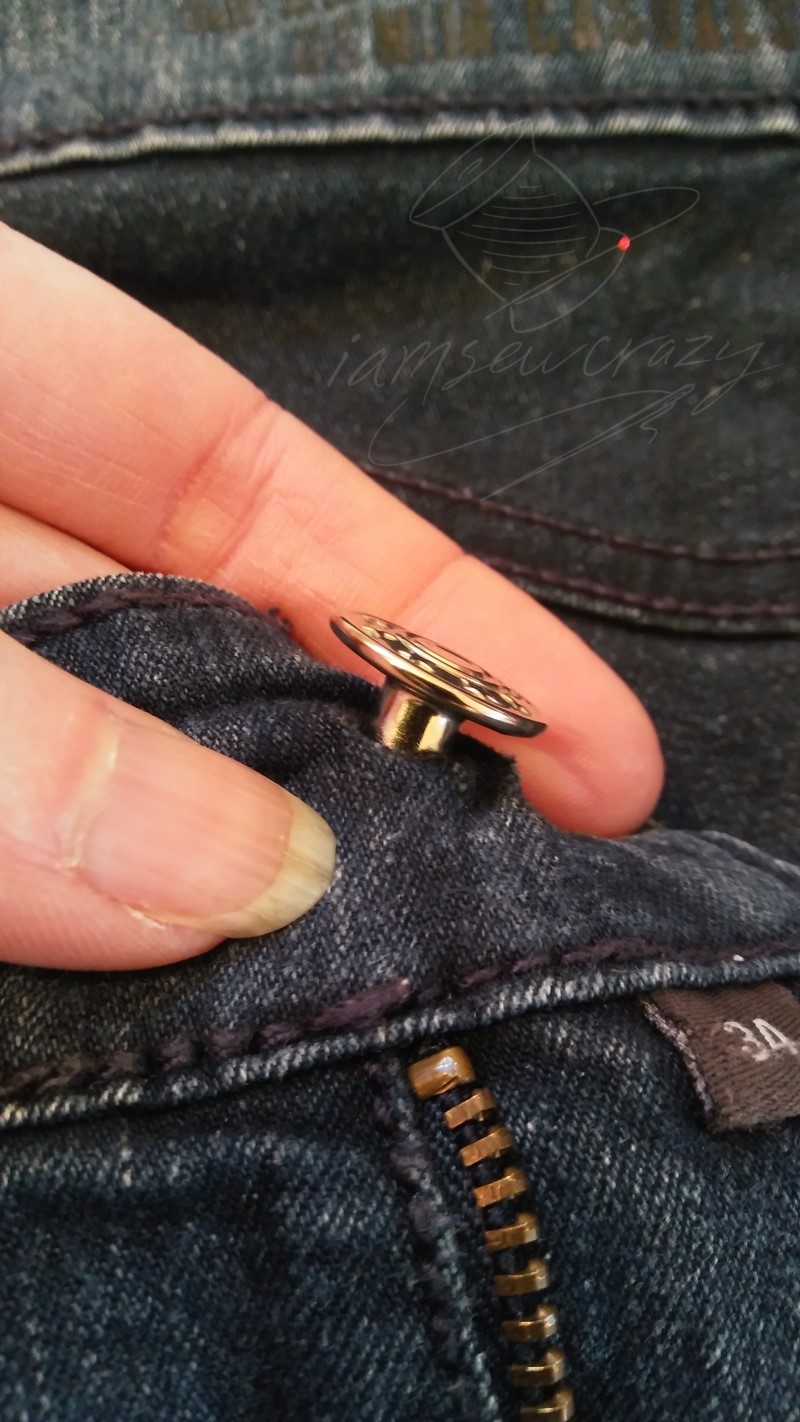
You can also use a pair of slip-joint pliers like these to press the two parts together. Slip-joint pliers have a moveable pivot point, and the jaws will open wide enough that you can pinch the tack and button straight down, not at an angle. A regular pair of pliers will pinch the pieces at an angle. Take a look at the pictures to see examples of the right and wrong way to join the two pieces.
It’s a really good idea to place a scrap of fabric over the pretty side of the button, to keep the pliers from scratching it. But I’m not using one in the pictures so that you can see the angle of the pliers more easily.

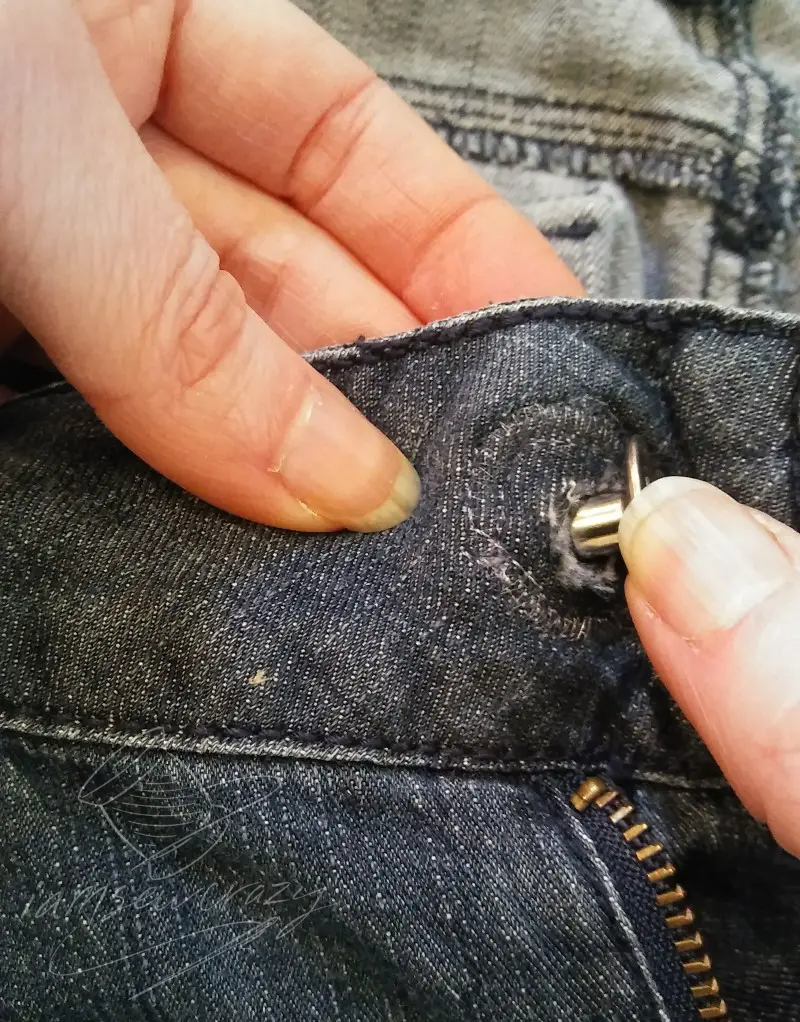
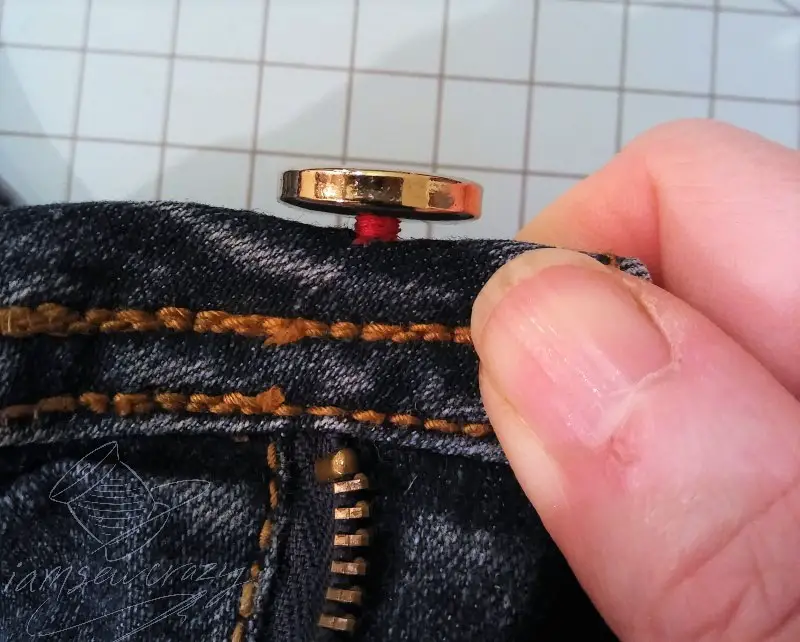
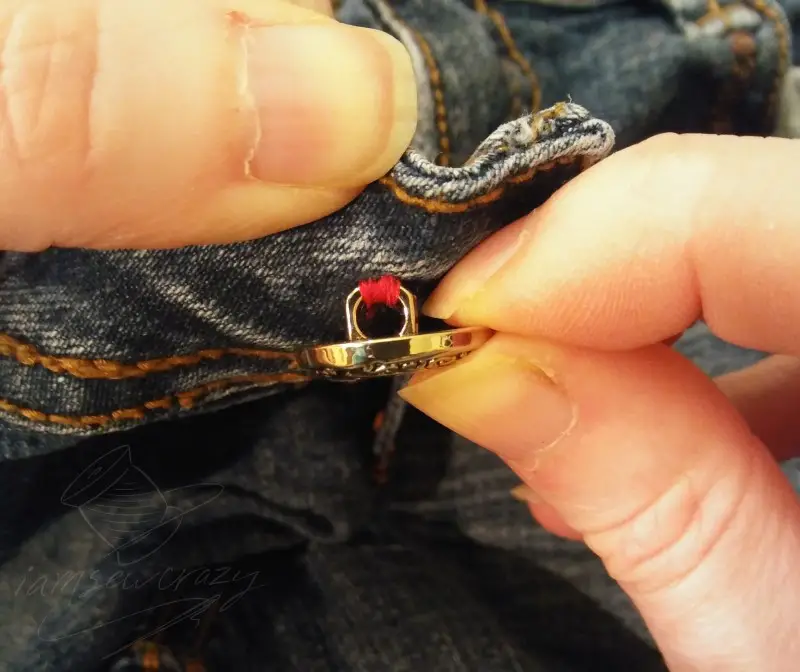
Check to see if the button is seated all the way down on the tack. You shouldn’t have any extra room in between the tack and the denim. You can see in the picture above that I can still get my thumbnail in between the tack and the denim, so I need to smack it again!

Once the tack is hammered all the way into the button, you’re done. Seriously, that’s it! Now you know how to replace the button on a pair of jeans!
Using repositionable jeans buttons:


If you’re not feeling confident about replacing a jeans button, here’s one more option for you. These jeans buttons attach much like a lapel pin, and can be repositioned. I haven’t used them personally, and it looks like the back sticks out far enough that it might be uncomfortable. But they would be perfect for an emergency sewing kit. Or for temporarily adding suspender buttons to a pair of pants.
Since these jeans buttons are repositionable, they might be a good idea if you aren’t sure of your button placement. Or if you think you will need to be adjusting the waistband in the near future. Moving the button to one side or the other is a super simple way to adjust the fit of your jeans! (And if you need a little more help with the fit, check out my list of 7 easy ways to make a jeans waistband bigger!)
How to reuse the button from an old pair of jeans:
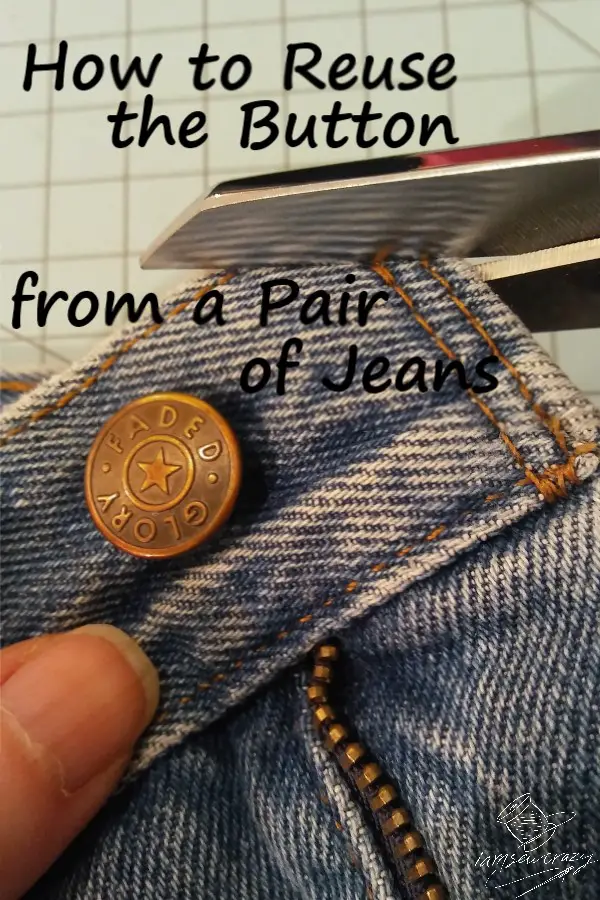
Metal jeans buttons are made to be one-use only: The tack goes in, but it’s not designed to come out. However, if the old jeans button is still attached firmly to the waistband, you can absolutely reuse it on a different pair of pants!
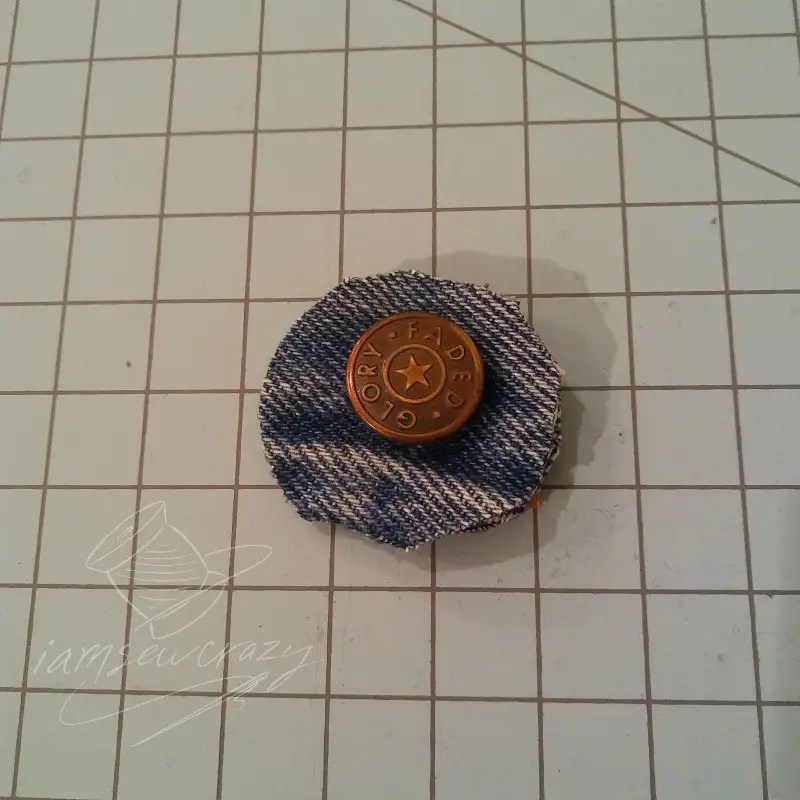

Cut a circle out of the waistband on the worn-out pair of jeans, with the button in the center. Cut just inside of the gold waistband stitches. Remove the leftover seam allowances from the bottom edge of the patch.

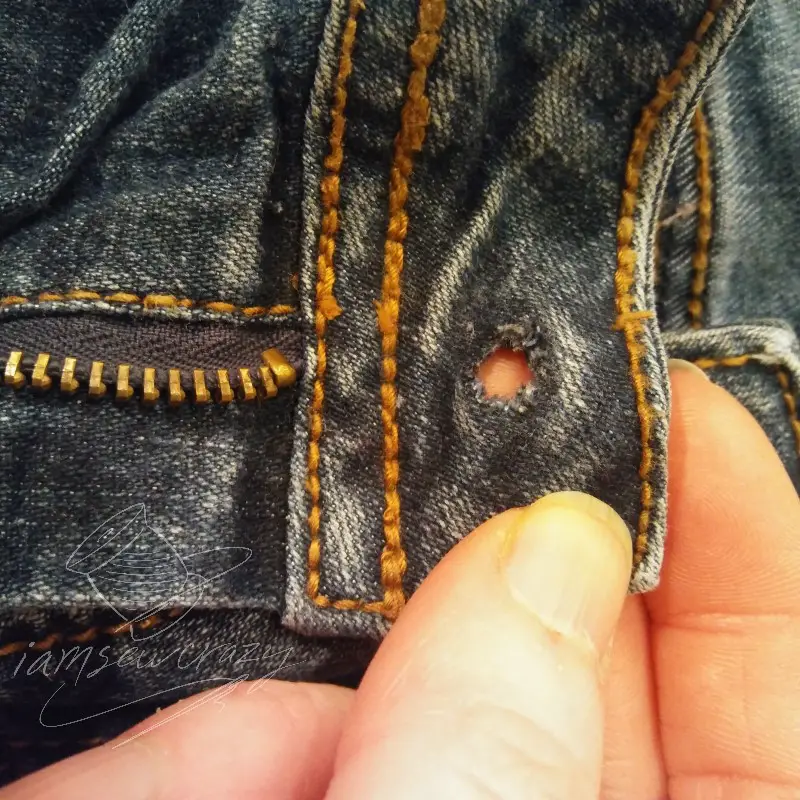
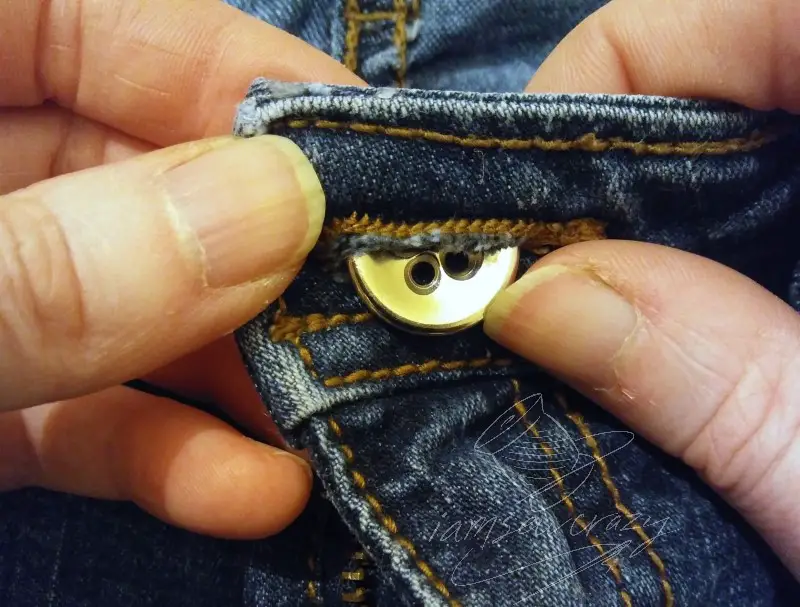
Go back to the jeans that you are repairing, and look at the hole where the button came off. You want the hole to be just large enough for you to push the circle of fabric through to the back of the waistband. Ideally, the hole will be exactly as big around as the button shank. You can snip it a little bigger, but don’t make it larger than you need to! Cutting it too big will just weaken the jeans unnecessarily.


Push the patch of fabric with the button attached through the hole to the back of the waistband. I’m using my hemostats for this; they work really well. The patch of fabric should be on the inside of the waistband, and the button should be on the outside of the pants.
Since you’ll be sewing through quite a few layers of thick fabric, I recommend a size 16 sharp needle. (It’s also called size 100 or a denim needle.) I also like using denim thread, which is a thread that’s made to blend in with denim fabric. It’s useful for all kinds of mending and repairs. (I’m using magenta thread for the tutorial, because I want you to be able to see what I’m doing!) My machine is set to a wide zigzag, and 10 stitches per inch (about 2.5 mm).

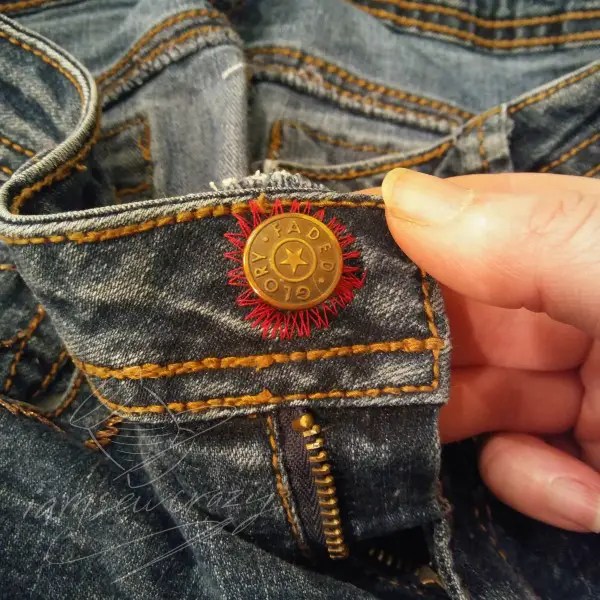
Zigzag two times around the perimeter of the patch, as close to the old jeans button as you can get. You will have to sew with the patch on the bottom. Make sure that the button stays out of the way of the needle!


Trim any excess fabric away from the edges of the patch after you’re done stitching.
If you don’t have a sewing machine, you can hand-sew the patch in place. But going through all of those thick layers of denim will be really tough. It will help to use a thimble and a needle puller. (A needle puller is made of rubbery, grippy material that helps you grab the needle and pull it through thick layers of fabric). If you have a sewing machine, I think that’s a much easier option.

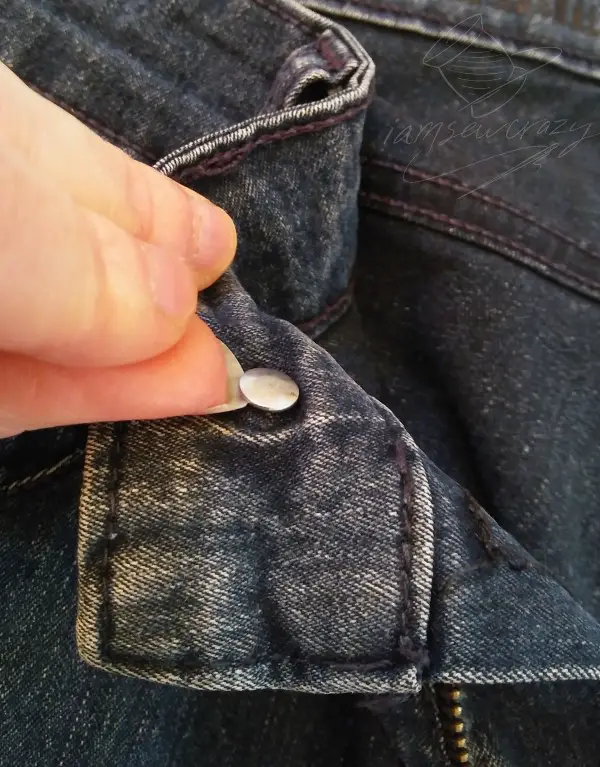
As long as you stitch fairly close to the button, you won’t be able to see the patch or the stitching while you’re wearing the jeans. The other side of the waistband (the side with the buttonhole on it) will overlap and cover all of the stitches. Even with the contrasting magenta thread, you can’t see it at all while the button is closed!

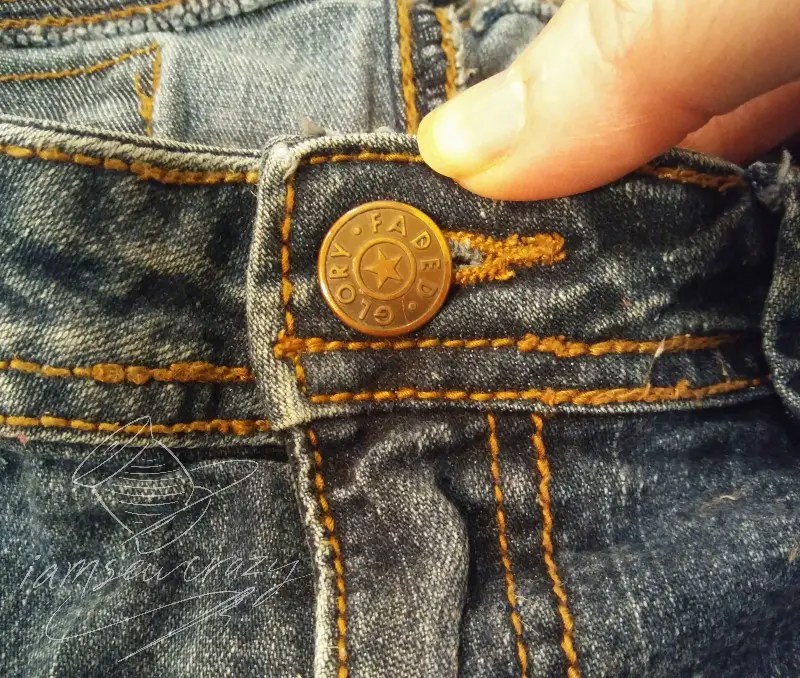
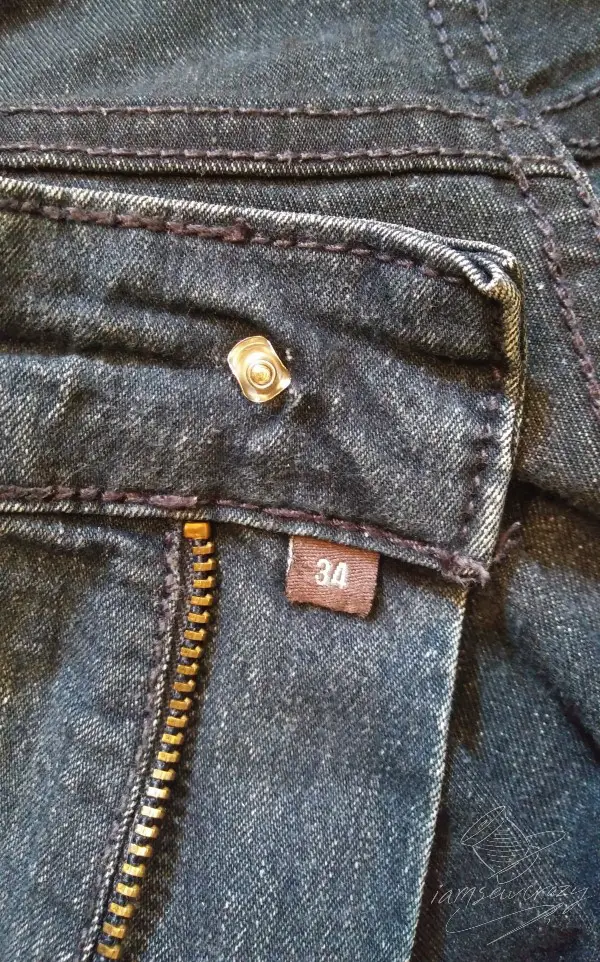
Here’s another pair of pants where I replaced the button by reusing an old jeans button. I sewed this pair with denim thread, and you can see how well it blends in with the fabric. Ta-daa! Now you know how to reuse the button from an old pair of jeans!
How to replace a jeans button if the waistband fabric is torn:
If the waistband was torn when the original button came off, you can still use a new jeans button. Using a hybrid of the two techniques above, patch the hole from the back. (This will be easy because the button won’t be in your way, and you can sew with the patch facing up). And then, use a hammer or a pair of pliers to apply the new button.
How to remove a broken jeans button:

If pieces of the old button are still attached, you will need to remove them before you can attach the new button onto your jeans. On this pair of jeans that I’m using as an example, the button has broken off, but it still has the tack on the back and a bent piece of metal where the button is supposed to be. This kind of button failure is unfortunately fairly common in lower-quality pants that use cheap zippers and buttons. But it’s also easy to fix!

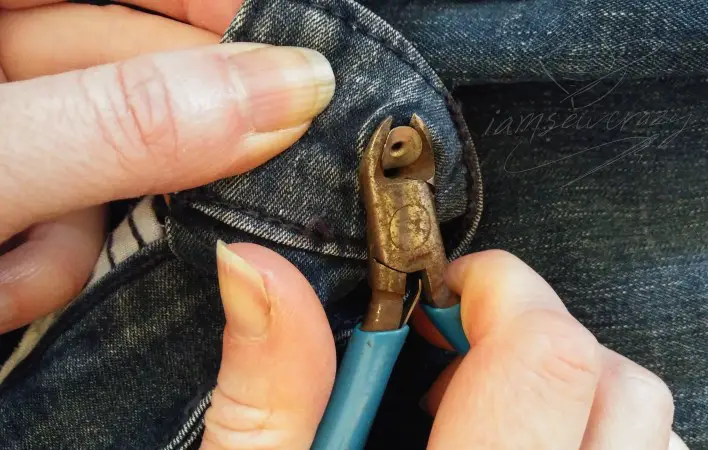
First, we need to get rid of the old metal pieces from the broken button. Use a small pair of pliers that have a sharp cutting edge, and cut the tack from the back of the waistband. Working from the inside of the pants assures that if you accidentally scuff or nick the fabric, it will be less noticeable.
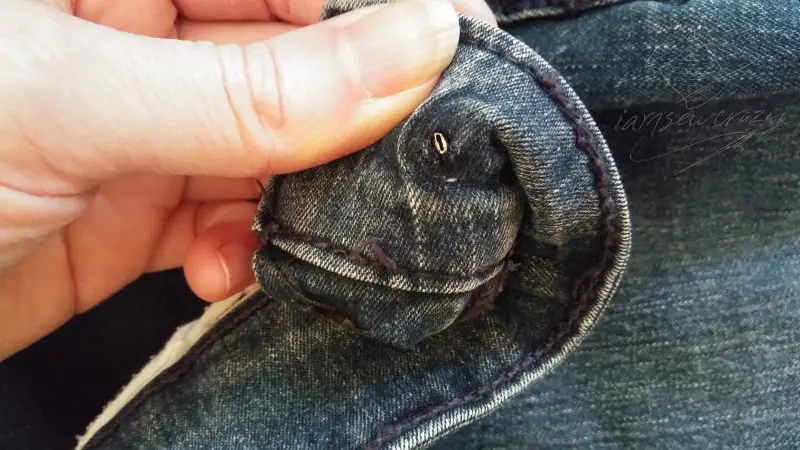
When the tack is snipped through, you can remove the metal pieces from both sides of the waistband. Now proceed with the steps above to attach a new button to your jeans!
How to sew a regular button onto a pair of jeans:

What if you want to attach a regular button with holes in it to a pair of jeans? You can do that, too! In fact, if you happen to have a pair of jeans that doesn’t have a standard size of buttonhole, this is likely your best option.
There’s a good chance you’ve attached this kind of button before. But when you’re replacing a button on a garment made of thicker material (like jeans or a coat), it’s very important to make a thread shank.

What’s a thread shank? It’s a stem made of thread that lets the button stand up like a mushroom, instead of lying flat like a dinner plate. It allows plenty of room for the other side of the waistband (the side with the buttonhole on it) to fit between the button and the fabric.

Start by choosing a button that fits easily (but fairly snugly) through the buttonhole. A 5/8″ or 17mm button is pretty standard for a pair of jeans, but you should always test the fit by pushing it through the buttonhole.
You will need a needle and thread. You also need something to use as a spacer, such as a large toothpick, skewer, or tapestry needle. Don’t use something with two fat ends, like a phone charger cord. You won’t be able to pull it out of the stitching later!


The toothpick should be about as thick as the waistband right where the buttonhole is. Here I’m folding the buttonhole in half so that you can see that I’ve chosen a toothpick as thick as one side of the buttonhole.
If you were sewing a button onto a dress shirt, you could use a small toothpick or a regular-sized needle as a spacer. The thinner fabric of a shirt would need a much thinner spacer than a pair of jeans. But for something thick, like jeans or a coat, we need a large toothpick.


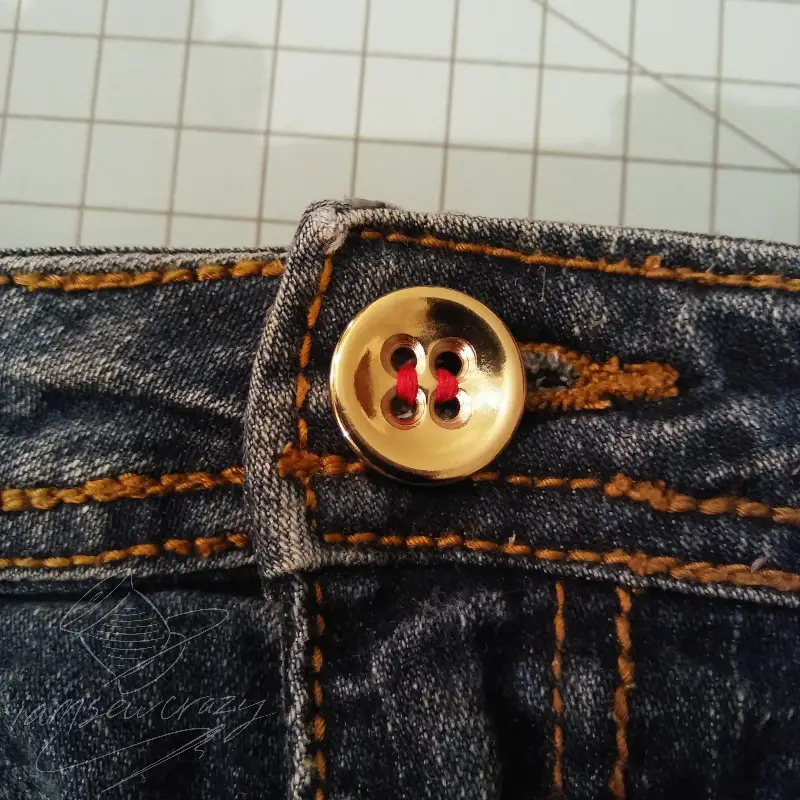
You should use matching thread when you replace the button on your jeans. But I’m using magenta thread here so that you’ll be able to see it.
Cut a length of thread that’s about as long as your wingspan (fingertip to fingertip), then fold it in half. Put the fold of the thread through the eye of the needle, and even up the thread so that you have the two cut ends a little longer than the fold.


Take one small stitch on the back of the waistband, and run the needle through the loop of thread.


Pull the thread tight and trim the two cut ends of the thread close to the fabric.

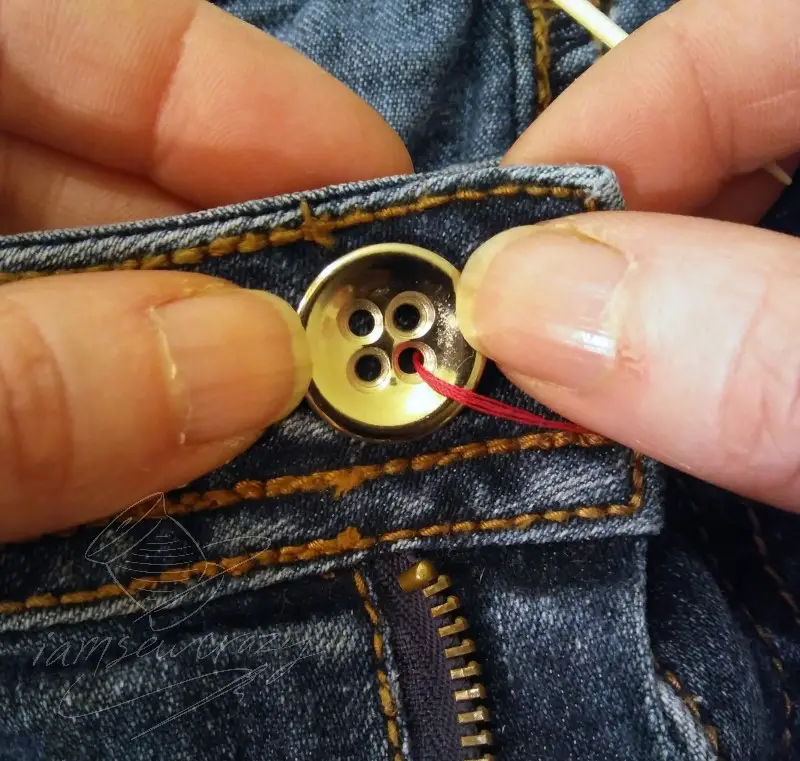
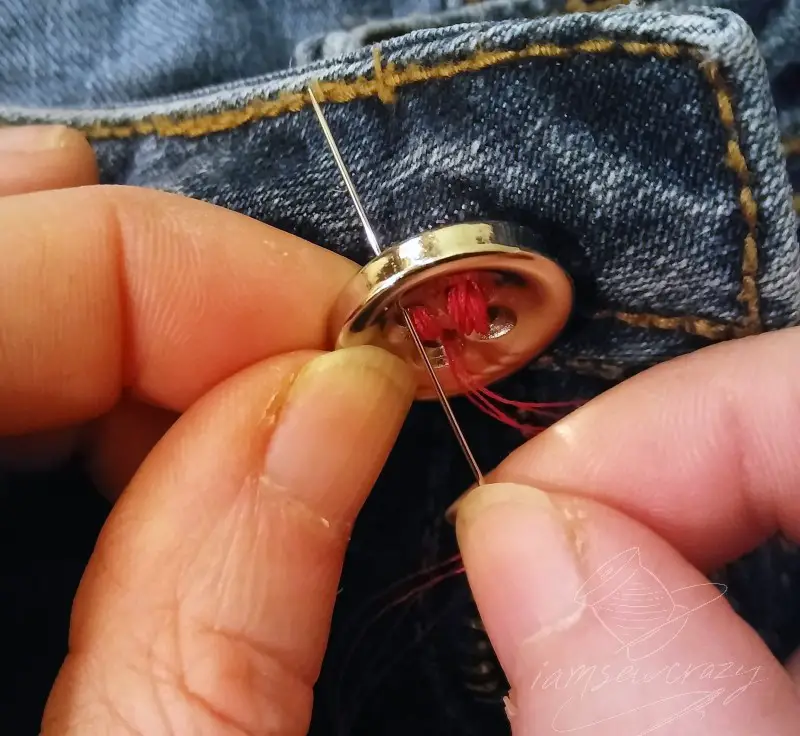
Then run the needle through to the outside of the waistband, and through one of the holes in the button.

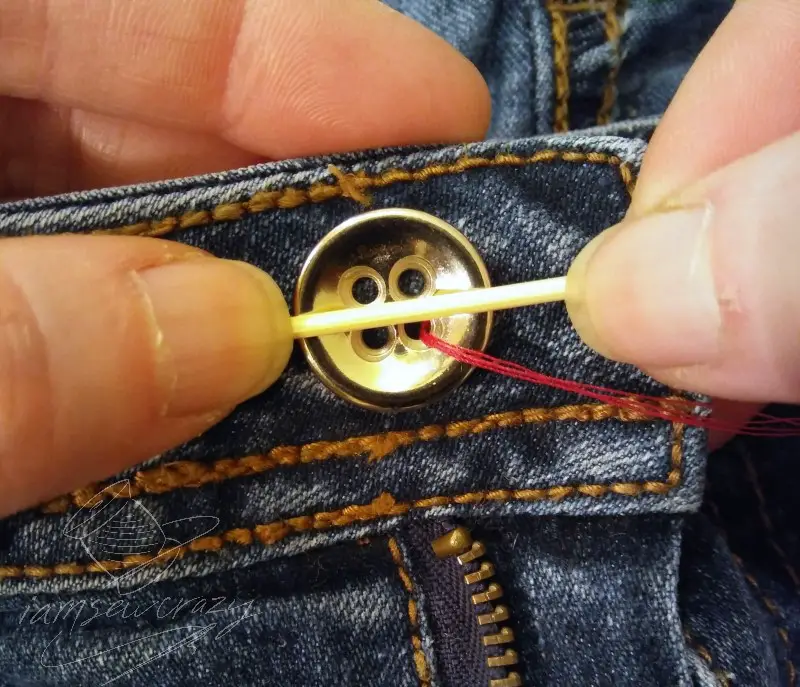
Place the toothpick on top of the button, between the holes. You can use painter’s tape to hold the toothpick down if you want to. (This is just one thing on my list of painter’s tape hacks that can make your sewing and crafting easier!)

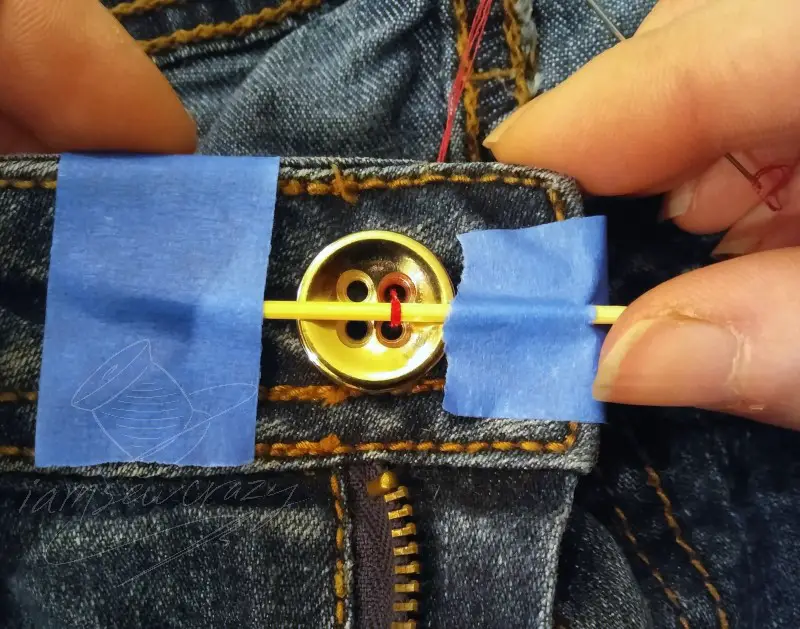
Put the needle over the toothpick, and through another buttonhole. Now push it back down through the jeans waistband, pulling the thread tight around the toothpick.

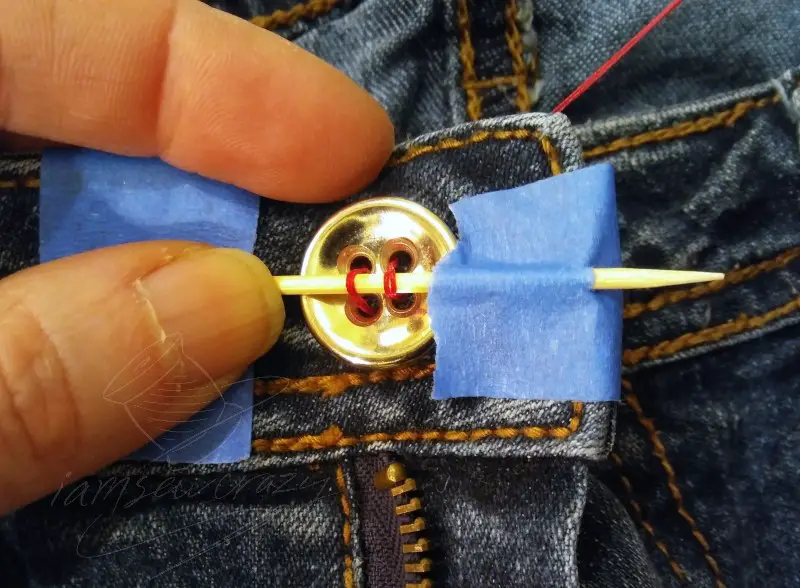
You will find very devoted members of the “make the shape of an X with your thread” club, and members of the “make an 11” club. You could probably start a fight in a fabric shop over it. I make an 11, but (psst, here’s a secret:) it doesn’t really matter. Both methods will effectively attach the button to the waistband. I feel like it’s a little easier to get all the thread evened out if the strands aren’t crossing over each other, so I make an 11. You should do whatever makes sense to you.

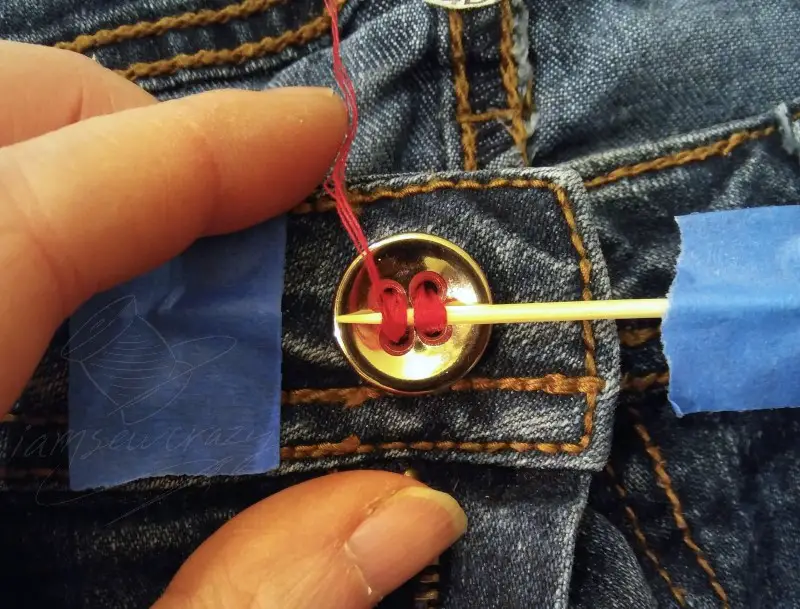
Continue sewing through one set of holes, and then the other. When you have sewn through each set of holes four times, pull the toothpick out.

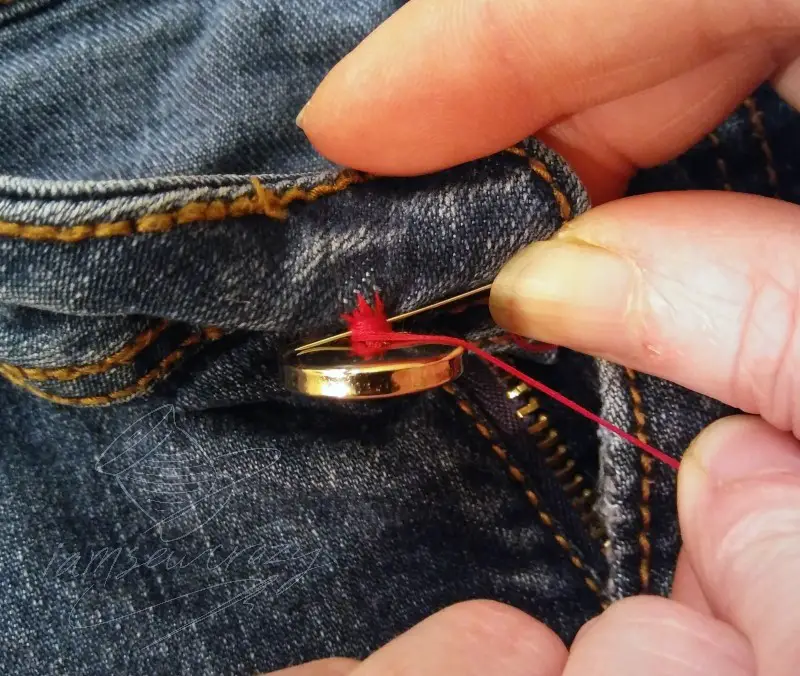
Now run the needle down between the button and the waistband.


Pull the button away from the waistband, and hold the thread tight. Wind the thread 4 times around the threads that hold the button to the waistband. There’s your thread shank!

When you’ve wrapped the thread shank, hold the thread tight and run the needle straight through the thread shank 4 times. Now cut the thread tails close, and you’re done!

Check out how the button is standing up off the fabric. That extra space lets the thick jeans waistband fit in between the button and the cloth comfortably, without straining anything.
How to sew a shank button onto a pair of jeans:

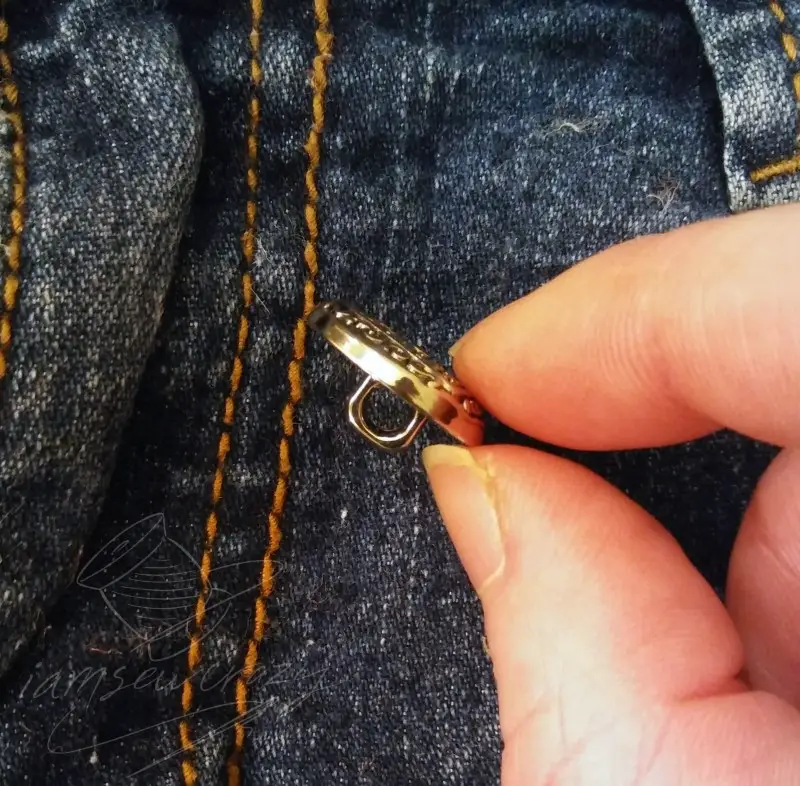
Another option is to use a shank button, which is a button that has a shank instead of holes. You do not need to make a thread shank when you’re using a shank button.

Make sure that the button fits nicely through the buttonhole before you start.

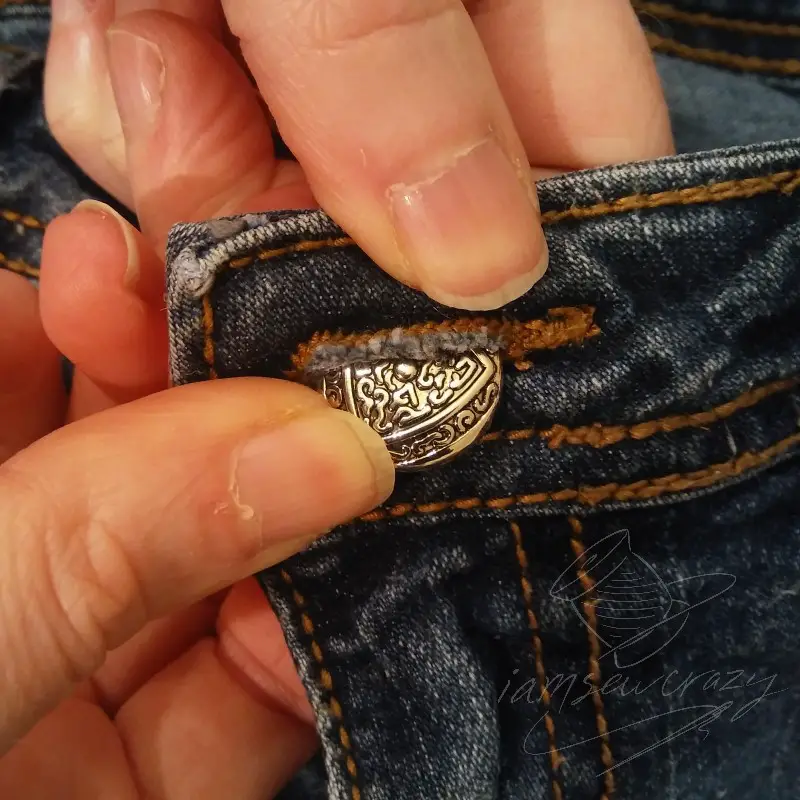
Take your stitches through the waistband, through the hole in the button shank, and back down through the waistband. Here’s a closeup of the finished product!
You can knot the threads when you’re done if you want to. I prefer to take several small backstitches to lock my threads at the beginning and end. If you do knot the thread, it’s a good idea to put a dab of fabric glue on the knot to keep it from coming undone later.
Now you know how to replace the button on a pair of jeans! It’s so much cheaper than replacing your favorite pair of jeans when they lose a button. Replacing a jeans button is a good skill to have in your bag of tricks. And it’s pretty easy to do, no matter which of these methods you choose.
If you need to patch holes in your jeans, or maybe learn how to cover stains on your jeans (or make other repairs to your clothes), check out my list of mending tutorials!


Excellent tutorial! Thank you.
So glad you liked it!
[…] blog post on replacing buttons on jeans goes into much more detail. So if part of your button is still attached to your jeans, or the […]