
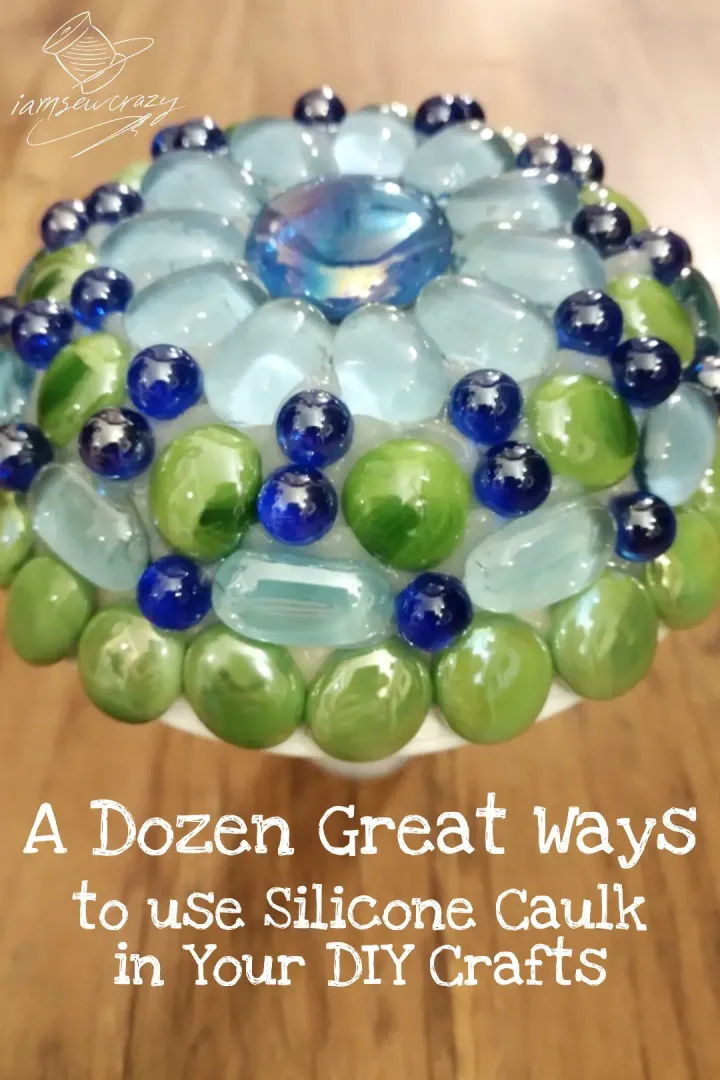

Hey everyone, here’s a roundup post to show you how to use silicone caulk in your sewing and crafting!
I often use 100% silicone caulk for traction, making molds, as glue, or as a sealant. I typically prefer the smaller squeeze tubes of silicone like this, because the huge tubes of silicone that fit into a caulking gun can be difficult to control. It comes in several different colors (including clear), so it’s easy to find something that matches your project.
Whether you choose a smaller tube or a large one, make sure that the tube you select is 100% silicone, and not part acrylic or another compound which may not hold up to heat and heavy use the way silicone does.
Using Silicone for Traction:
When you are using silicone for traction, you want to apply it, smooth it out, and then let it fully cure before using the item. You are trying to add some grip, not glue the rug to the floor or the straps to your shoulders!
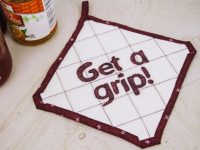
First up, allow me to introduce the latest article that I wrote for We Like Sewing magazine: It’s a super useful potholder/jar opener that uses silicone caulk to create a grippy, non-slip surface so that one side of the potholder doubles as a jar opener. It’s a really fun and easy project that makes a great gift, and you can choose fabric that matches your kitchen decor! My “Get a Grip!” potholder/jar opener tutorial includes tips on what materials make the best heat-resistant potholders, how to quilt the layers together, an easy fold-over binding technique that finishes the edges with no fuss, and of course there are lots of pictures to walk you through the whole process.
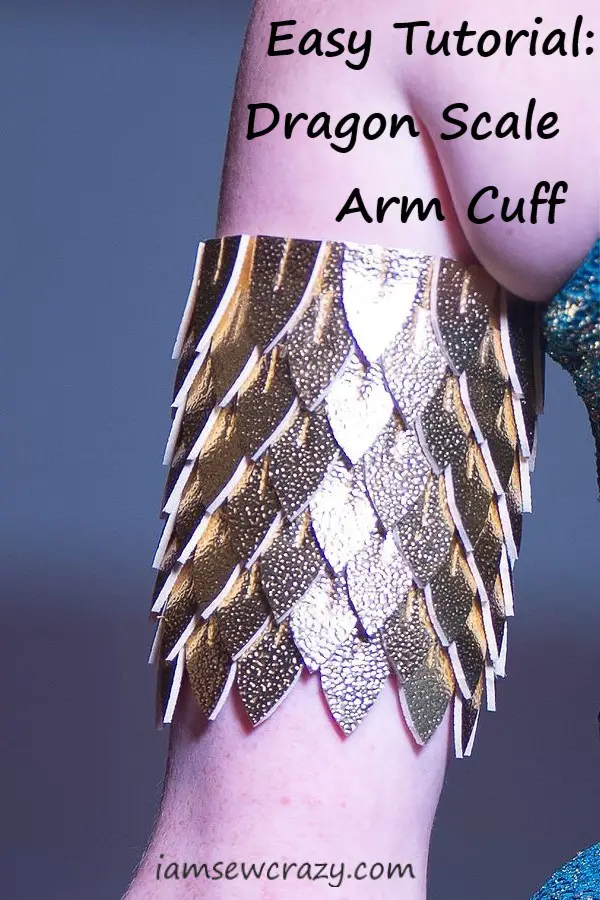
Silicone caulk also keeps arm cuffs (and other items that rely on friction to stay up) from slipping around. I used silicone on the dragon scale arm cuff from the Flights of Fancy Collection, and it worked great to help it grip all the different sizes and shapes of the models who wore it. One of them even wore it on her leg! (If you want to make your own dragon scale arm cuff, I made a full tutorial and uploaded my template so you can print it for free!)
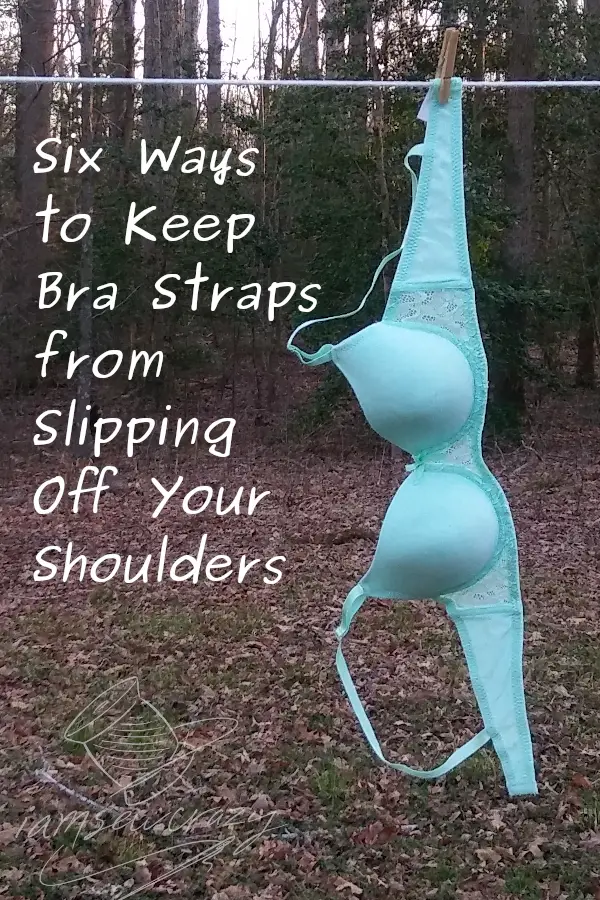
Silicone is one of my Six Ways to Keep Bra Straps from Slipping off Your Shoulders! Check out the full post to see other options that might be just what you need to keep those pesky straps where they belong.
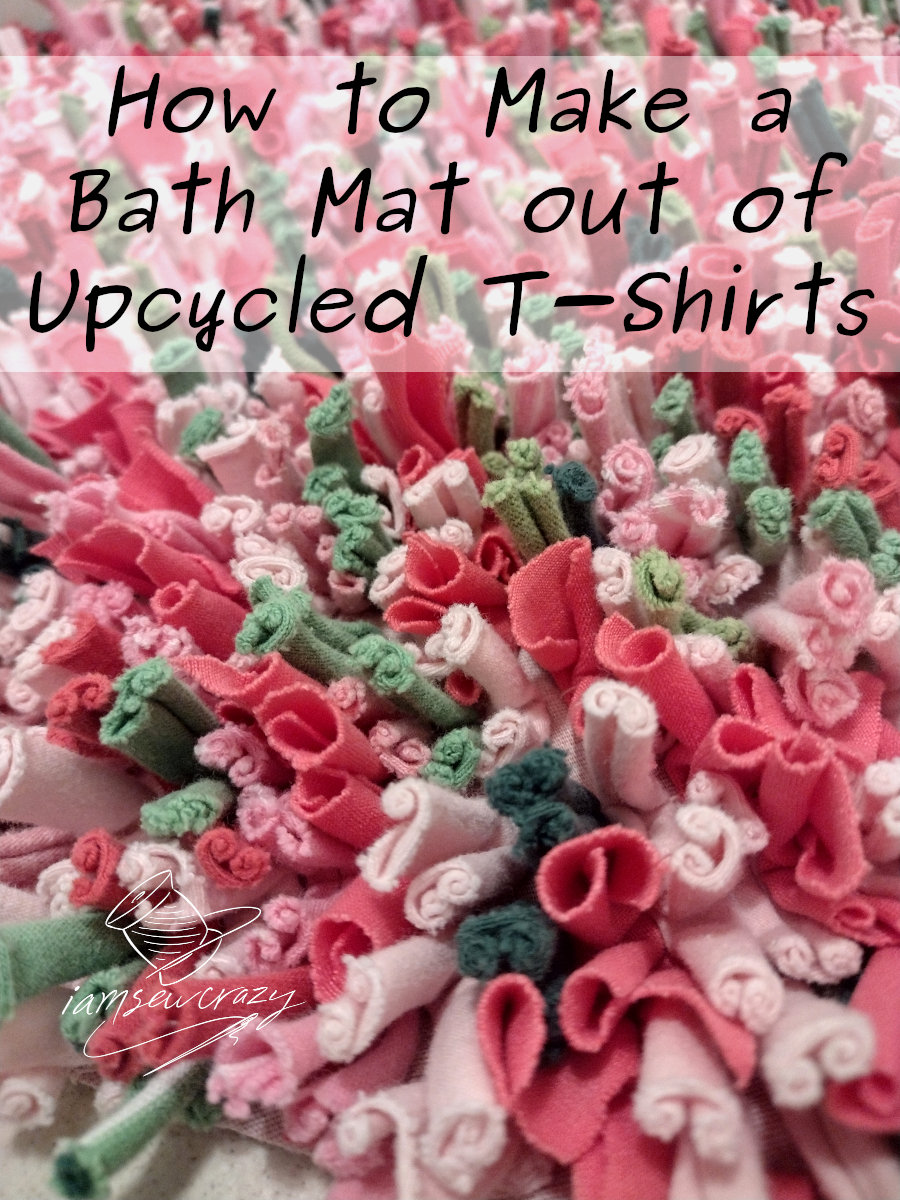
Silicone is a really wonderful way to keep throw rugs and bath mats from sliding around on your floor. When I make any small rug, like my bath mat made out of T-shirts, I put dots of silicone caulk on the back so that it will stay put.
Similarly, you can add dots or squiggles of silicone to the bottom of children’s onesies or footed pajamas. It doesn’t come off in the wash, and you can find different colors to go with your design. I typically just use clear, but there are quite a few options around!
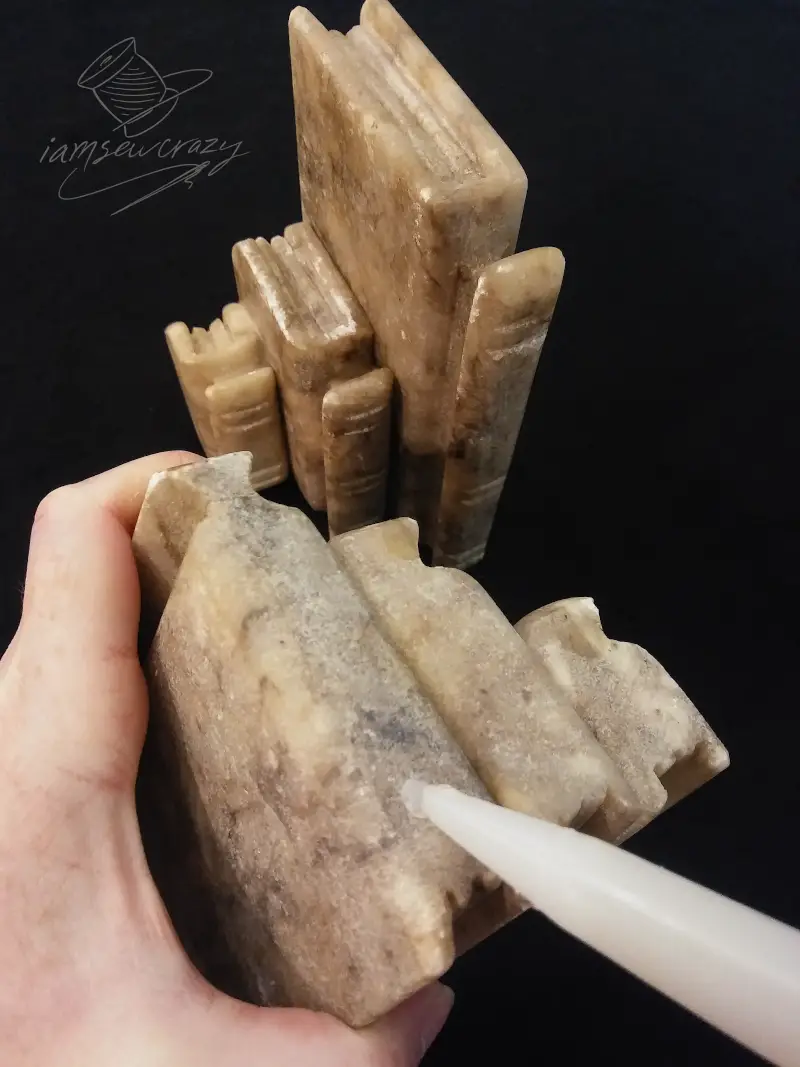
Silicone caulk is also awesome to use on the bottom of scratchy home decor items, to keep them from scuffing up your shelves. These stone bookends were polished nicely on the tops and sides, but rough on the bottom. I didn’t want them scratching the shelves or sliding around, so I put dots of silicone on the bottom to prevent that from happening. And here’s a hint: if you put 3 wide-set dots on the bottom of your item, you won’t have to worry about it tipping or rocking, because three points of contact will always balance. Nice!
Using Silicone to Make Stamps:
Mindful Makers had a really cool video that shows you how to use silicone sealant to create a reusable stamp from your own design. Check it out below!
Using Silicone as Glue:
Silicone caulk makes a really durable glue that’s great for heavily textured pieces. I use it a lot with glass and other slick materials, as well as when I want a really thick layer of glue to set objects in that works almost like grout.
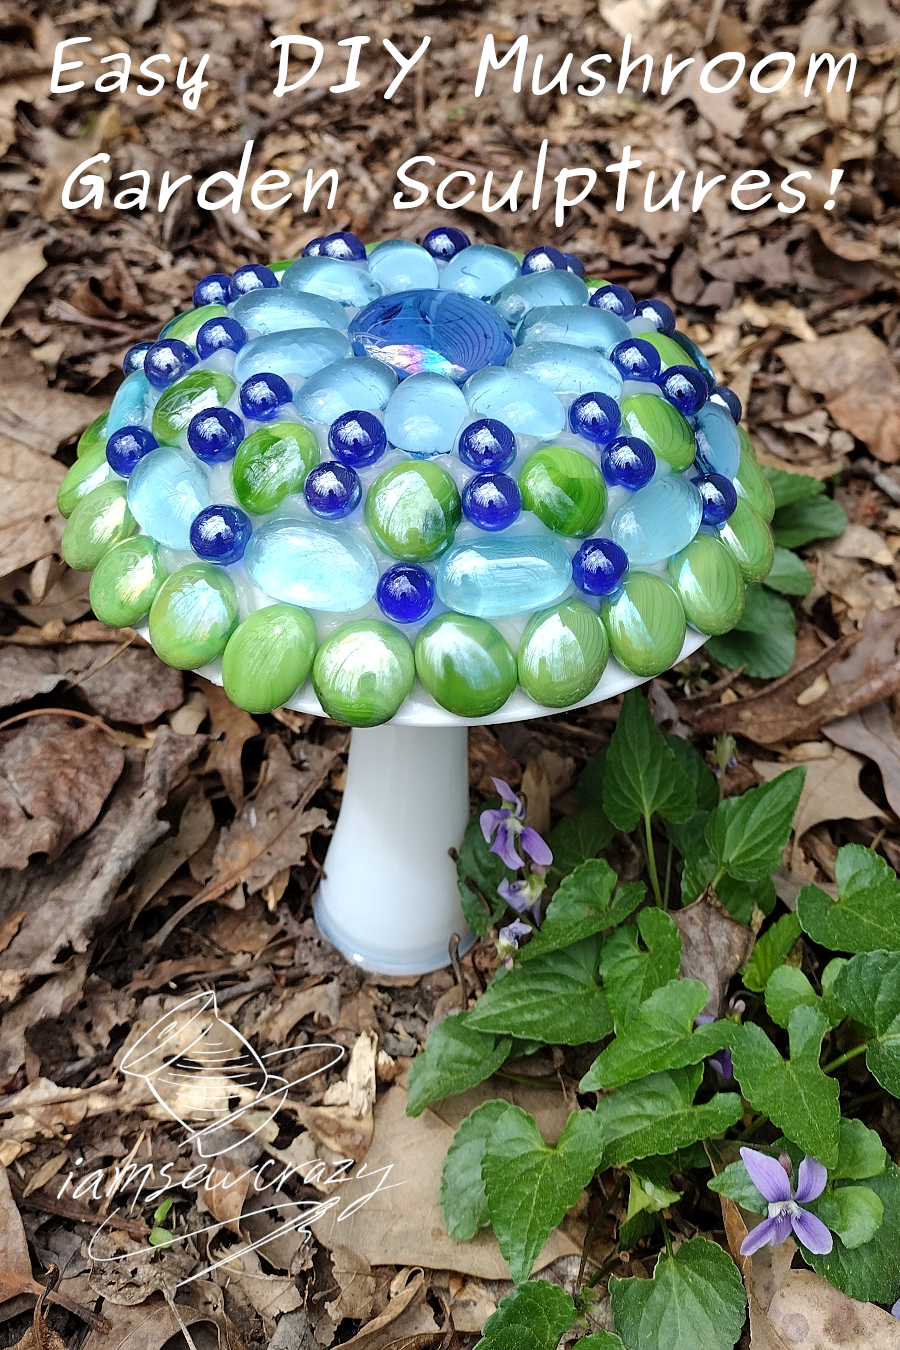
Silicone is an excellent all-weather glue for outdoor projects like this mushroom garden sculpture I made. Clear silicone holds all of the parts and pieces together, and it can easily handle being outdoors year-round!


I used white silicone caulk to set pieces of a broken glass windshield into these cabinet knobs. They match my aqua and gray laundry room really well, and the best part is that the broken windshield was free. After the silicone had cured, I covered the glass with UV resin so that there were no sharp edges. I think they look perfect!
Using Silicone Caulk for Making Molds:
Silicone is AMAZING for making molds! Usually if you were looking to make molds for resin casting or other crafts, you would buy a softer, thinner silicone compound that creates more flexible molds. And if you have a highly detailed piece or one that will be very difficult to unmold, then that’s exactly what you should use. But sometimes you can make the perfect mold by using silicone caulk.


When I wanted to make some mica earrings to match the mica bracelet that I resin-cast, I didn’t want to use a round or oval mold with perfectly symmetrical edges. I wanted a more irregular shape to complement the natural mica pieces I was using. So I loosely traced my pieces of mica on the back of some sticker backing paper (you could use freezer paper instead), and then flipped the paper over and freehanded some small silicone molds on the shiny side of the paper that were a little larger than the outlines I’d traced. I spread out a very thin layer of silicone, and then added some shallow walls to make a well for the resin. I let the silicone cure, and then placed the mica pieces inside the little molds and poured resin over the mica.
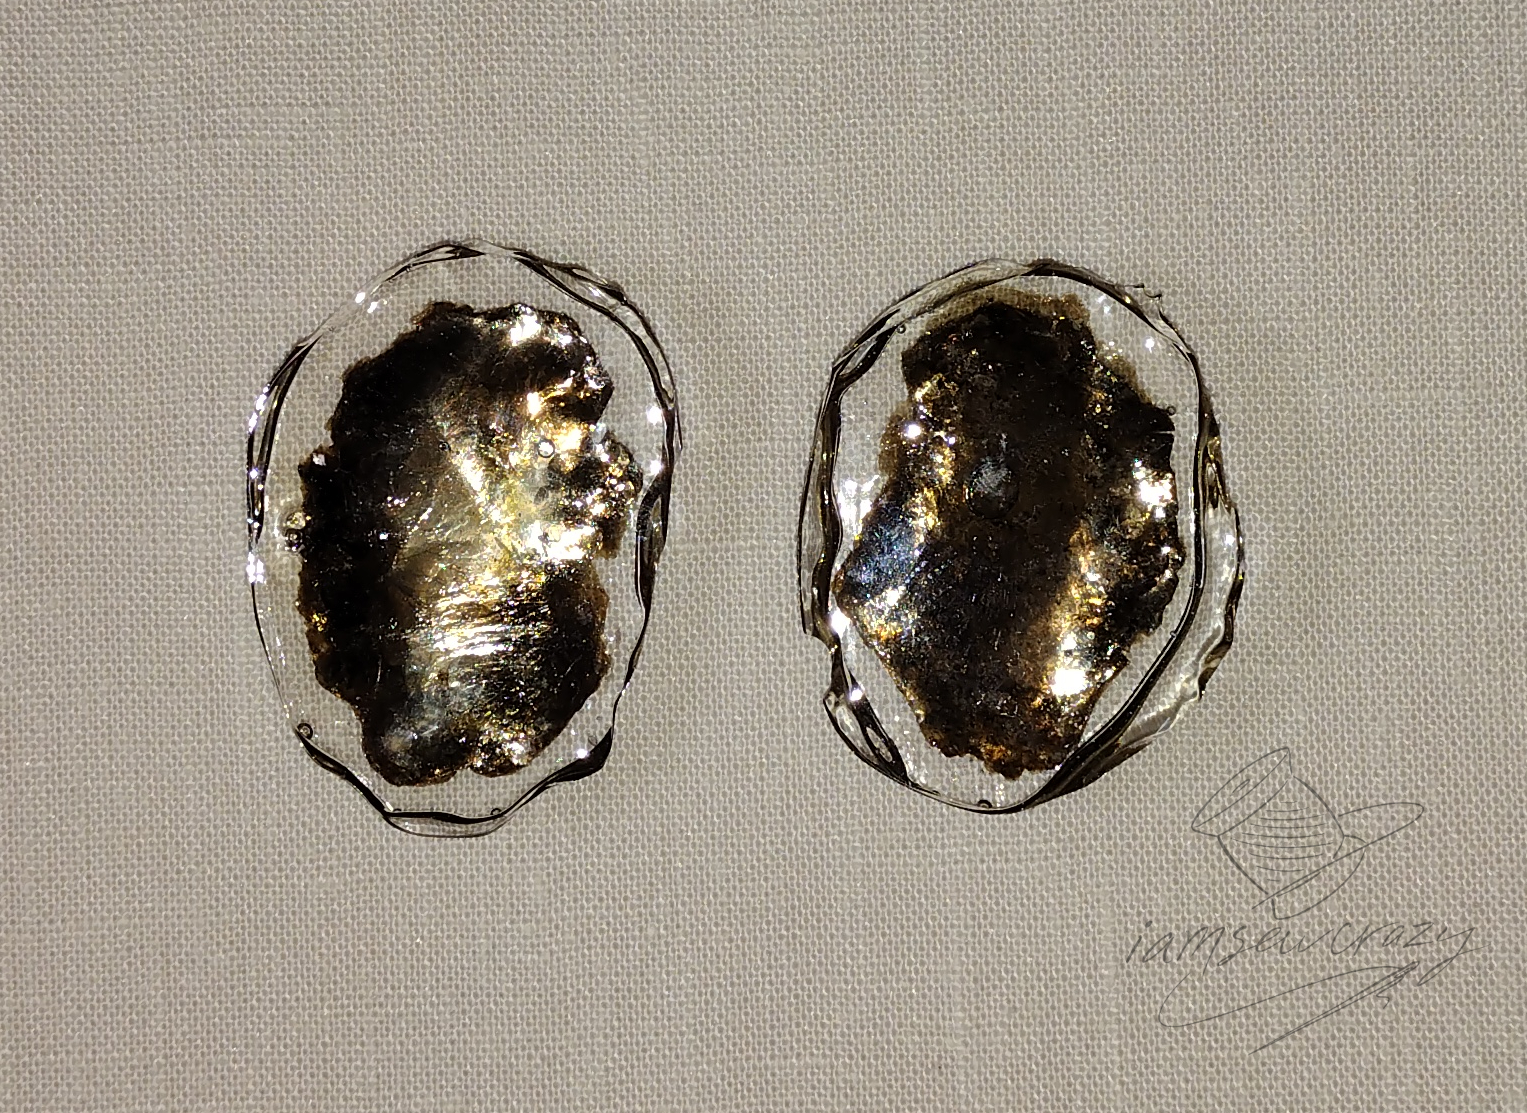
Voila! I had a perfectly sized and shaped mold with organic edges that complemented the irregular shape of the mica. The molds are reusable (although I would use more caulk to make different molds if I had pieces of mica that were shaped much differently).
This method of making molds out of silicone caulk adds cornstarch (or baby powder) to the silicone. The molds can be filled with resin, clay, or even hot glue in order to cast a duplicate of the original object. Read Barbara’s silicone mold making tutorial over on Colorful Crafts for more details!
Another mold-making tutorial by audreyobscura on Instructables uses silicone caulk and dish soap to complete the mold. Both techniques are easy to do and inexpensive, and may be just what your project needs!
Using Silicone as a Gap Filler:
Silicone can really help you out in your DIY projects by filling in little gaps around baseboards, crown molding, between pieces of paneling, etc. It’s hard to get all of the joints perfect, so any little cracks can be concealed using caulk.
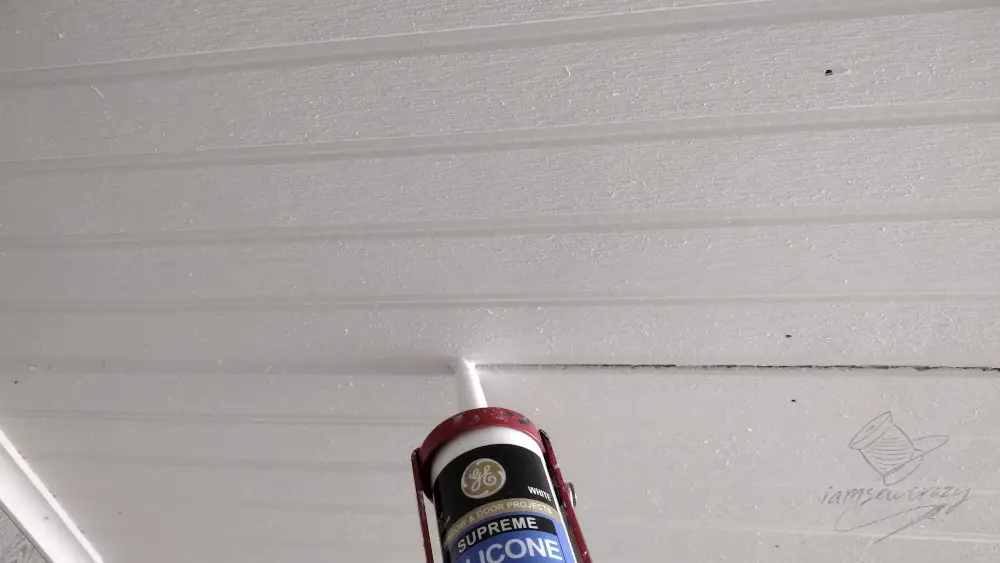
Here’s the ceiling in my renovated laundry room. My brother and I put white beadboard on the ceiling, and I filled in the crack between panels using white silicone caulk. It looks so good now!
Caulk comes in limited colors, but some of it is paintable. So check the tube when you go shopping, and if you can’t get a good match for the color you need, choose a caulk that’s paintable after it has cured.
Using Silicone as a Sealant:
Silicone is great for sealing all kinds of things, which is no surprise because that’s what it’s sold for! (Not making dragon scale arm cuffs stay up, haha!)
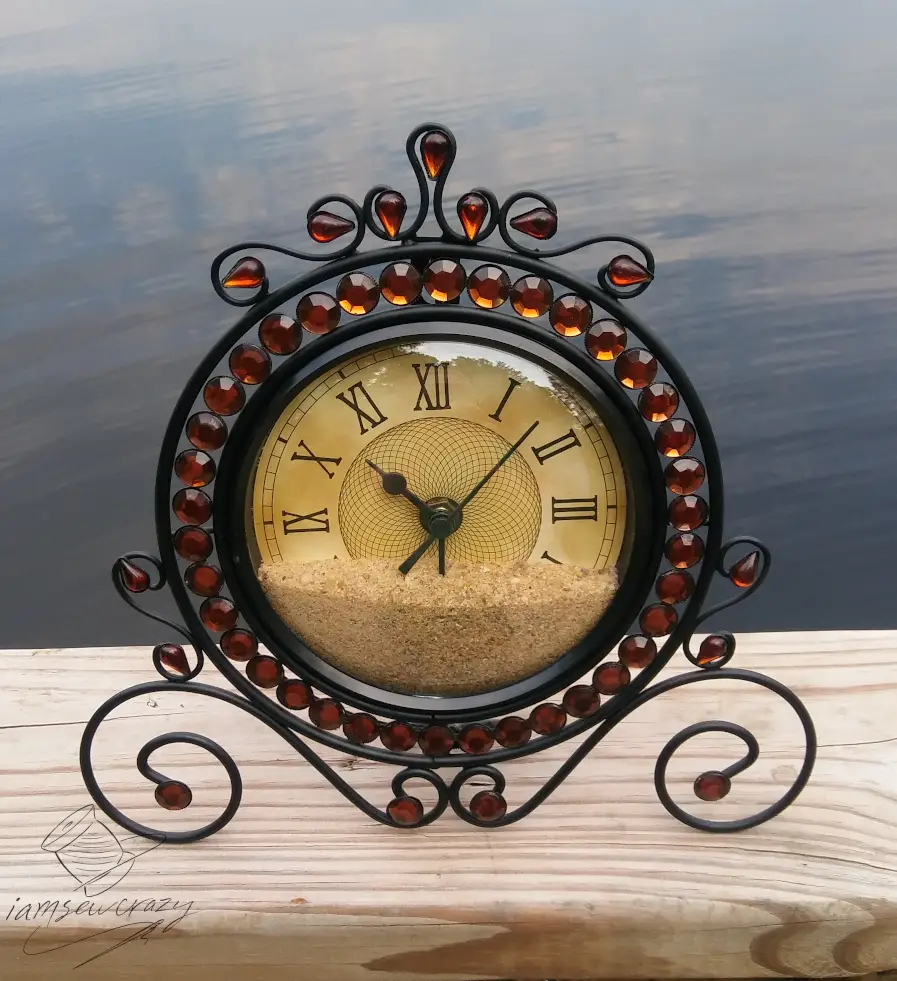
When I make crafts that I want to stay closed up, like my Sands of Time commemorative clock, I use clear silicone caulk to keep them sealed tight. For the clock, I applied the silicone directly to the frame of the clock and then sealed the face permanently in place. Now I don’t have to worry about sand seeping out of any cracks between the frame and the clock face.


Or, how about making a waterproof message in a bottle? Take a look at my favorite reader-made craft from the message in a bottle contest. The corks on the tiny bottle and the larger bottle are both coated with silicone caulk to make sure that nothing spills or seeps out. And if you’d like to make your own message in a bottle, head over to the tutorial where I’ve provided eight free printable PDF scrolls you can use! Grab an empty bottle and have fun making this craft for yourself or a friend.
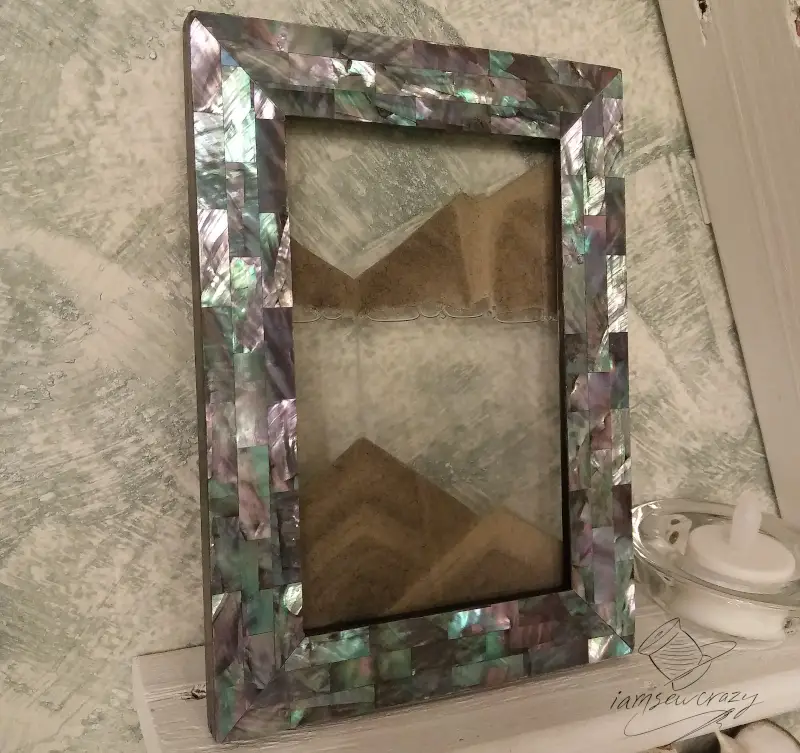
Here’s a picture of my Shifting Sands Kinetic Art. It’s made of a picture frame, two panes of glass, and sand and water sealed in between them. The sand slowly drifts down in layers, creating patterns of stripes, peaks, and valleys as it falls. When you flip it over, the process repeats, and it never seems to create the same pattern twice! Silicone aquarium sealant is the magic ingredient that keeps it all together. If you’d like to make your own, guess what? Yep, I’m creating a tutorial to show you all how I made this mesmerizing craft. Subscribe to my email list to make sure you don’t miss it!

Or, if you’re in a hurry, you can always purchase a piece of kinetic sand art on Amazon (like the round one pictured above) for yourself or as a gift.


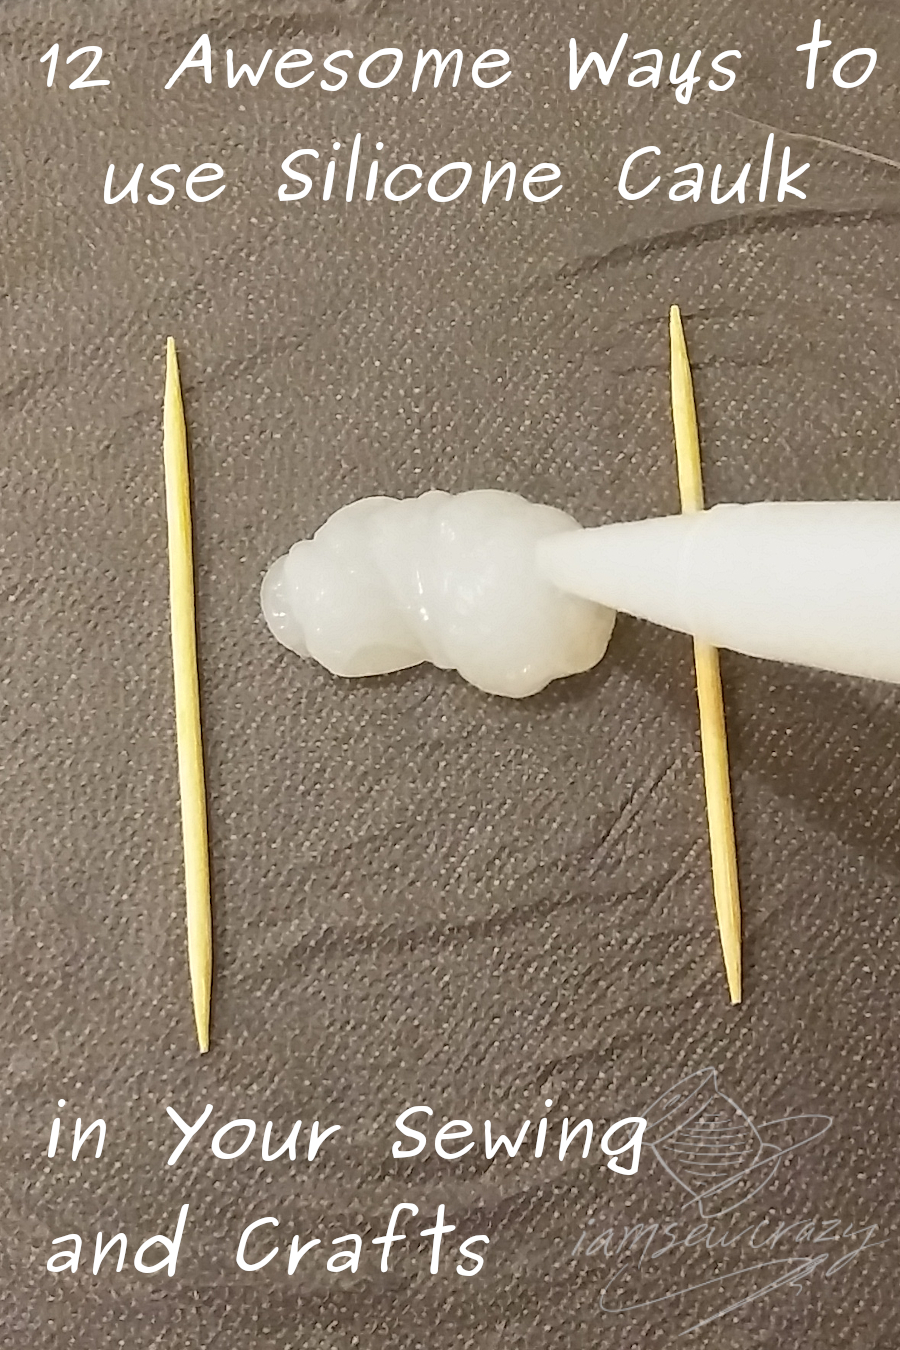
You can also use silicone caulk to make a custom removable gasket, which is what I did to seal a Shipwreck in a Bottle I’m making. This method is great for those times when you don’t want your craft to be permanently sealed up, because the gasket is formed separately which allows you to open and close the bottle repeatedly. In this case, since the silicone is going to be sealed up very tightly between a water-filled bottle and a metal bottle cap, curing the silicone ahead of time meant that I didn’t have to worry about the silicone having enough air to cure while it was inside the bottle, or getting wet while it was still goopy.
I squeezed out a small amount of clear caulk onto a piece of press-n-seal between two toothpicks, and then scraped across the toothpicks using a piece of cardboard with a straight edge. The toothpicks ensured that the silicone was the same thickness all the way across the gasket. Then, I let the silicone cure, traced around my bottle cap to cut the gasket out, and voila! I had a custom waterproof gasket to keep the sand and water inside the bottle.
Tips and Tricks for Using Silicone:
Silicone caulk is most often used to seal showers, sinks, bathtubs, etc, and of course I use it for that, too! But you will probably need a large tube of silicone and a caulking gun if you have a large project to get done. The caulking guns aren’t too difficult to use, but they can be really unwieldy for smaller projects. I prefer the kind with a hex rod instead of a ratchet rod, like this one here, because in my opinion it’s easier to control the amount of pressure you are placing on the tube while you squeeze the silicone out. They are also quieter!
There are a few things you should know if you have never used a larger tube of silicone and a caulking gun before. To open the large tubes, you will need to cut the tip off of the tube (I use a utility knife or x-acto knife, but the caulking gun I linked to has a cutter built in). You can control the size of the bead of silicone that comes out by cutting more or less off the tip of the tube. Start with a very small cut, and then cut it again if it’s too small of an opening; you can always cut more but you can’t put it back on!
Next, you need to poke something into the opening you just made to pierce the foil seal inside the tube a few times. The caulking gun I linked to has an included metal attachment specifically for piercing the foil, but any really long, thin, pointy object will work.
Caulking guns have sort of a delayed reaction; when you squeeze the handle you increase the pressure inside the tube, which of course makes the silicone come out. But because they are shipped with the pointy part of the tube empty, the silicone can take a few seconds to emerge. So if you keep squeezing, you may end up with a large amount of silicone coming out all at once. Just be patient at first, and wait a few seconds before you apply more pressure.
When you apply silicone to a non-porous surface like glass, plastic, or metal, you need to start with a clean slate. Scrape off any cured caulk on the surface, and wipe the area first with rubbing alcohol. This will remove any residual oils from your hands or other sources, and ensure that the silicone bonds to the surface really well. (Silicone will stick to many things, but fresh silicone has a hard time sticking to cured silicone!)

After you apply the silicone, you will need to press it down in order to form a good seal and smooth it out. I often use a disposable item like a piece of cardboard or a plastic spoon to smooth it, but I also have some caulk smoothing tools that were specifically made for caulking joints like bathtub walls and showers. They have lots of shapes and angles to choose from, so you’re sure to find something that works just right. This kit also includes some nozzles and caps for the tubes of caulk, which is great because a lot of the larger tubes don’t come with a cap or nozzle anymore.
You can also use a paper towel soaked in a mixture of dish soap and water to smooth out the caulk. But if you are caulking something that needs to be watertight, it is generally a bad idea to introduce soapy water because if the caulk does not have a good seal, and then you press it down to seal it and some of the soapy water gets in between the caulk and the surface, then the caulk will not stick where you need it to stick. However, it’s fine to use soapy water on some of these projects that don’t need to form a seal, like the arm cuff.
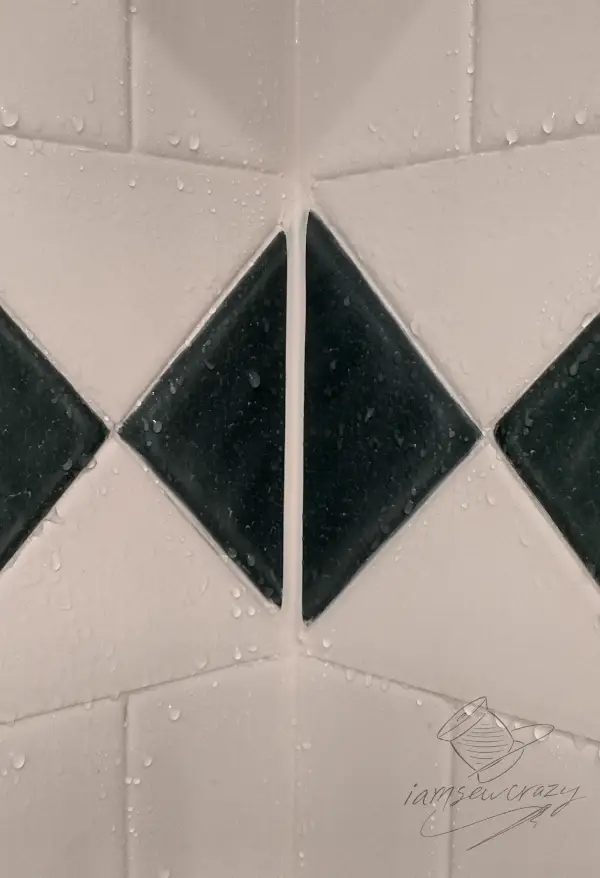
Painter’s tape can be really useful for making a straight edge. When I re-sealed the shower in my mermaid master bathroom, I used painter’s tape to mask off the most visible areas before I applied the caulk. You can see in the corner of the shower that you can’t really see the beige caulk on the beige tiles, but when I went over the dark green tiles, the high contrast meant that the silicone would really stand out. So, I applied painter’s tape to the tiles before I caulked the joint, which gave me a flawless straight edge. (For more painter’s tape tips, check out my list of 17 ways painter’s tape can make your sewing and crafting easier!)
So, let’s say you’ve gotten some silicone in an unintended location. How do you clean it off? Uncured silicone can be wiped off with a paper towel or other disposable rag, and then the residue can be cleaned with dish soap and water. Make sure to rinse the surface and wipe it with alcohol again before you reapply the silicone. If the surface still seems slick or greasy at all, then wash it again to remove all of the residue.


Cured silicone can be scraped off with a paint scraper or a razor blade, if it’s on a flat, scrapeable surface like glass. If you can’t really scrape the surface easily, you can spray on some WD-40 and let it sit, which will soften the silicone and help you remove the bulk of it. When I was making my cabinet knobs out of the pieces of broken windshield, I messed one of them up and wasn’t happy with the end result. So I popped out the glass and as much of the silicone as I could using a flat bladed screwdriver. Then, I filled the well of the knob with WD-40 to soften the remaining silicone. After letting it sit for about 2 hours, the caulk was really skwooshy and I was able to wipe out the remaining silicone using a paper towel. If you have a very thick layer of silicone to remove, just scrape off whatever you can before you add the WD-40. If there was a lot left after the scraping process, you may need to repeat the WD-40/paper towel method in order to get rid of it all.
Make sure that you THOROUGHLY clean up the WD-40 before reapplying caulk, or else the WD-40 that’s left on the surface will make the new caulk skwooshy, too! I use water with lots of dish soap, scrub the surface well, rinse thoroughly, and then re-wipe with alcohol.
There are several silicone caulk removers on the market, but I have always used WD-40 and been happy with the results, so I haven’t tested them.
On a porous or fluffy surface like a pillow or your clothes, the silicone is going to be extremely difficult to remove. Your best plan is to wear old clothes and be super careful where you put the silicone in the first place, but of course I know that doesn’t always happen… when I sealed the shower in my bathroom, I somehow got a little blob of silicone IN MY HAIR. Fortunately, hair seems to be one surface that silicone doesn’t stick to very well, and I was able to get my hair unstuck relatively easily after the silicone had cured.
That’s it! I hope you’ve picked up some good ideas, and if you have any tips of your own for using silicone caulk in your crafts or sewing, be sure to drop them in the comments!
Happy crafting!
Jessie
[…] This tutorial for how to make a stamp using silicone calk was my favorite of the collection of tips and creative ways to use silicone caulk in unexpected ways. Pop on over to the blog I am Sew Crazy to see her collection of creative uses for silicone caulk. […]
Thank you so much for this info about silicon caulk! Very helpful, and gives me lots of ideas for my own crafts. I have two questions: How is silicon different from hot glue? Simply different substances? and second, Do you know a way to make the silicon softer for easier squeezing? The one time I used it, it was very stiff and difficult. Warm it up? Other ideas?
Thank you so much.
Pam P.
Hi Pam, I’m glad you liked it!
Silicone and hot glue are indeed different substances. Hot glue is basically plastic that melts and then re-solidifies when it’s cool. I like using hot glue for some projects, like attaching embellishments to wreaths, but there are pros and cons to each material:
-Hot glue is far less flexible when cured/cool when compared to silicone
-Hot glue is prone to UV damage and not a good choice for outdoor projects, whereas silicone is approved for outdoor use
-Hot glue is not intended to make a watertight seal, but silicone excels at it
-Silicone will make a far smoother, tidier line (using soapy water to smooth it out or painter’s tape guidelines) because it is less stringy than hot glue and is able to be shaped, smoothed, and molded before it cures
-You have more working time with silicone vs hot glue, which can be a good thing or a bad thing depending on your project
-Silicone will not stick to cured silicone, whereas hot glue will stick to itself
-Hot glue will obviously burn you and is often not a good choice for crafting with kids
-If you need to remove it right away, silicone is easier to remove. Once cured, they are both an absolute pain to remove 😂 but I tend to have an easier time removing hot glue
-Hot glue comes in many, MANY more colors than silicone does, including metallic and glitter colors. Silicone is offered in very basic colors like clear, white, black, gray, and tan
-Silicone remains effective at high temperatures (such as on the pot holder in the article) whereas hot glue will turn into a mess
These are just a few insights based on my experience, I’m sure there are many more things we could add!
Regarding the viscosity, I have heard that silicone caulk can be thinned with acetone, but I have not personally done this. It would definitely be a mess for most projects to remove the silicone from the tube and thin it out, but for some projects that would work very well.
Warming up the tube by placing it in a tub of hot water before use will indeed make it softer. I have also found that different brands can vary in viscosity, and the texture of the caulk changes if the tube is expired or has been opened for a while. So make sure you are starting with a fresh tube.
It’s been quite a while since I made my project with aquarium silicone, and I might be remembering wrong, but it seems to me that it was softer than the stuff that’s sold for kitchens and baths? That could just be down to a variation between different brands though.