
If you don’t already have painter’s tape in your craft room, you might want to get some! It doesn’t leave marks behind and is easy to remove, and I’m always finding handy ways to use it in my crafts.
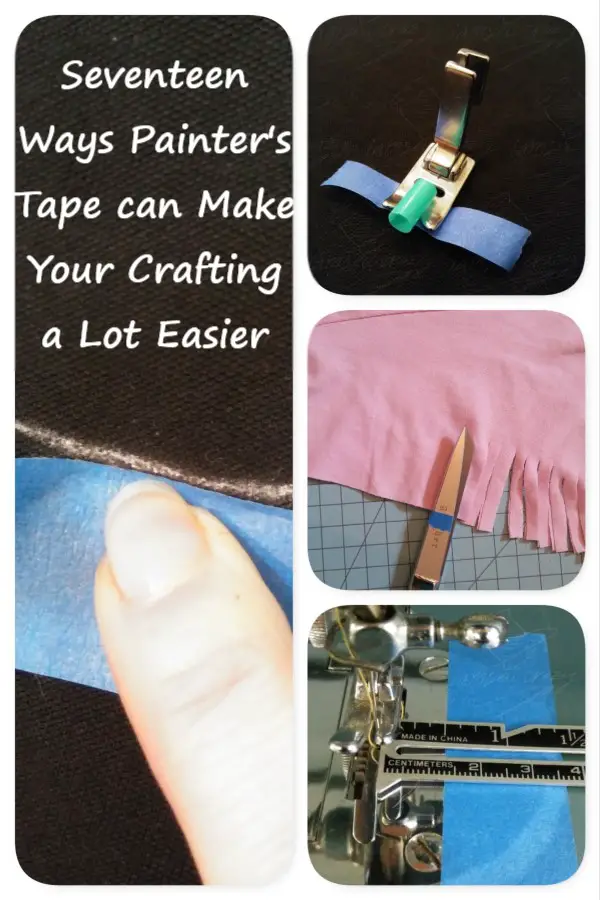
This brand of painter’s tape is the one I use, and it’s a mainstay in my sewing room. It goes without saying that you can use it to mask off areas where you don’t want paint or glue, because that’s what it was designed for, and of course that’s a very handy thing for crafts. But you can use it for so much more than that! Here are some more ways I use painter’s tape in my sewing, crafting, and DIY projects:
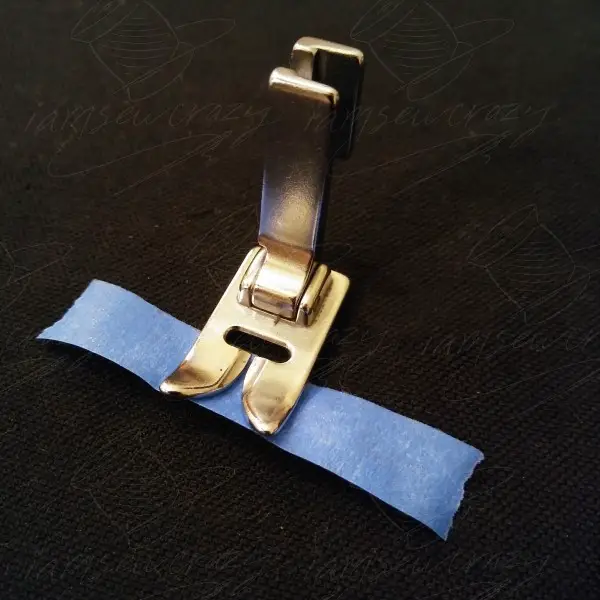
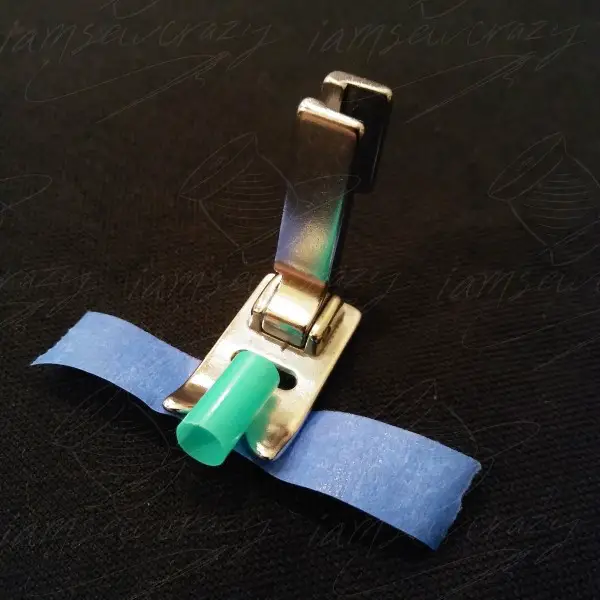
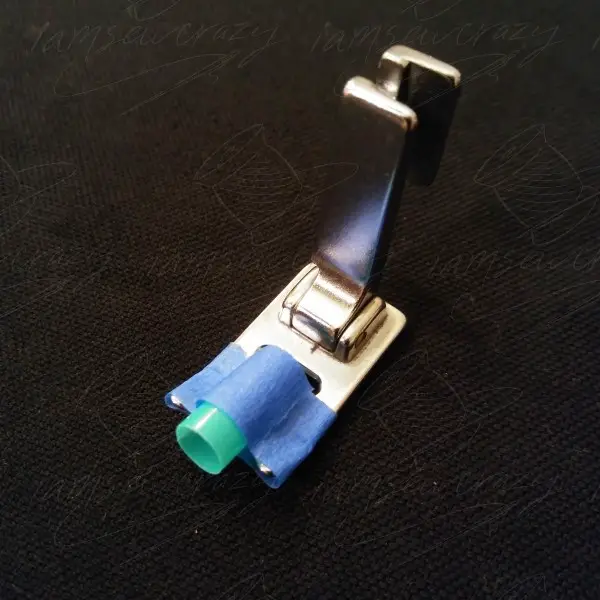
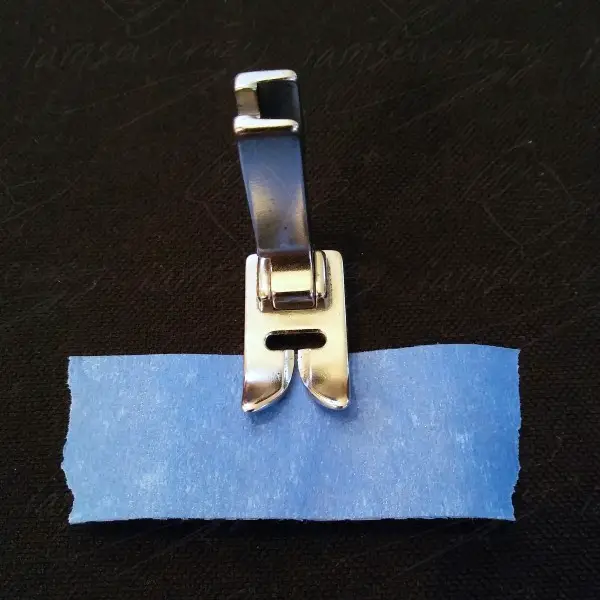
You can use a piece of painter’s tape and a drinking straw to make a cording foot! A cording foot is a special presser foot that has a slot to guide a piece of yarn or cording directly under the needle as you zigzag over it, for a technique called couching. It’s a great way to add text, lines, or shapes to wall hangings, modern quilts, tote bags, or pillows.
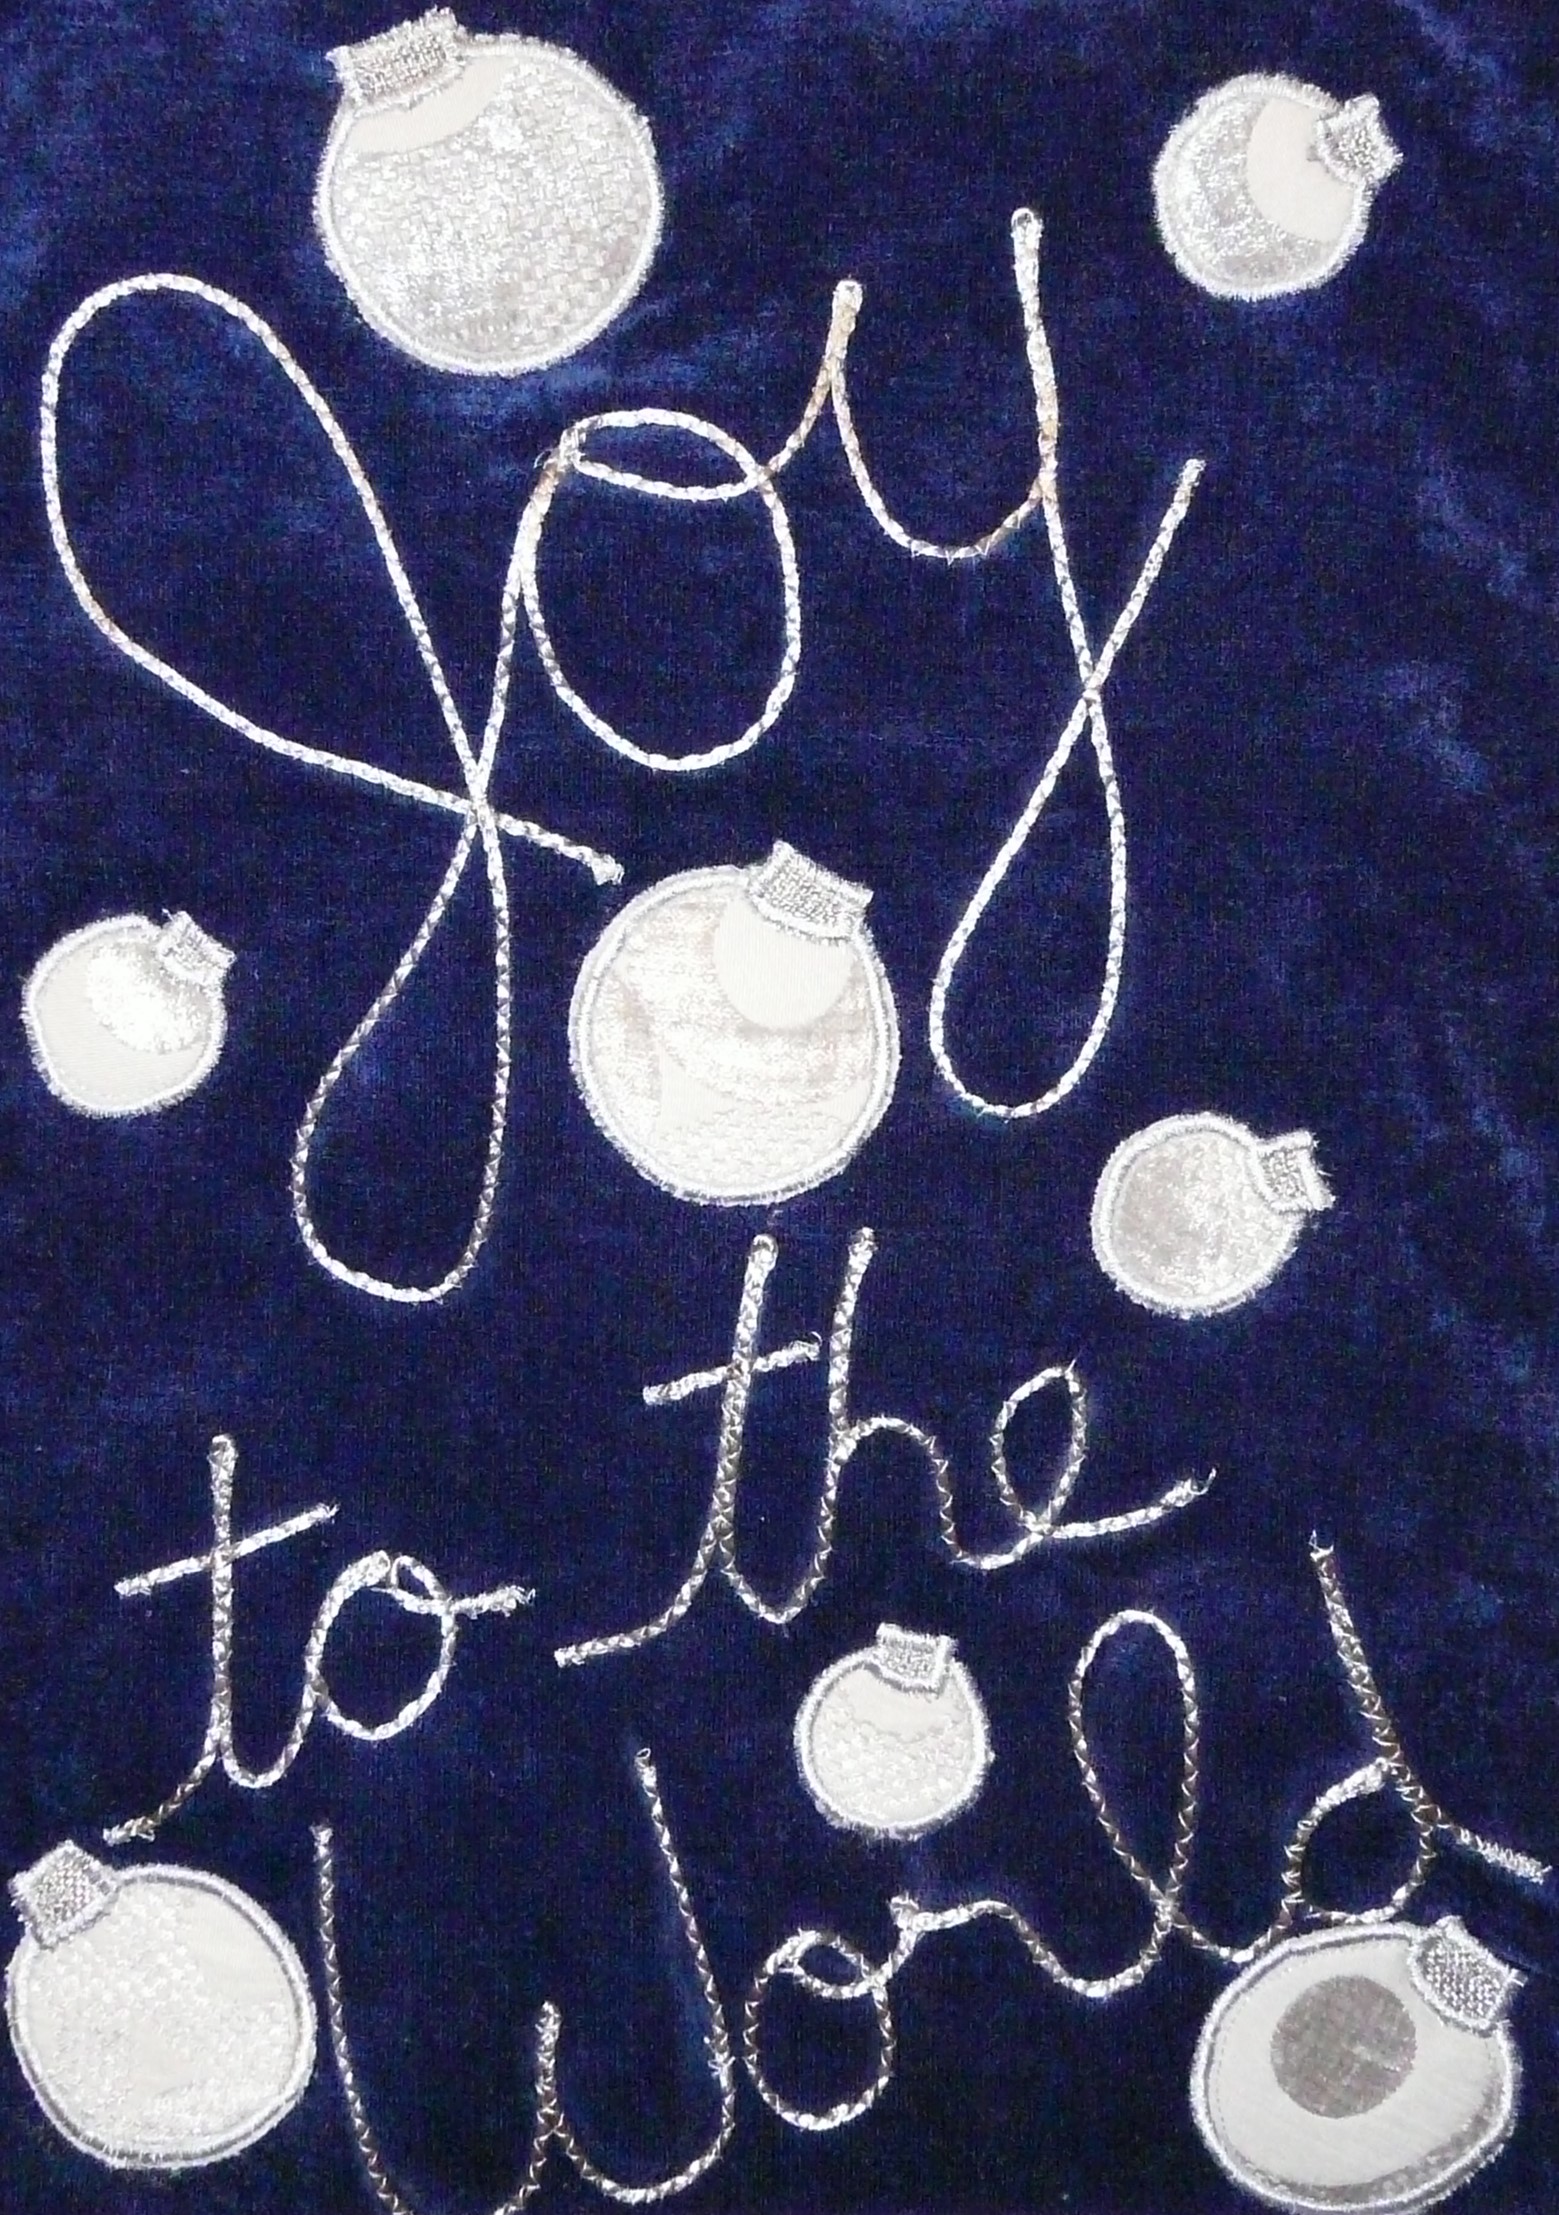
Here’s a wall hanging I made by couching bright silver rattail cord onto a background of blue upholstery velvet, and then cut some Christmas ornament shapes out of silver fabric and appliqued them. If you look closely, you can see the zigzagging thread that holds down the rattail cord. That’s couching!
If you don’t already have a cording foot, the drinking straw hack will help you couch yarn or cording onto your sewing project. Just feed the cord through the drinking straw, and the straw will keep it in place under the needle as you zigzag over it. Of course, if you do a lot of couching, you might want to get a designated cording foot for your machine. The specialty cording feet are easier to place the cord into, and they make it a lot easier to see where you’re stitching. I have one and I love it!
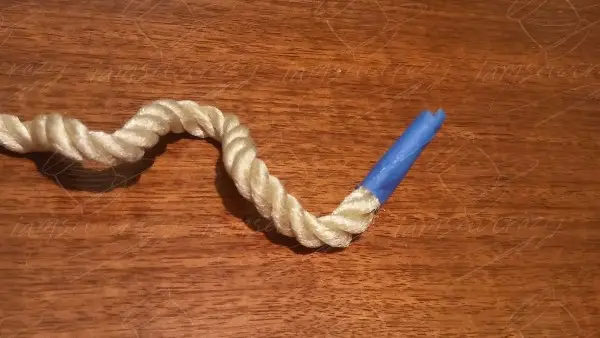
Painter’s tape makes a good temporary aglet if you need to stiffen the end of a rope so that you can thread it through a hole or grommet, or if you’re using a cord that frays easily for weaving or macrame. Just use the tape to wrap the first inch or two of the rope, and remove or cut off the tape when you’re done working. The tape will keep the end of the cord from separating and getting fuzzy and difficult to work with.
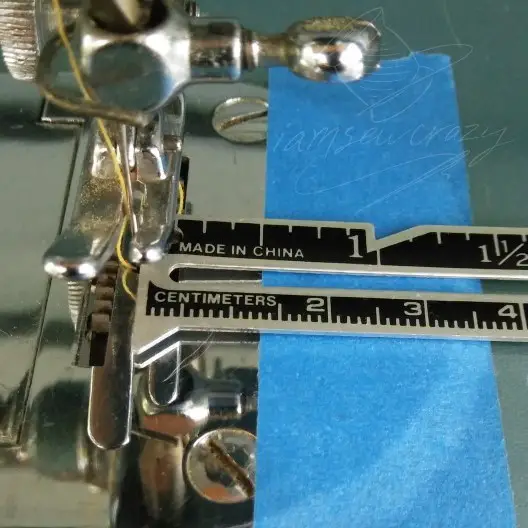
Painter’s tape makes a good temporary hem or seam gauge on the throat plate or bed of a sewing machine. The vintage machine in the picture (that’s my treadle-powered sewing machine) doesn’t have any seam width markings on the throat plate, so I add a temporary one whenever I need it. Measure from the needle out to the width that you want your hem or seam to be, and place the painter’s tape that distance from the needle. When you’re ready to sew, line up the edge of your fabric with the edge of the tape, and you’ll have the correct width of seam allowance!
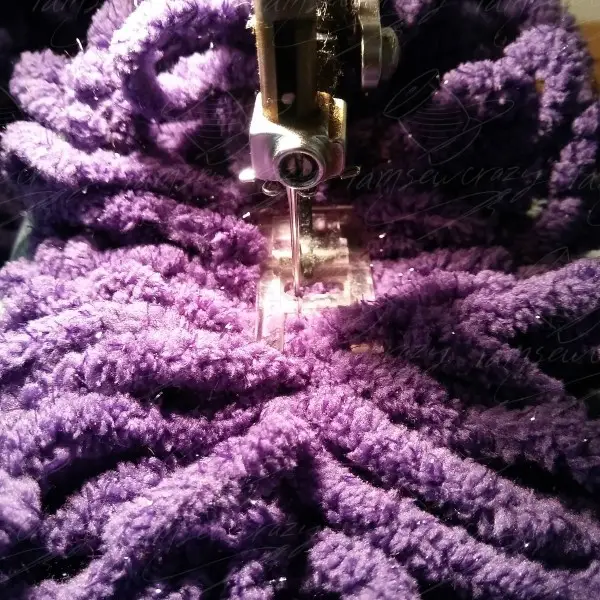

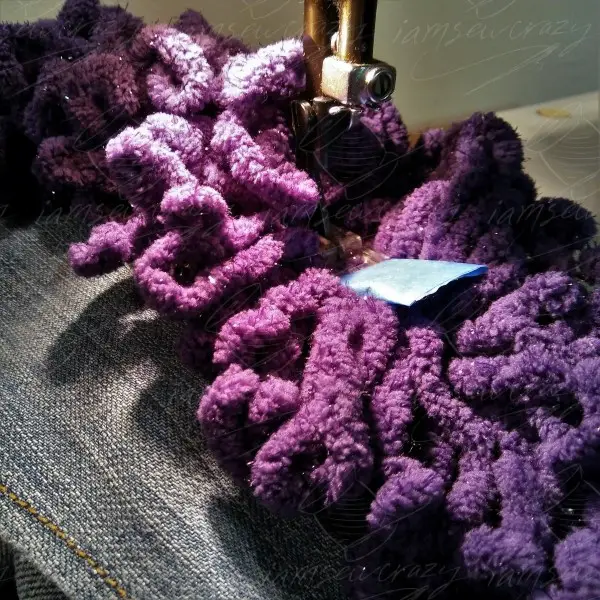
Sometimes when you’re sewing a trim or fabric that’s heavily textured, like furry yarn, or has loops, like this chenille trim, it can get caught around or between the toes of your presser foot. So I wrap the toes of my presser foot with painter’s tape to make an extended foot that glides smoothly over the textured trim. You can see in the first picture that the presser foot is sinking into the trim I’m adding to the edge of the denim jacket. When you wrap the presser foot, just smooth the tape flat and follow the upward curve of the front of the foot. Take a look at how the tape lets the presser foot ride over the loops of the trim in the last picture.
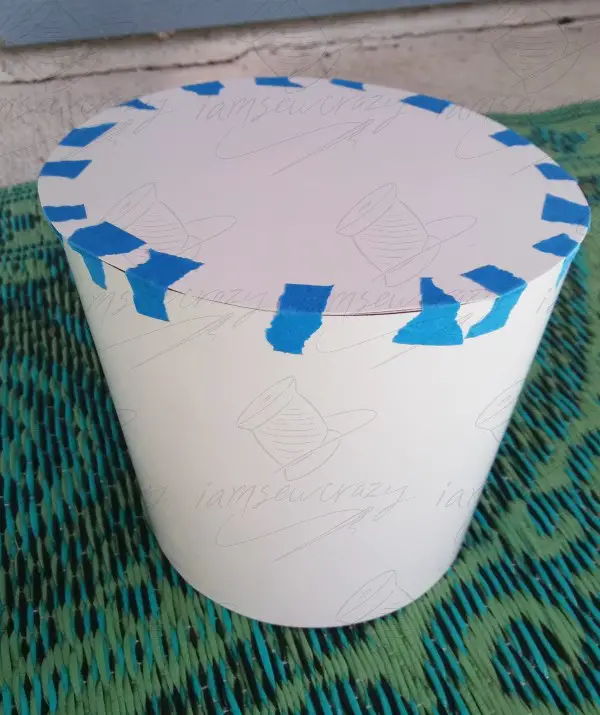
I also use painter’s tape to “pin” some finicky items such as 3D cardboard shapes (like the top hat I made for this giant bunny sculpture) where I can’t use pins or clips. With this hat, I wanted to run a bead of hot glue around the inside of the hat crown, and I used painter’s tape to hold the pieces together while I glued the seams.
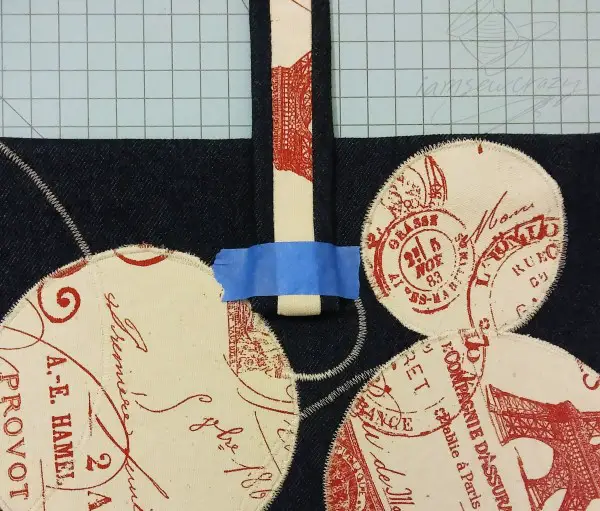
Painter’s tape is handy to hold down thicker things that would be difficult to get a pin through (like zippers or handbag straps) until I’m ready to sew them. It won’t hurt your needle if you accidentally sew through it, so you don’t need to worry about catching it in your stitching by accident.
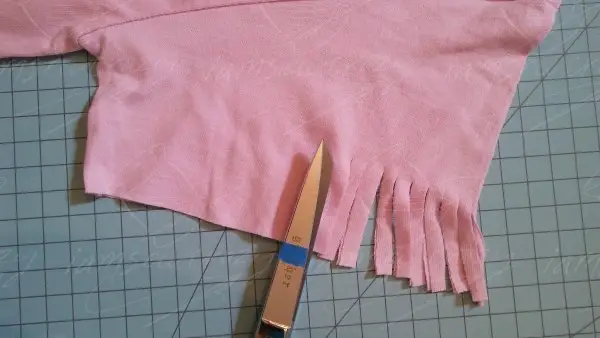
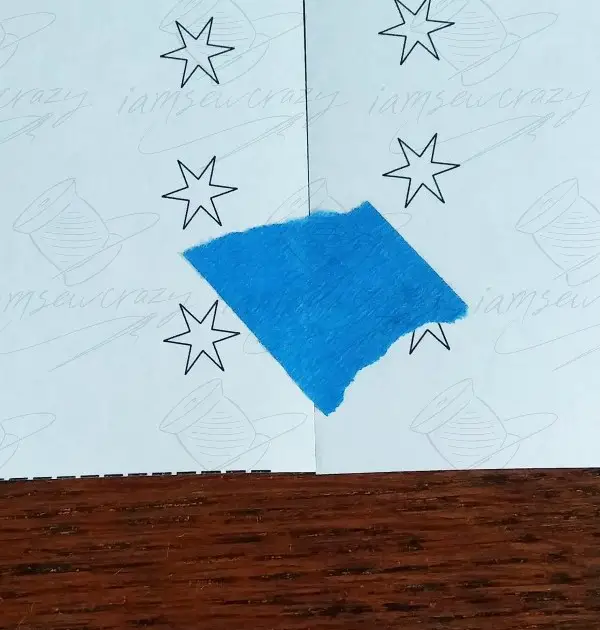
I use painter’s tape to mark a gauge line on my scissors. For example, when I need to make a bunch of 1/2″ deep snips around a curved seam allowance, I can put a piece of painter’s tape 1/2″ away from the tip of the scissors. Then I just clip the fabric up to the line of tape, and my cuts are all the same depth. This trick works really well for cutting fringe into a skirt like this (or the hem of a shirt), or for making a no-sew fleece blanket like this one.
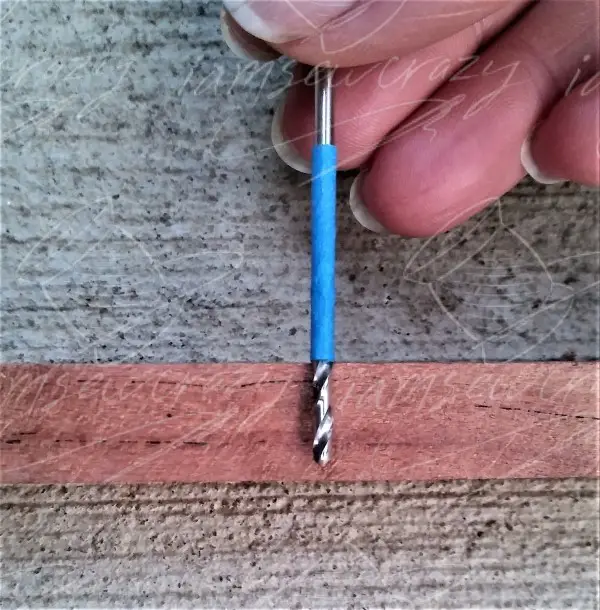
You can use a similar trick to drill holes to a specific depth, by wrapping the drill bit with tape the same distance from the tip as whatever depth of hole you need. Then drill like normal, stopping when the tape touches the surface of your material. See in the picture above, how the drill bit won’t go all the way through the board if I stop drilling when I reach the tape? This trick is especially handy if you want to keep from drilling all of the way through to the other side of a board, shelf, or picture frame.
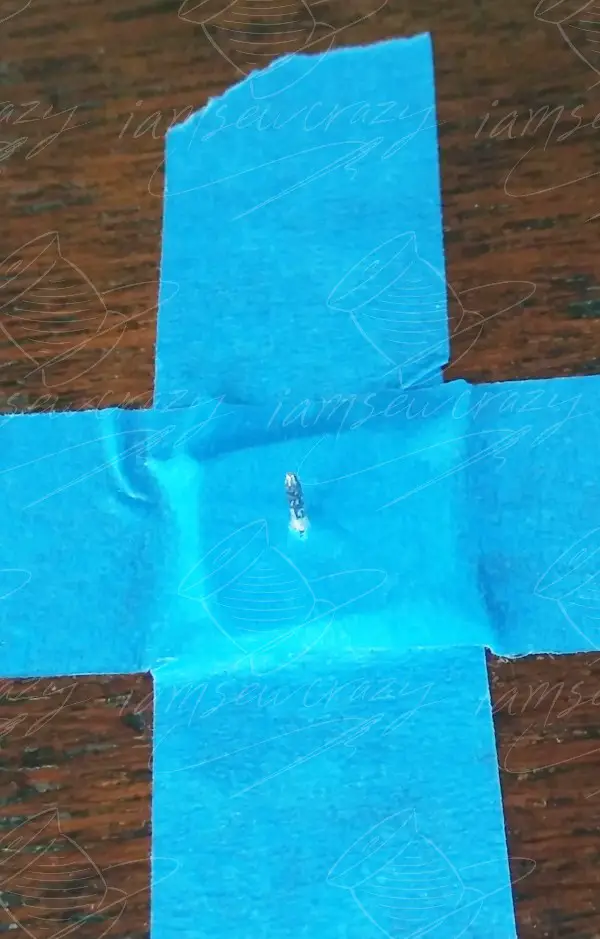
Here’s a great hack: use a couple of pieces of painter’s tape and a thumbtack to sew perfect circles without marking or tracing! This mindblowing technique is fun and easy, and it’s so cool that it deserved its very own tutorial. It’s great for applique, embroidery, modern quilts, orange peel or mock cathedral window quilts, and home decor projects like table runners, pillows, and wall hangings.
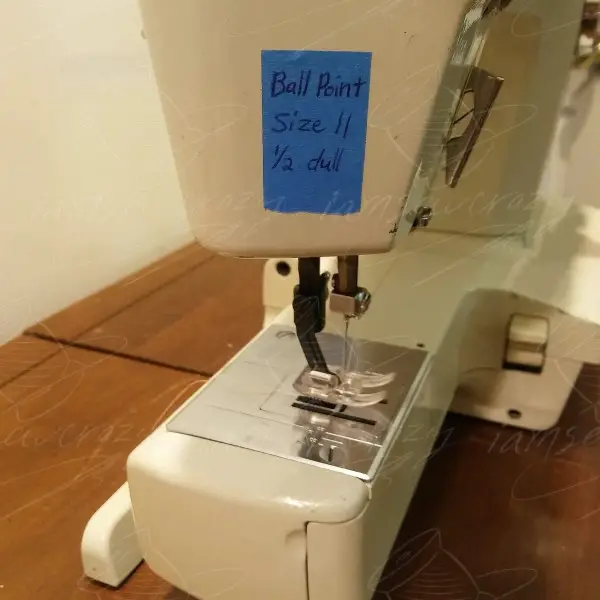
Sometimes I stick a piece of painter’s tape to my sewing machine and write on it the size and type of needle I have installed in that machine. That way, I don’t forget what kind of needle is in the machine and then have to try to read the tiny print on the needle shank later. If you don’t anticipate using your machine again for a little while, it’s a great way to keep an eye on what kind of needle is installed. (And when you take the needle out of the machine, you can store your sewing machine needles like this to keep track of the size and type!)
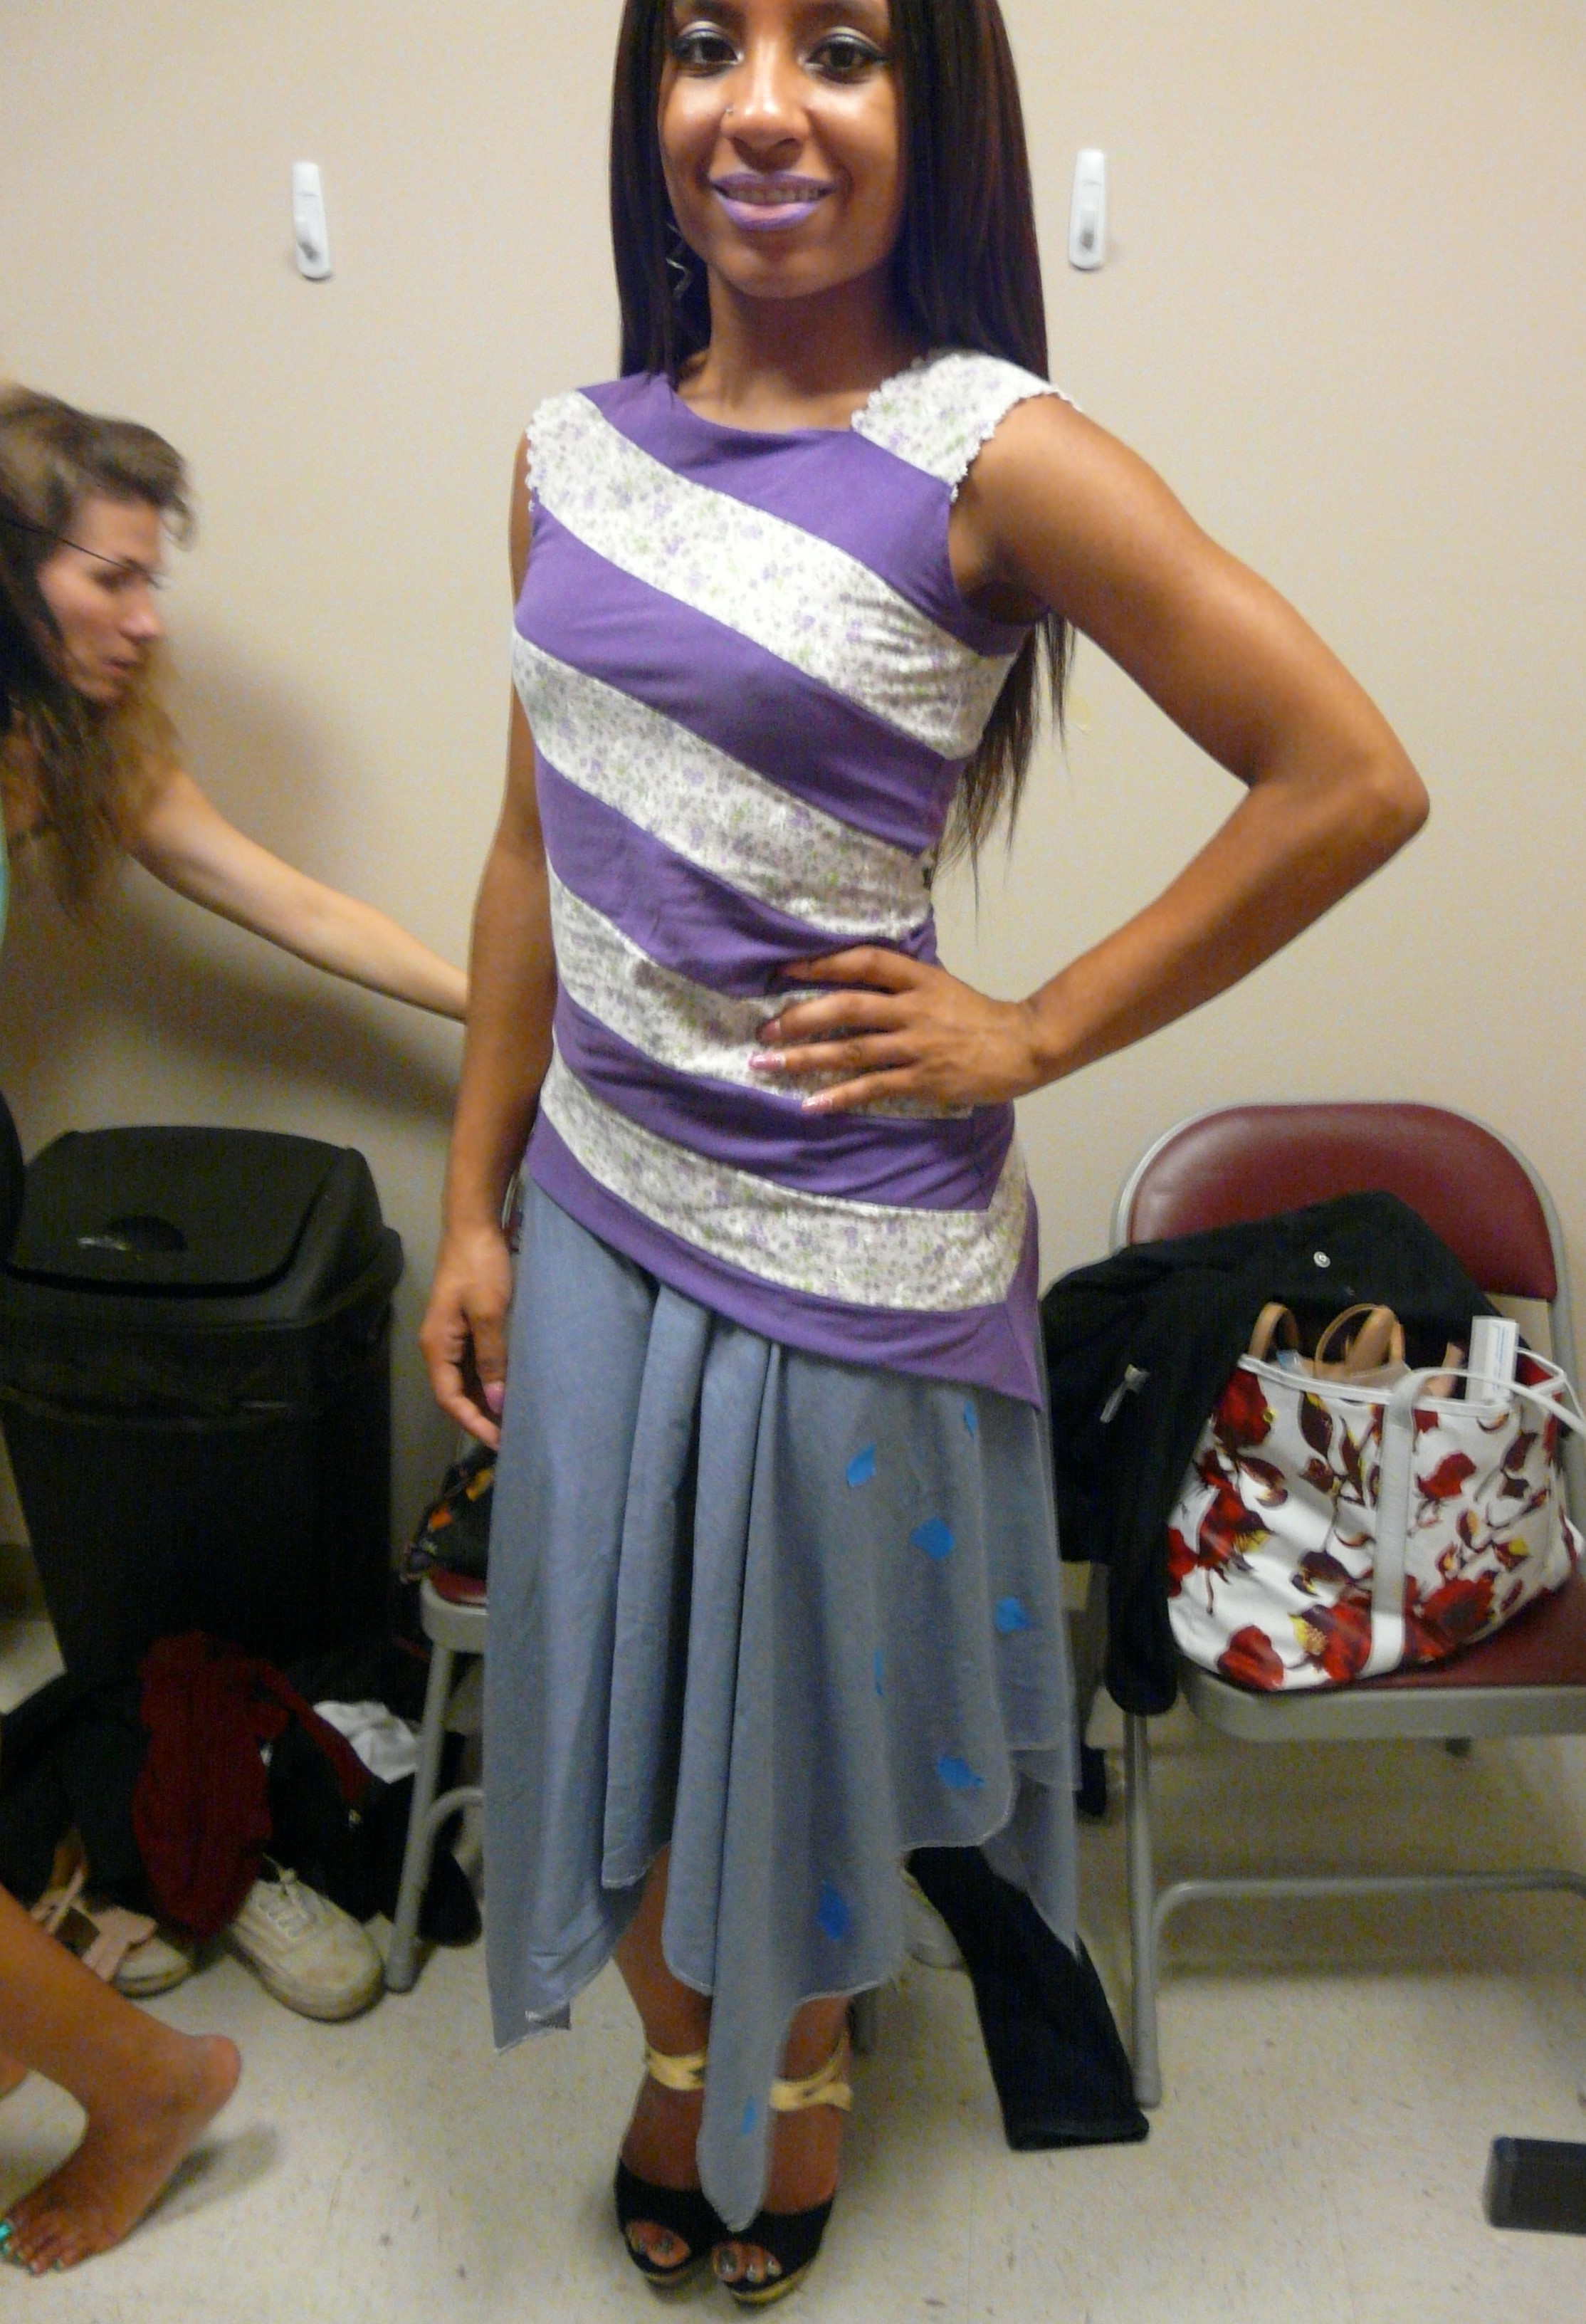

I use it to mark the position of embellishments on garments, like I did for this handkerchief-hem skirt. I wanted to be sure that the purple flowers would be visible on the runway, but the skirt drapes differently on every body. So I stuck painter’s tape to the skirt at the fitting, while the model was wearing it. Then I knew where I could attach my fabric flowers later, to be sure that the embellishments showed off and looked their best. It’s modeled by the lovely Eboni Monet Brown, and the runway photo is courtesy of Michael Hostetler Photography.
By the way, if you like the outfit that Eboni is wearing, I have written a tutorial to make the asymmetrical striped top out of 2 upcycled t-shirts, and I’m planning to post a tutorial for the easy handkerchief-hem skirt in the near future. You can subscribe to my email newsletter to make sure you don’t miss it!

I have used painter’s tape to mark the wrong side of fabric when the two sides looked similar. If the two sides look identical, sometimes it doesn’t matter which side is the “right” one. But (particularly for knits) it can be beneficial to keep track of which side is which, and painter’s tape is a quick and easy way to do that. Most knit fabrics will naturally roll to one side or the other when they are stretched, and having all of your pieces cut with the same side out can be important for drape.
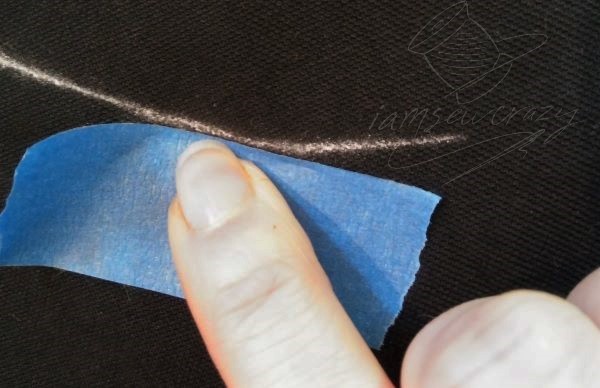
Since you can write on top of painter’s tape, you can use the same idea to mark rows of a quilt or other joining seams that you don’t want to get mixed up. I’ve never had the tape leave any residue behind after I removed it, even when it was stuck to a delicate or sheer fabric.
I use painter’s tape to tape pattern pieces together when I’m still drafting the pattern and know I might want to un-tape them to make adjustments, or draw marks on top of the tape. Unlike clear tape, you can peel painter’s tape off of a printed pattern without ripping the paper, and write on top of it. Here I’m taping together the pieces of my Lego Block Throw Pillows pattern (you can print the pattern yourself for free if you want to make one!)
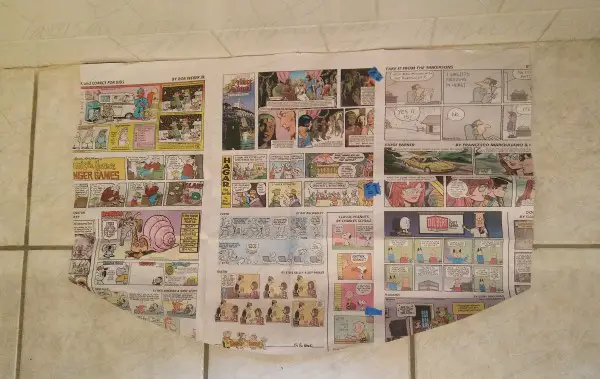
Similarly, you can tape sheets of newspaper together with painter’s tape to gauge the size of rug you need to fit a particular area. Whether you’re buying a rug (I love these soft bath mats that look like river pebbles!) or making one (like my bath mat made out of t-shirts), having a visual cue like this makes it much easier to picture the size that your finished rug needs to be.


Painter’s tape makes a great emergency “eraser” for tailor’s chalk, lint, glitter, and more! Yes, there are lots of ways to get rid of tailor’s chalk (the only reason it’s even a thing is because it’s not permanent), but sometimes I just want to change a line a little bit or fix a mistake I made. A small piece of painter’s tape is a quick and easy way to do that. I have also used it to snatch a bit of lint or stubborn glitter that landed on my design where I didn’t want it.
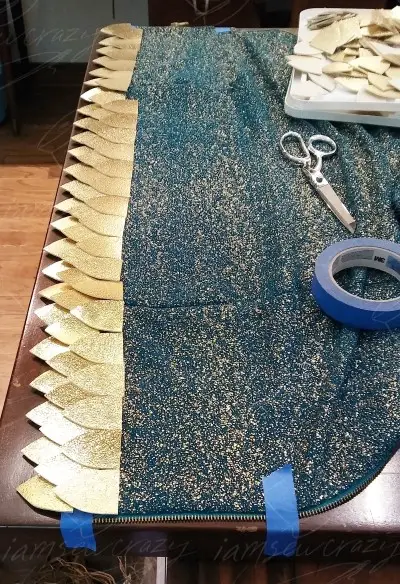
And it’s a great way to keep things from moving around while you’re working on them. Here, I’m using painter’s tape to hold the Dragon Dress from the Flights of Fancy collection firmly to my tabletop while I plan out my dragon scale design. The tape worked great to keep the dress stretched tight, and prevent any shifting while I laid out the scales.


Painter’s tape can be a great way to hold together a custom form or pressing aid. For example, I was going to weave vines to make an arm cuff for my Forest Fairy design (another outfit from the Flights of Fancy collection). To make things easier, I wanted a fake arm that I could pin into and anchor the vines while I wove them into a pattern. I used fabric scraps to make a thick roll that was the size of my arm, but I needed a way to keep the fabric from unrolling that wouldn’t get in the way of my pins or make the form lumpy. Painter’s tape to the rescue! It held the fake arm together while I worked (please excuse the dried paint all over my thumb), and then I let the vines dry in place around the fabric roll so that they would keep their shape.
And there’s the finished arm cuff on the runway! The Forest Fairy design is modeled by the adorable @catherineelioh, photography by @travis__shott.
If you use this method to make a pressing aid (like a sleeve roll or a ham), be sure that the fabric you are using to make the roll can withstand the heat of the iron, and keep the tape on the bottom side of the pressing aid so that the iron doesn’t touch it.
So there you have it! Painter’s tape is a must-have in my sewing room, and after reading through these tips, you might want to pick up a roll to use in your own crafting adventures!
These are great tips! Thank you for sharing!
I’m glad you liked them! 🙂
Best tips post I have seen in forever, a few I know and use but all are viable and practical which often isn’t the case. Congratulations on being awesome, you are the first newsletter I have ever subscribed to.
In point of fact I have turned down freebies before purely because subscribing to a newsletter was involved and I didn’t want to be bothered by them.
Thank you so much! That’s high praise. 😁 Glad to have you aboard, and I hope you enjoy the upcoming posts just as much!
Thanks for great uses of tape , love the drinking straw for cording , safe lapel pin use and for referring to Anne Colemans book I was able to find an old copy for a few pounds. Many thanks
I’m so glad you liked the tips! The lapel pin to sew circles is one of my all-time favorite tricks. I hope you enjoy the book!