
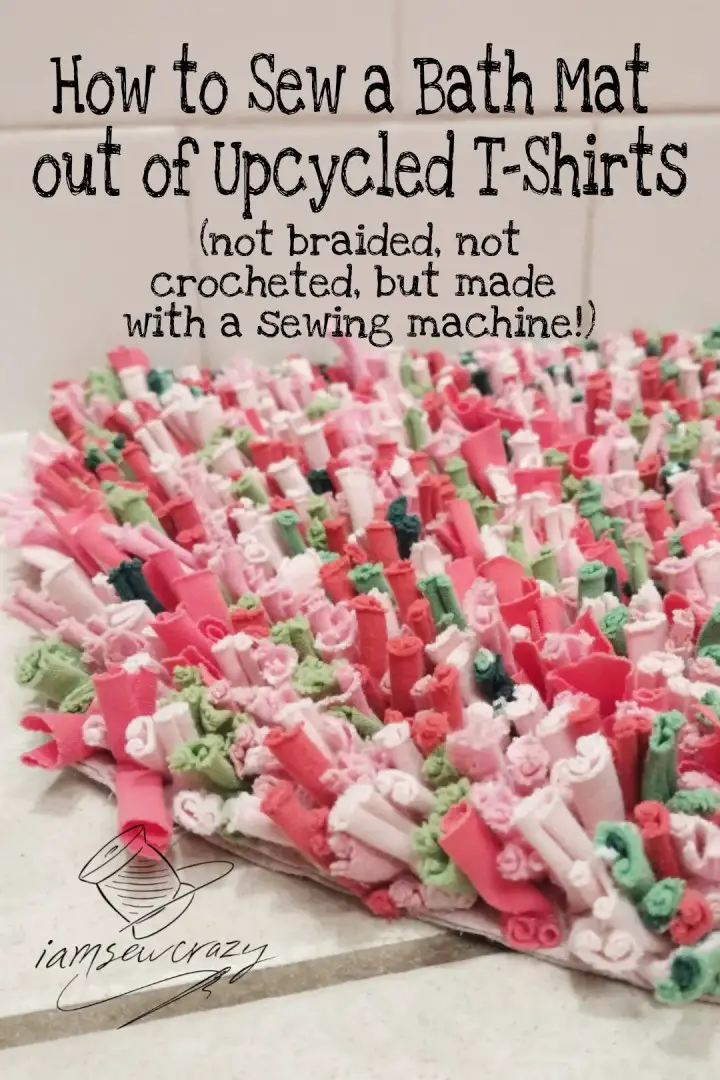
Hey everyone, I’d love to show you how to sew a bath mat out of t-shirts! This DIY bath mat is a fun project that can be colorful and lively, or more muted depending on what fits your mood and décor. It’s made entirely on a sewing machine, so you don’t need to know how to crochet or latch-hook. I love the raggedy high-pile look and feel of this mat, and it’s quite easy to make. So here’s how to make your own bath mat out of t-shirts:
Materials you will need
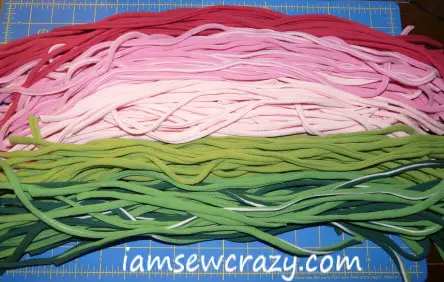
I used 6 different t-shirts to sew this bath mat. You probably already have some worn-out t-shirts on hand, or you can stop by the thrift store to get some in whatever colors you like. I only used shirts that were made primarily of cotton, so that the mat would be very absorbent. (Some athletic wear is made of synthetic fibers, which I chose to avoid.)
I like upcyling where I can. (Check out some of my other upcycled projects!) But I understand that you may not be able to find t-shirts in the exact colors you are looking for. In that case, you can use cotton jersey knit yardage like this. It’s perfectly fine to use a print! The pattern won’t really show up in the finished mat, but the colors will.
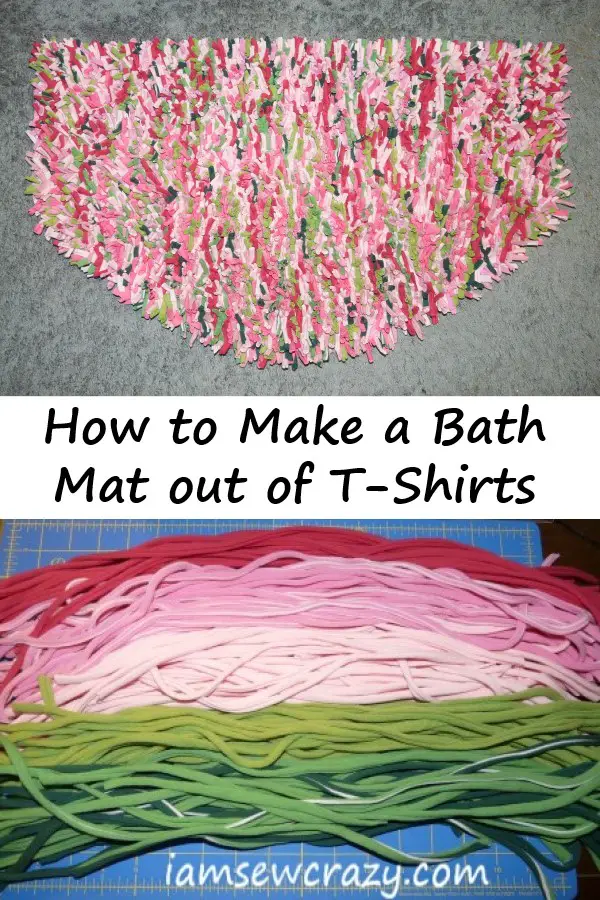
The amount of fabric you will need depends on how large you want to make your mat. But 2 yards would have been plenty to make my bath mat, which was 30″ wide by 18″ tall at the tallest point. So unless you want to make a large rug, 2 yards is a good amount to purchase.
We will also be using some sturdy woven fabric as the bottom layer that all of the t-shirt strips will be sewn to. Don’t be afraid to upcycle here, too! A tablecloth from the thrift store would work just fine, or any fabric that doesn’t stretch and isn’t too flimsy. Aim for a fabric that’s a little thicker than a bed sheet, but thinner than denim. Get something that goes with the colors of t-shirts or knit fabric you chose. One yard of 44″ wide fabric was plenty to make my bath mat, but if you want a rug that’s quite large you may want to buy more than that.

I added some dots of clear 100% silicone caulk to the back of the mat, as an anti-skid treatment. Buy a squeeze tube like this, because I think it’s much easier to control than a caulking gun. I let the caulk cure completely before putting it on my floor, and it hasn’t harmed my floor in any way. It works very well to keep the mat from sliding around. You may want to try it on any other area rugs in your house that always seem to shift around.
You will also need basic sewing supplies (here is a list of my favorites.) I’m using a rotary cutter and mat to cut the shirts, which makes the process very fast and easy. But you can use scissors if that’s what you have! This really is a no-sweat project, because nobody will be able to tell if the strips weren’t cut perfectly evenly.
Make sure you have a new size 14 or 16 sharp sewing machine needle.
Cut the t-shirts into strips
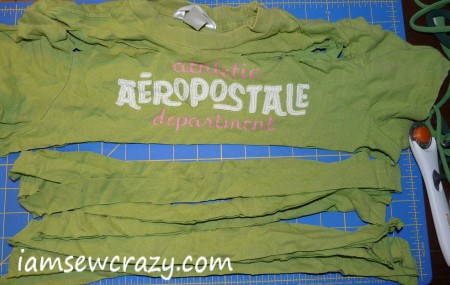
I cut my t-shirts into 1″ (2.5 cm) strips from one side to the other. I avoided the hems, sleeves, and the writing that was on the shirts. This left me with just plain strips of cloth.
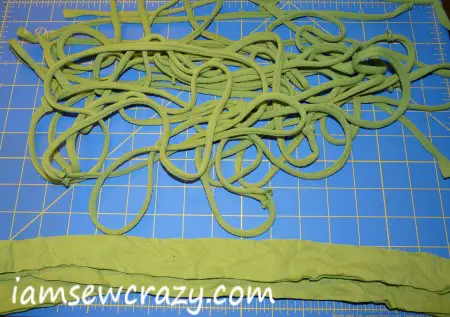
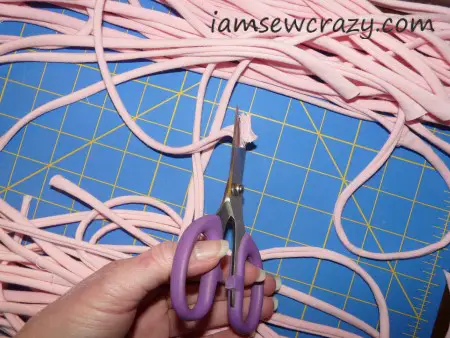
Then I pulled on the ends of the strips of cloth until they rolled into little fabric tubes. I also snipped out the small pieces of the t-shirt side seams that were left.
Every now and then you’ll come across a t-shirt that doesn’t turn into a tube when you cut it and tug on the strip. I decided to only use shirts that rolled into tubes, but of course that’s up to you.
If you are using a large piece of jersey knit, you will need to make sure that you cut your strips so that they roll into tubes when you pull on them. Cut a strip off the side of the piece of fabric and stretch it. If it doesn’t roll into a tube, then cut strips off of the top or bottom instead of the side.
How to make your bath mat pattern
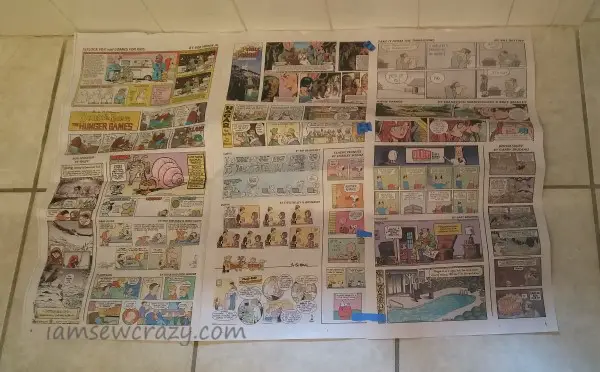
One of the best parts about making your own bath mat is that you get to decide what size and shape it will be. I suggest taking some newspaper over to your shower and laying it on the floor. This will help you visualize exactly how big you want your bath mat to be, and what shape suits you best. Tape some pieces of newspaper together if you want a larger mat.
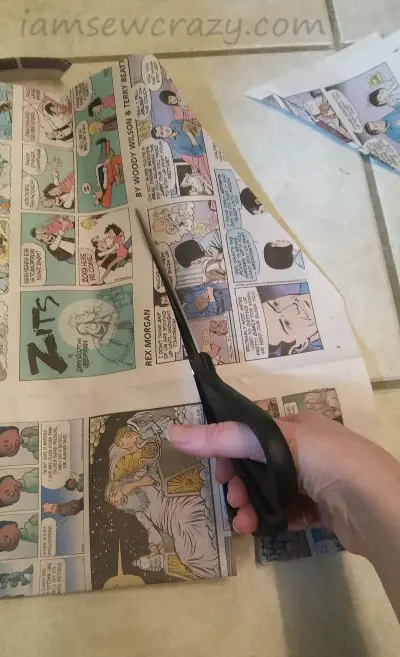
Fold the newspaper in half and trim both sides at once so that it stays symmetrical, and cut it down to different sizes and shapes. Lay out your options on your bathroom floor until you find one you’re happy with.
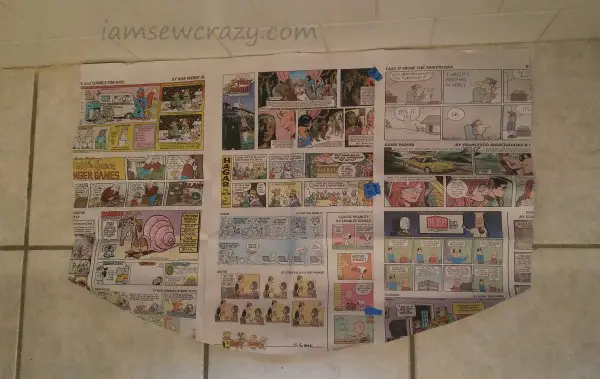
I ended up choosing a shape that looks like a rectangle with a semicircle stuck onto it. That’s what fit in the space and looked good. And the semicircle part will catch any drips of water as the shower door swings open.
Cut and sew the fabric for the base of the bath mat
Once you’re happy with the size and shape of the newspaper template, you’re ready to cut out your base fabric. Fold the piece of woven base fabric in half, and lay your newspaper template flat on top. You want to cut out 2 pieces of base fabric using your newspaper as a guide, and since the fabric is folded, this way you’ll cut both pieces out at once.
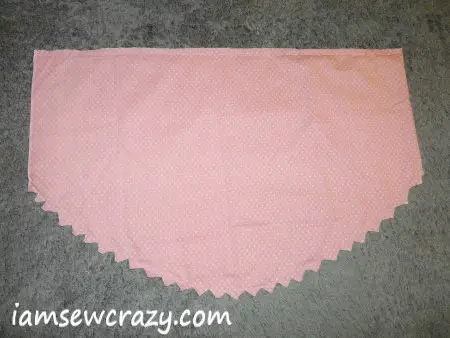
Put the two pieces of base fabric right sides together, and sew around the edges. Leave a space about 4″ (10 cm) long unsewn, so you can turn it right-side out. Clip the excess fabric out of the seam allowances if you have any curved edges. The above picture shows my base fabric after I’ve sewn and clipped it, but before I turned it right-side out.
Now turn the mat right-side out, and fold in the seam allowances at the opening. Glue the seam allowances with a glue stick, so that it looks like the edge of the mat is sewn all the way around. The glue stick will hold the opening in place temporarily. We will be sewing the opening shut permanently as we start adding the t-shirts to the mat.
Sew the t-shirt strips onto the bath mat
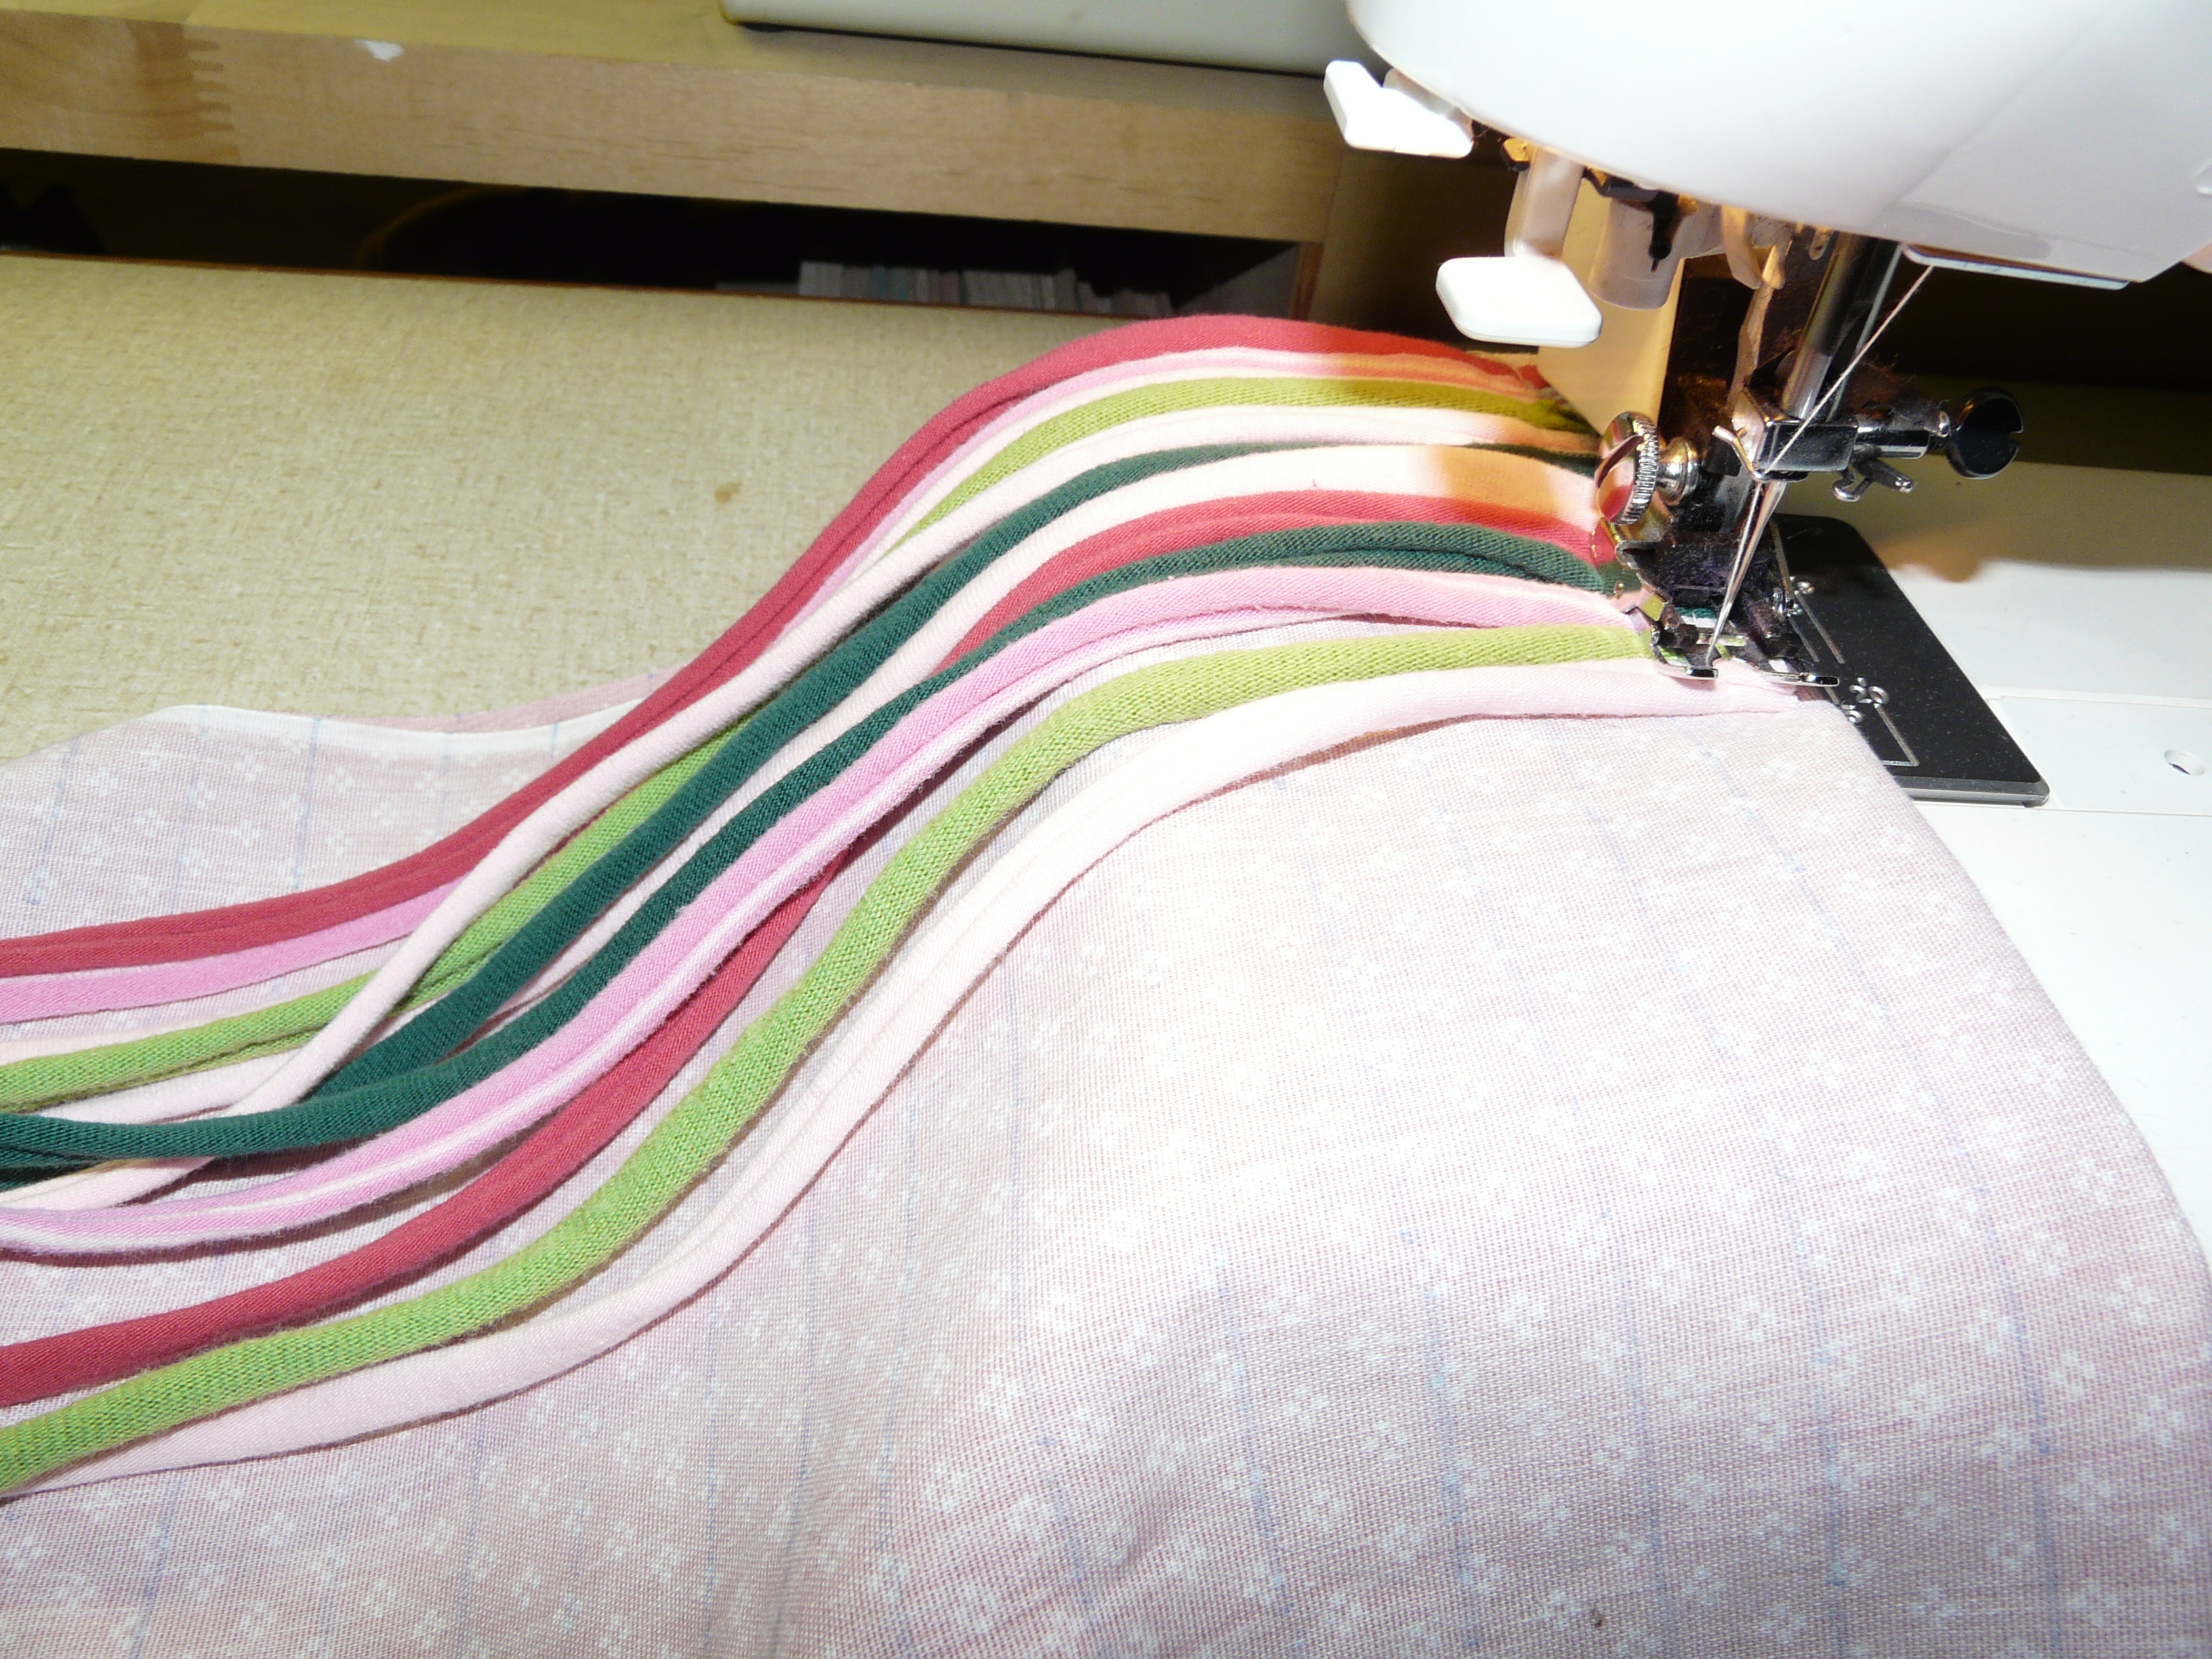
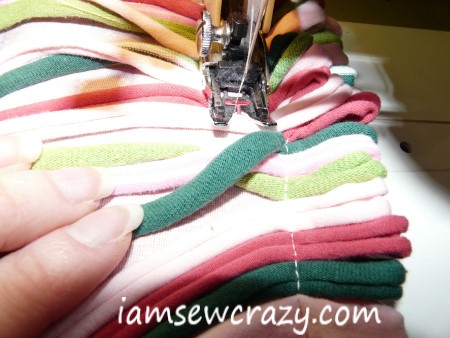
Mark lines on the top of your base fabric to help guide you in sewing down the t-shirt pieces. (If you picked a striped or plaid base fabric, you can just follow the lines of the fabric.) My lines were 1/2″ (1.25 cm) apart. Now lay t-shirt tubes on the first line like I have in the pictures. Using a triple stitch, sew all the way down the mat. (A triple stitch takes two stitches forwards and one stitch backwards, and it’s extremely durable. If your sewing machine doesn’t have a triple stitch, it’s okay to use a short straight stitch.) I used a walking foot, and I recommend using one if you have it, but if you don’t, no worries. Just use what you’ve got and go slowly.
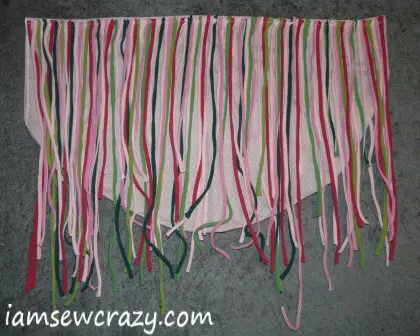
Once you get the first line sewn, the mat kind of looks like a grass skirt. Now is the time to wrap it around your waist and dance around the house to Bang the Drum All Day. You might be thinking, can’t I skip this step? The answer is no. No, you cannot.
I chose not to trim the t-shirt pieces after I sewed each row, I just made a 2″ loop and went on to the next row. I thought the strips would be easier to keep a handle on that way. But you can also cut the excess off and start each row by laying the t-shirt pieces out. You do what works best for you!
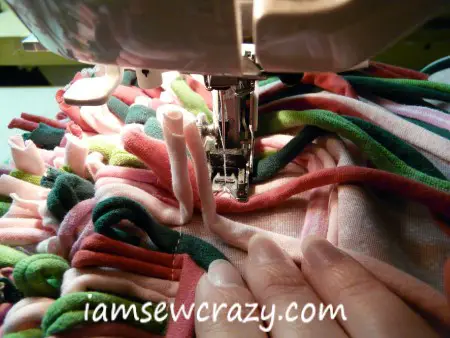
I also didn’t want stripes on the bath mat from sewing a light pink, then a dark green, then a light green, etc. on every row. So I switched it up by crossing some of the strips over each other to randomize the colors a little bit. Take a look at the picture above to see what I mean.
When one t-shirt strip got too short, I just stuck a new one in its place and kept going. Make sure that you sew over the opening in the base fabric (the hole where you turned the large piece of fabric right-side out) as you sew on the lines of t-shirt strips.
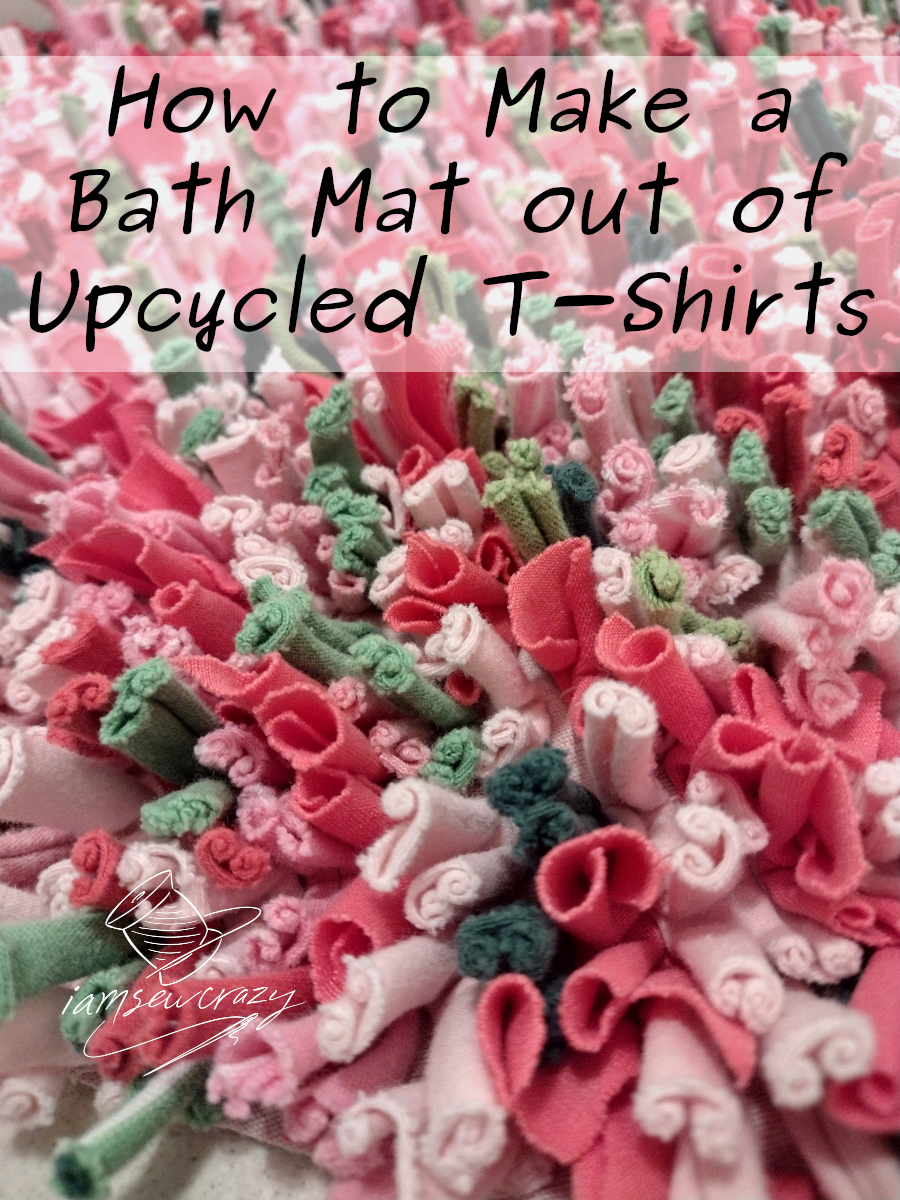
When I was done, I cut through the loops at the top so the bath mat was covered in shaggy noodles, not loops. You can leave the loops, but loops tend to grab your toes when you step on the mat.
Add caulk to keep the rug from sliding around
I also added some dots of clear 100% silicone caulk to the back of the mat, to keep it from sliding around on my bathroom floor. Buy a squeeze tube like this, because I think it’s much easier to control than a caulking gun. I let the caulk cure completely before putting the mat on my floor, and it works very well to keep the mat in place. (And check out my list of 12 awesome ways to use silicone caulk in your sewing and crafts!)
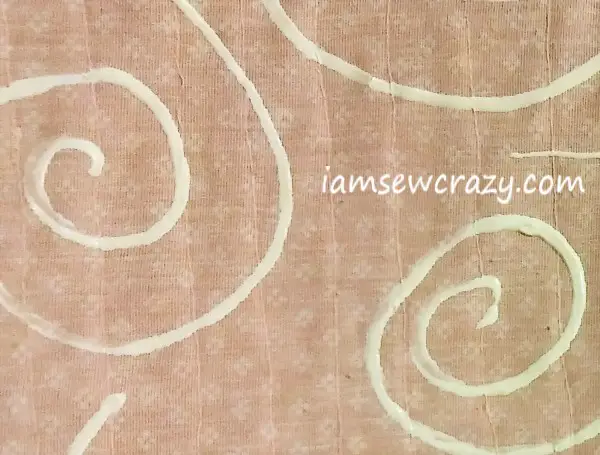
If you want to, you can get creative and make designs with the caulk. The clear caulk obviously won’t show up very well. But you can get white caulk, if you want it to be visible on the back of your mat. I machine-wash the mat all the time, and it’s held up super well. The caulk is still firmly in place.
And there you have it! Now you know how to sew a bath mat out of t-shirts. It’s comfortable and absorbent, and it even matches your bathroom! Woohoo!


Ok, a bath mat is on my to do list now. 😯
Just curious to know if your base fabric is just a regular piece of cotton cloth or if it is a knit type of fabric. I found this page at Sew Can She.
It’s just regular woven fabric. I believe it’s part cotton and part polyester, and it’s a bit thicker and sturdier than quilting fabric.
I don’t recommend a knit for the base, because a stretchy fabric makes it harder for the mat to keep its shape as you sew. 🙂
Just found you today because of your bath mat pattern. Thanks so much for such an easy solution to an on-going problem. Dirt tracked through the house makes the bath mat look horrible, and trying to wash it every week means I don’t have one for awhile….Now it doesn’t matter!! I can make as many as I’d like!!! And they’re sew cute!!! Love your creativity!!!
Thank you, I’m very glad you like it!
Thank you sew much for sharing. I am in need of new bath rugs, I cannot wait to get started.
Thank you for your pattern/instructions. This sounds like a great way to repurpose the t-shirts we’ve accumulated. I’m wondering about adding some type of non-slip grip to the back. (I also found this on Sew Can She)
I’m glad you liked it!
I actually did put dots of clear 100% silicone caulk on the back of mine to keep it from sliding around, and it works great. I’ll update the post to include that info. 🙂
I should clarify that I put the dots of caulk on the back of the bath mat, and then let it completely cure/dry before I put the bath mat on the floor. The caulk stays rubbery and grippy after it’s cured, but at no point did I put wet caulk on the floor.
This is an awesome idea, Jessie. We all use bathmats, and wear t-shirts. It’s a win win. I’ll be showcasing your tutorial tomorrow.
Thank you so much for featuring my work!
So cute and clever! Thanks for sharing this technique.
wouldn’t it be easier to use rug hooking netting for the base?
Only if you’re a hooker 😝 Sorry, I couldn’t resist. All kidding aside, I wouldn’t try to sew through rug hooking netting. This bath mat was completely sewn, so none of the t-shirt strips go through to the back or loop around the base at all. They are just sewn down to the top of the base fabric.
You could absolutely make something similar using rug hooking techniques, but you might have to cut your t-shirt strips narrower to get them through the holes in the netting. I’ve done rug hooking before, but I came up with the sewn method and found that it was much faster for me, so that’s the method I highlighted in the tutorial. But do whatever floats your boat!
Love the design and your writing is awesome! (the grass skirt – LOL!) Great design and pics! I’m putting this on my project list …
Thank you so much! I’m glad you enjoyed it! 🙂
This is the amazing bath mat. I appreciate for your beautiful renovation. It is a very informative blog to discuss the bathroom problem very efficiently. Your discussion not only perfect for a small bathroom but also for the whole house.
Love your instructions. I made a similar mat and used fabric that is intended for the soles of pajama feet for the bottom layer of the base. It is slip resistant. I purchased it from JoAnn.
That sounds like a great idea! Did the slip-resistant fabric drag or rub on the bed of your sewing machine as you were sewing the mat?
Really nice post, lots of direction with a sense of humor. Love the idea of using up some of those old t-shirts and not using them as dust rags. I will definitely try to make one of these.
Thank you! I hope it turns out well for you. 😊 I’m glad I could provide some inspiration!
I love this idea and plan to try it. I was wondering how the rug stands up when you was it in the washing machine?
Hi Sheila, I’m glad you liked it! The rug has held up great, in fact as I write this comment the bath mat is over 3 years old. I wash it in hot water and throw it in the dryer, and it still looks fantastic! Make sure to use a triple stitch if your machine has one; it’s really durable and easy to make. I hope you give it a try!