

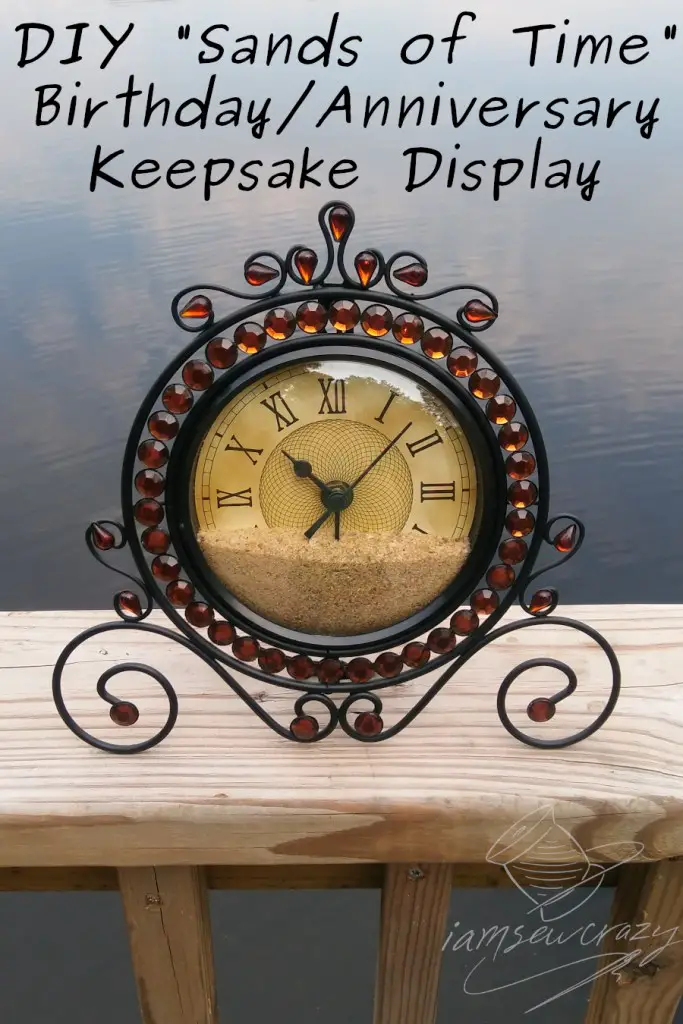
A stopped clock is a good way to commemorate a date that’s special to you. Set the hands on your Sands of Time clock to the hour and minute that corresponds to your special month and day. (I have mine set on 10:30, for October 30th.) It serves as a good visual reminder of a birthday, anniversary, or other special day. You can make it even more special by using sand from a memorable beach trip, or buying a clock from a particular shop or destination. I’ll show you how to make a Sands of Time clock of your own, as a keepsake or gift.

For this craft, I chose a clock with a clear glass cover over the face, so that I could add some sand to the clock. The sand, of course, isn’t essential, but I added it for a few different reasons. I felt like it suited the style of the clock. It looks frozen in time, as though the sand is what caused the clock to stop. And I thought it worked well because sand is closely associated with time due to hourglasses (and other poetic metaphors).
It also reminds me of one of my favorite poems (A Dream Within a Dream, by my homeboy Edgar Allen Poe). The poem talks about sand slipping through the author’s hand, as a metaphor for the loss of more important things. Sand is so plentiful and unimportant, yet its constant analogy to one of the most precious things we have (time) is somewhat fascinating to me.
I want to stress that this is not a working clock. Do not put sand in a clock and expect it to keep time.
Step 1: Find a clock

If you want to make your own Sands of Time Clock, you will need an analog clock with a clear glass or plastic cover over the face. Lucky me, this beautiful metal clock was broken! So it was incredibly cheap at a thrift shop. As long as the face cover isn’t cracked or damaged, a broken clock is just fine. Make sure the batteries are removed.
You will also need sand (maybe from a special beach trip?), probably a screwdriver, possibly glue, and a small squeeze tube of clear silicone caulk.
Step 2: Take the clock apart


Your clock will likely have some screws on the back that hold the clock together. You need to remove these screws. You might also run into some clips holding the face plate to the frame. My clock had a plastic ring that held the glass down tight over the clock face. The two black plastic pieces were snapped together, but it wasn’t difficult to separate the pieces and remove the glass.

Here, you can see the decorative metal frame, clock face, glass, and plastic ring. You can even see where the four screws held the whole thing together! Every clock is different, so you may need to go off-script a little bit when you take yours apart. But I’ve never come across a clock that was glued shut or otherwise particularly difficult to take apart. And I’ve dismantled lots of clocks for the sake of craft projects.
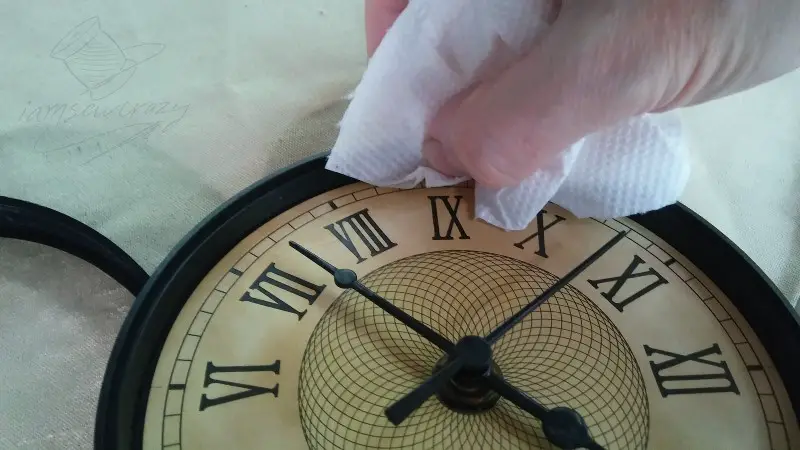
Once you have the clock taken apart, check to see if there are little areas where the sand could seep behind the clock face. You can see in the pictures that I had to glue down the printed background with the numbers on it. The edges weren’t sealed tight to the frame, and I didn’t want sand to creep behind the paper. But good old Mod Podge got the job done. I used a small paintbrush to apply the glue, and wiped off the excess with a paper towel.
Be sure to let the Mod Podge dry completely before you add any sand to the clock, or else it will stick to the wet glue and stay there forever.
Step 3: Figure out how much sand your Sands of Time clock needs


Now you can do a dry-fit to see how much sand you will need to add. Pour in some sand, and then hold the glass in place while you tip the clock upright. Make sure that the level of sand is exactly what you want. Double check that the clock hands are showing the correct position. When you are happy with the way it looks, pour the sand out and set it aside in a separate container so that you can add that exact amount back in.
I had to fill my clock up less than halfway. My chosen date (10:30, or October 30th) meant that the minute hand would be covered up completely if I filled the clock too full of sand.
You can remove the second hand of the clock, if you find it to be distracting. I wanted to keep mine, but it wasn’t necessary in order to display the date. However, if you’re displaying something besides a date, you can use the second hand as an additional set of digits.
Step 4: Clean everything up and add silicone

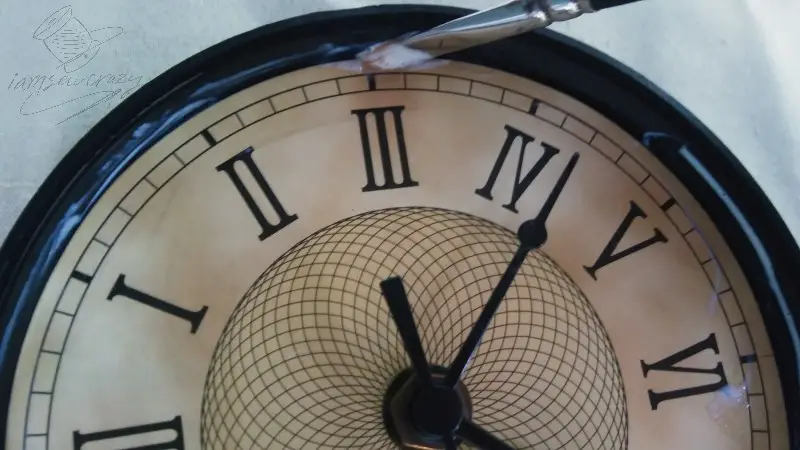
Now wipe off the rim of the clock frame (where the glass will touch) with rubbing alcohol. This will remove any sand particles and ensure that you get a good seal. Wipe the glass off as well, especially the inside. This is your last chance to clean the inside of the glass!

I am using clear silicone caulk to seal the sand inside the clock, because it works very well as a sealant/glue for all sorts of different craft projects. It’s one of my favorite materials to work with! In fact, I wrote an entire post about how to use silicone caulk in your sewing and crafts.
I always recommend a smaller squeeze tube of silicone like this. It’s so much easier to control than one of those huge tubes that fits inside a caulking gun. But here I am, using one of those dreaded huge tubes in a caulking gun.

Apply a small bead of silicone to the clock frame where the glass will sit, and smooth it out with your finger. Don’t add so much that it will goop out when you add the glass; just a thin line will do.
Step 5: Add the Sands of Time and reassemble the clock
Check one last time to make sure that your clock hands are in the right position. Now carefully pour the predetermined amount of sand into the middle of the clock. Press the glass into place, and let the clock sit there without tipping or shaking anything. Otherwise you’ll get sand stuck to the uncured caulk!
Once the caulk is cured, you can reassemble your clock by adding the screws back in. (The silicone usually takes 24 hours to cure, but the tube will be able to tell you.) You’re all done! Now you know how to make a Sands of Time clock to commemorate a day that’s special to you.
I’m going to leave you with the poem I mentioned at the beginning of the post. It’s one of my favorites.
A Dream Within a Dream
By Edgar Allan Poe
Take this kiss upon the brow!
And, in parting from you now,
Thus much let me avow —
You are not wrong, who deem
That my days have been a dream;
Yet if hope has flown away
In a night, or in a day,
In a vision, or in none,
Is it therefore the less gone?
All that we see or seem
Is but a dream within a dream.
I stand amid the roar
Of a surf-tormented shore,
And I hold within my hand
Grains of the golden sand —
How few! yet how they creep
Through my fingers to the deep,
While I weep — while I weep!
O God! Can I not grasp
Them with a tighter clasp?
O God! can I not save
One from the pitiless wave?
Is all that we see or seem
But a dream within a dream?
