
Hey everyone, I would love to show you how to make your own resin jewelry! Recently I had the opportunity to try out a resin casting set. It included resin, a bunch of silicone jewelry molds, some tools, accessories, and glitter. The kit was sent to me for free, however it is very inexpensive. I told the lovely representative that I would only mention the resin set on my blog if I was completely satisfied with the quality.

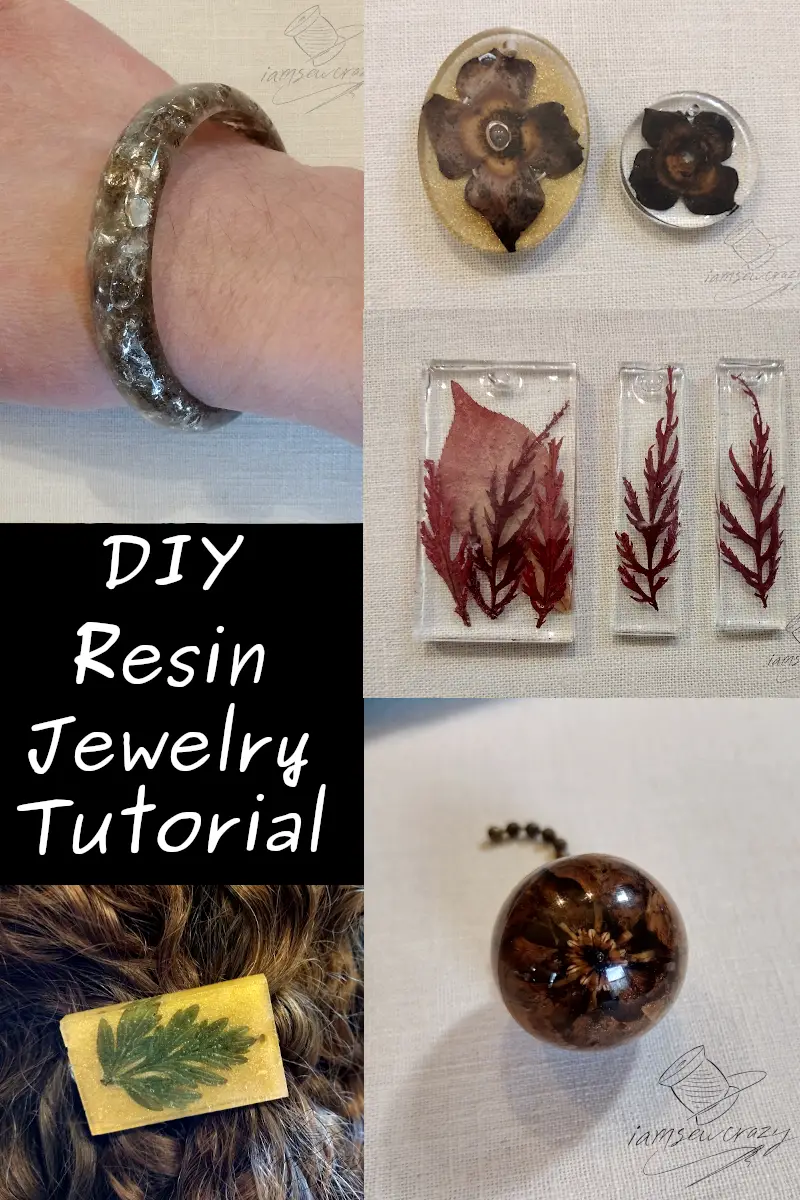
I had never poured resin before, so this is a true beginner’s experience. And as it turned out, I loved everything about this kit. The variety of sizes and shapes of the molds was in itself inspiring, and the resin was very easy to work with. You can use the molds to make bracelets, rings, pendants, earrings, keychains, beads, cabochons, faceted gems, and even a sphere! Read on for some tips and tricks about how to make your own resin jewelry. I’ll also tell you about a few things I’d change the next time I cast resin. But first, let’s take a look at some of the DIY resin projects that I made! There are bracelets, rings, hair clips, earrings, pendants, and even some ceiling fan chain pulls!
Mica and Resin Bangle Bracelet
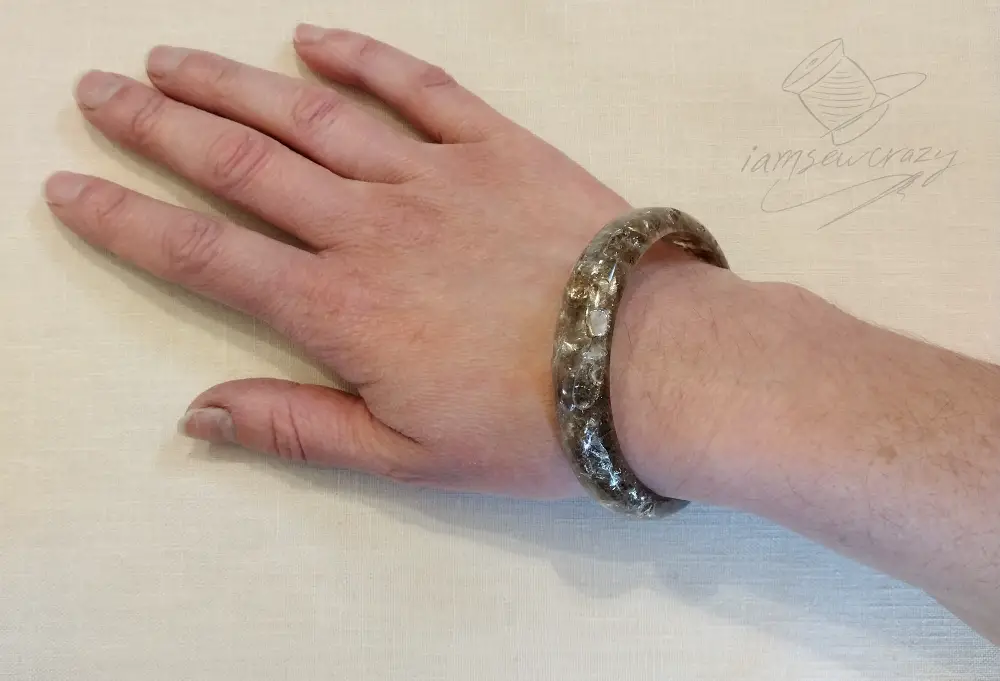
I decided to gather up some mica, which is a mineral that occurs naturally where I live.


Mica is soft and flaky, and very easy to break up. I just used my fingers to separate the flakes and then tear them into smaller pieces. If you don’t have mica in your area, you can get mica flakes like this on Amazon.


The mica flakes went into one of the bracelet molds. (And all over the table, haha!) Then the resin was poured into the mold. I pinched and squeezed the mold a little bit to work the resin all the way down to the bottom of the mold, and left it to set.
If I were making it again, I might pour the resin into the mold before I added the mica. I’m wondering if I would have ended up with fewer bubble troubles that way. But I was worried about having enough time to add all the mica flakes (and pour all of the other projects I had lined up) before the resin reached the end of its working time.
The finished bracelet is glittery and glimmery, and I love how it highlights nature’s original bling!
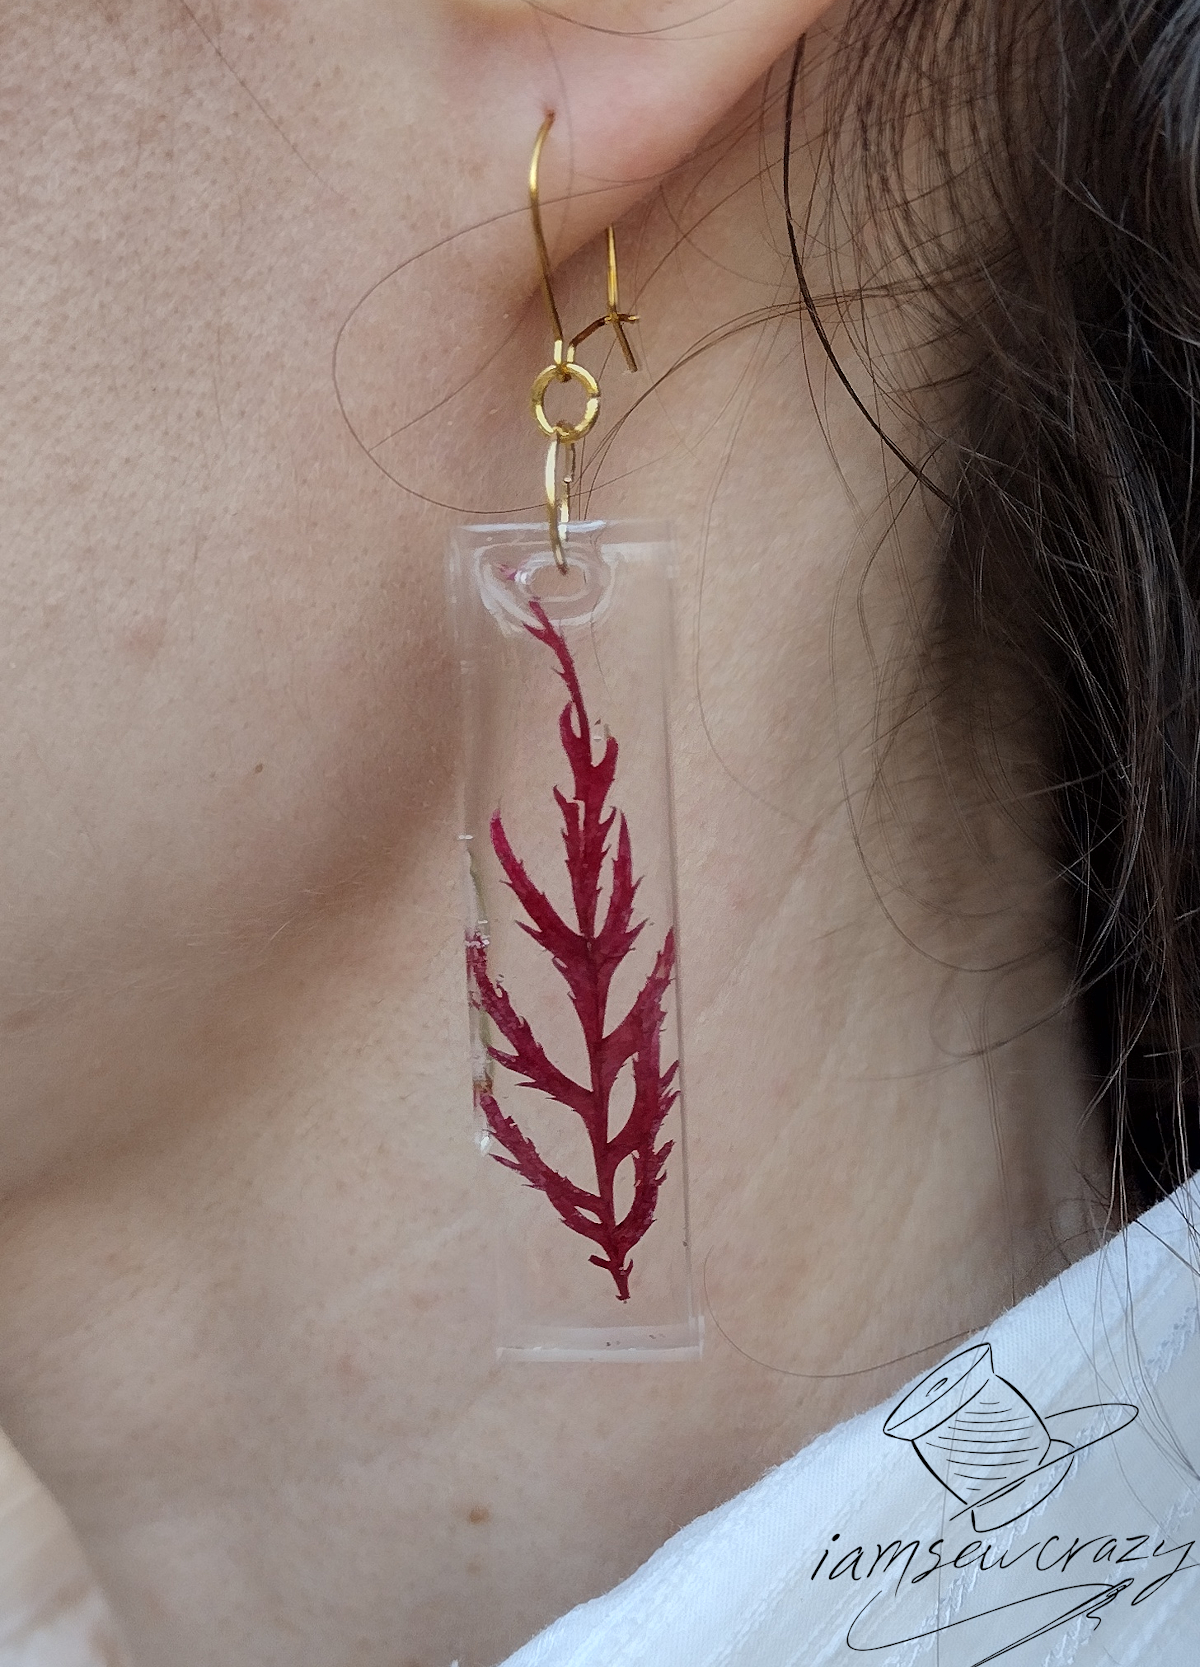
Japanese Maple Leaf Earrings and Pendant
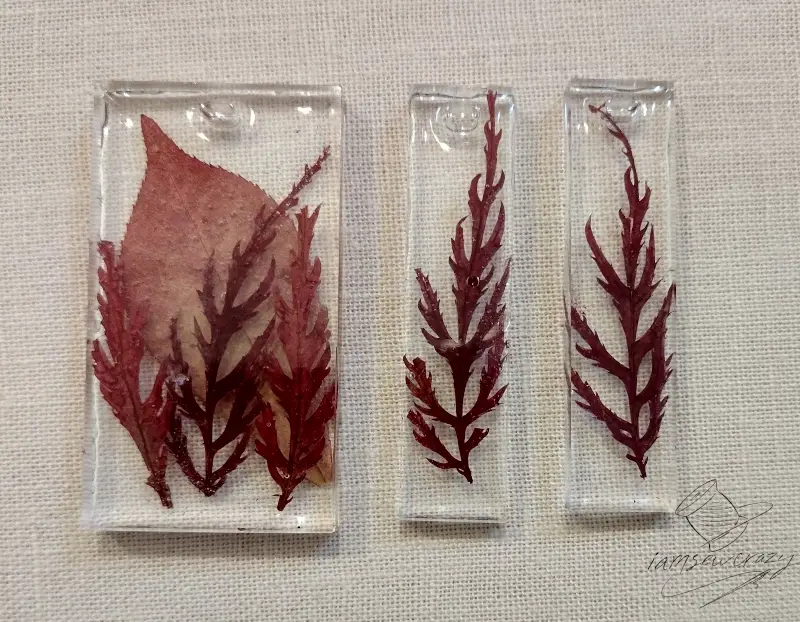
It’s autumn here, so there are plenty of brightly-colored leaves to find. These lacy red leaves came from a Japanese Maple tree. I broke them into pieces that would fit in the molds I had chosen, and weighed them down overnight. This was so that they would lay flat and not curl up and pop out of the resin while it finished curing.


I poured this set in two stages. With the first pour, I added a layer of resin over the leaf pieces to make one earring and a pendant, then left them to set.
A few days later, I poured the matching earring, and added a second layer of resin on the pendant that included a red Euonymus leaf. I think they look like flames!
Horse Hair Pet Keepsake Rings
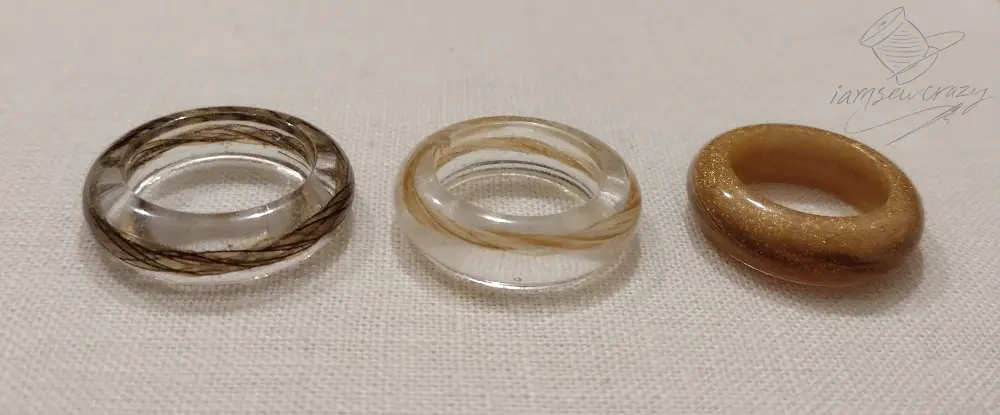
These horse hair and resin rings were my sister Nichole’s idea. So cute! They will be a gift for the friend who owns the horses. You could really use fur or hair from any pet! Just twist or wrap it into a ring shape that is as big as your chosen ring mold. The resin casting kit came with three ring molds of different sizes.

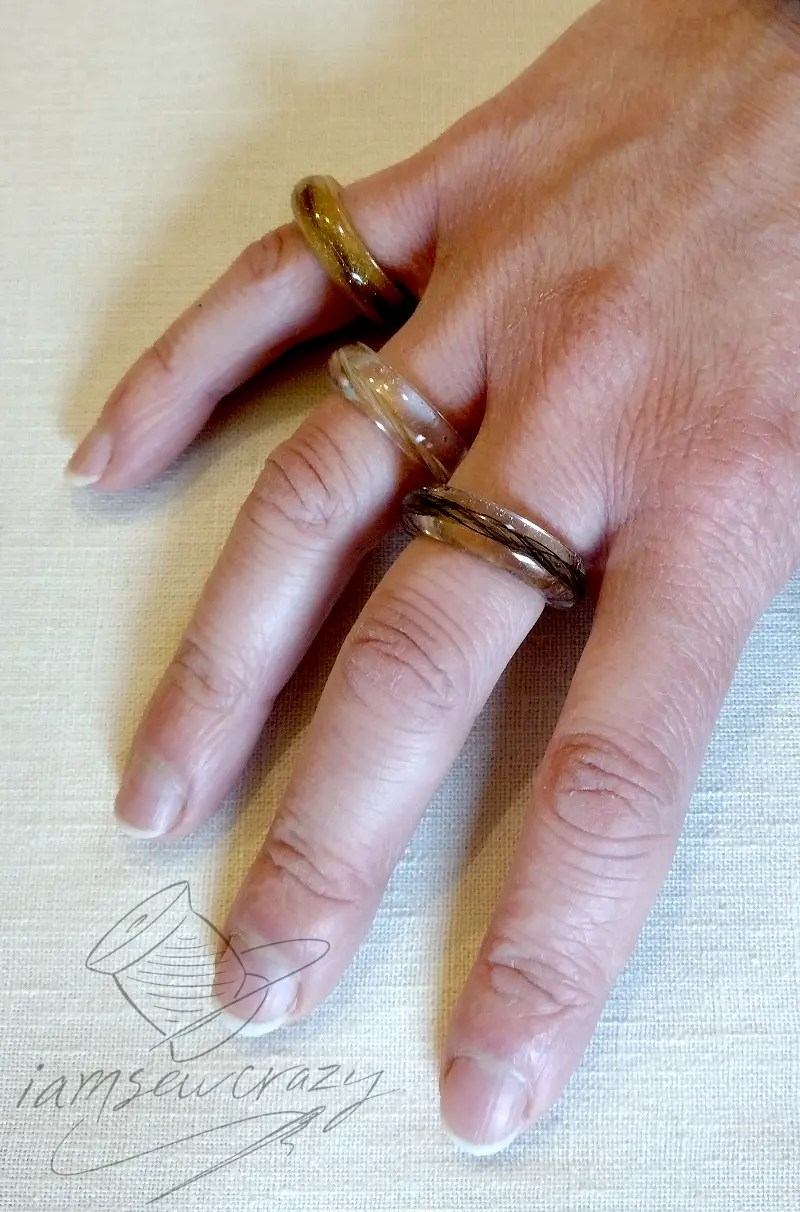
She used hair from the horses’ tails to make small wreaths, then we added them to the ring molds. I covered them with resin, and pinched the molds a little to help work out the air bubbles. One of the rings was made with resin that was tinted with gold metallic acrylic paint.
Cypress Cone and Lichen Ceiling Fan Chain Pulls
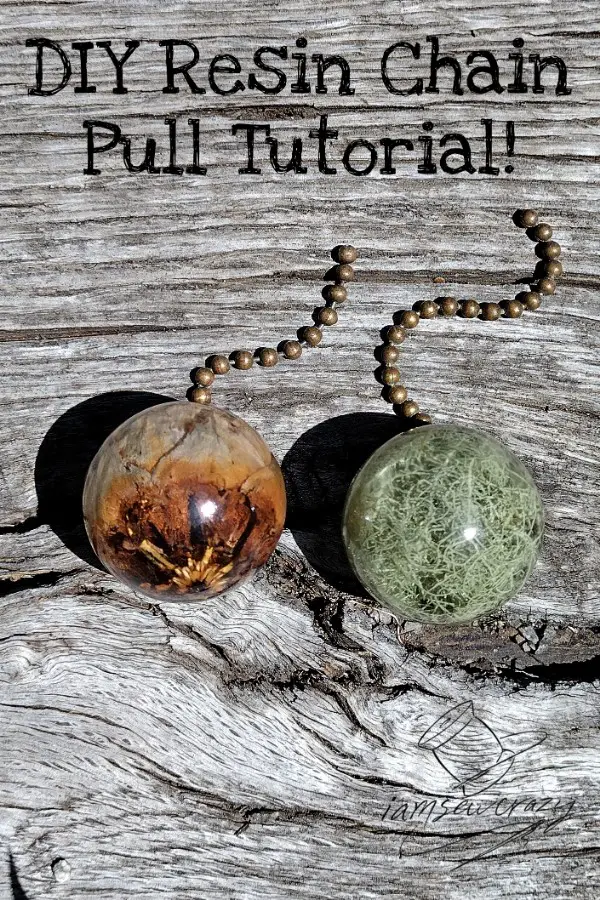
The resin casting set includes a two-part sphere mold, and I was dying to try it out! I made spherical chain pulls by casting a Cunninghamia tree cone and a chunk of lichen in resin.


Filling this mold was a little bit trickier, because the hole in the top of the mold is small. But the resin casting set comes with some disposable pipettes that made the job a lot easier. Don’t try to pick up or squeeze the mold while you are filling it, because you might pop the two halves apart!
I dropped the end of a ball chain through the hole on top that you use to fill the mold. The other end of the chain was clipped up with a clothespin, to make sure it didn’t go anywhere.
The second time I poured resin, I filled the same mold with a chunk of lichen to make another chain pull.


There was a small seamline around the middle of each piece, as you can see in the photo above. This line may not bother you, but I wanted to remove it. I used very fine (1000-grit) sandpaper to sand down the seamlines until the sides of the spheres were smooth. The sandpaper removed the seamline, but also made the pieces dull and milky-looking. So, I coated each piece with acrylic floor polish to make them shine again. The floor polish was something I already had on hand. Butt I’m willing to bet that another layer of resin would also work to bring back the shine. Or you might try clear fingernail polish instead.
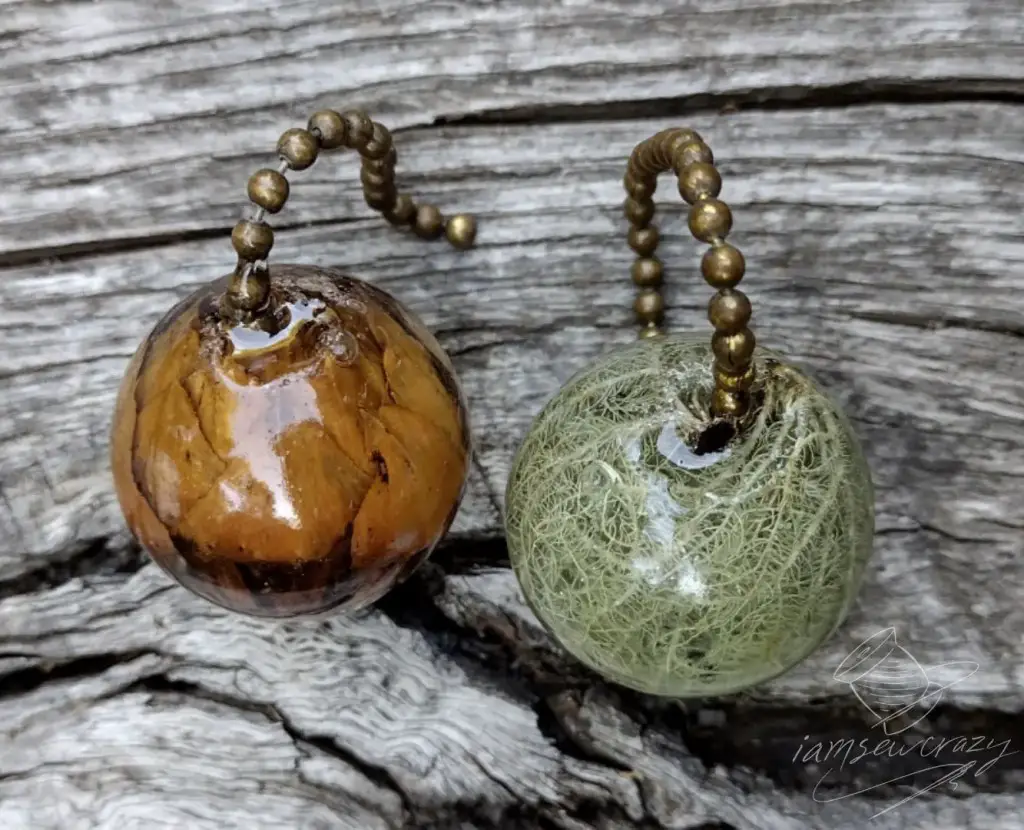
The very top of each piece was a little bit messy, where the hole in the mold was. I have a few bubbles that rose to the top and stayed at the base of the chain. There’s no way to see it after they are attached to the ceiling fan, so it doesn’t bother me!
Fern Leaf Hair Barrette
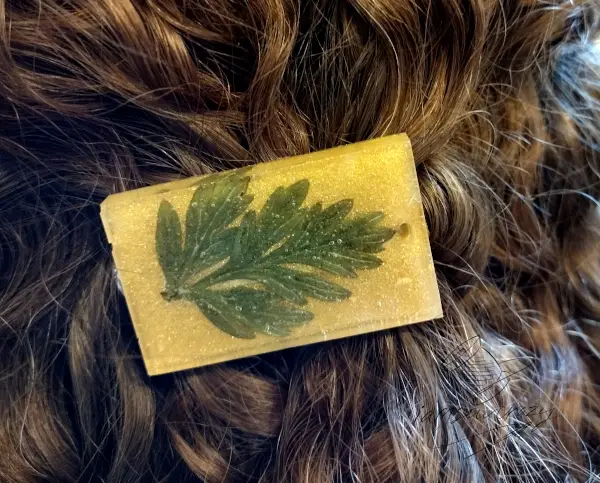
This barrette features some foliage from a Fern-Leafed Bleeding Heart plant. I chose a fresh piece of leaf that was the right size to fit inside one of the rectangular molds. I poured a small amount of clear resin, added the leaf face down, and poured clear resin on top.
A few days later, I added a second layer of resin with a small amount of metallic gold acrylic paint mixed in, and added a metal spring barrette clip on top.


I used the stir stick to push the resin all the way across the base of the barrette, to hold the metal clip firmly in place. But the layer of gold resin was shallow enough that it didn’t reach all the way to the clasp and cause it to freeze shut.
I was a little hesitant to use the torch on this project to remove the bubbles. Since the fern leaf was fresh and not dried, I didn’t want to wilt it with the heat! If I made this same project again, I would pour a thin layer of resin, use the torch, and then lay the leaf down and cover it with another layer of resin. As it was, the bubbles in the initial layer of resin had no way of rising to the top once I put the leaf over them. The bubbles that ended up in front of the leaf are a little distracting to me, but they aren’t visible from a distance.
Persimmon Cap Resin Earrings and Pendant
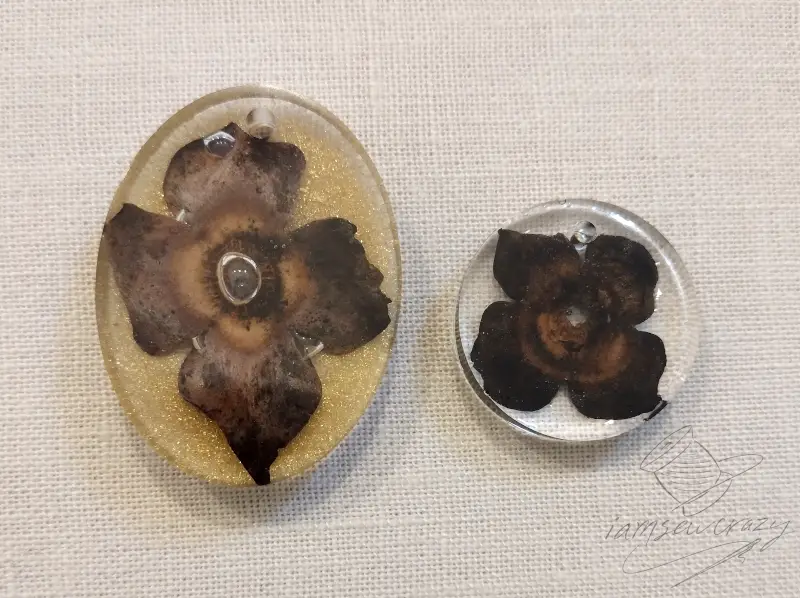
The little caps (calyxes) that grow on top of persimmon fruits are another cute little detail from nature. It’s something that is often overlooked, but they made great little earrings and pendants that look like flowers.


The pendant was cast in clear resin, and then I added a second layer of resin on the back that was tinted with gold paint, just like the hair barrette. But this time, instead of pouring a thick layer, I just smeared on a very thin layer with the stir stick. It looks almost like it has a golden glow!
Dead Sea Salt Ceiling Fan Chain Pulls
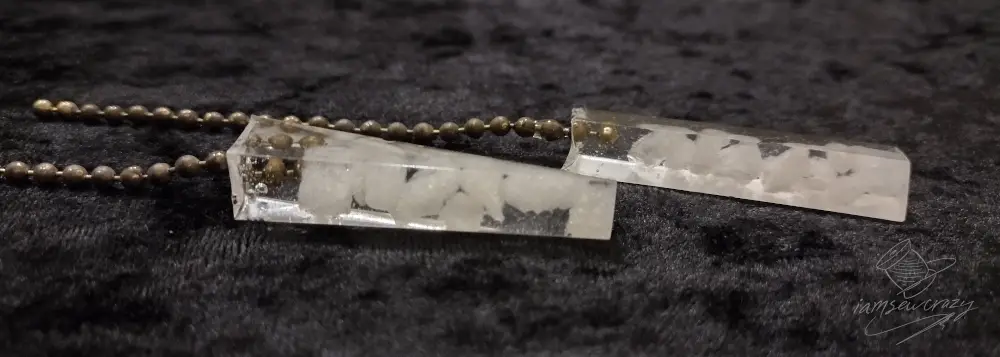
The tall cylindrical molds with open tops are perfect for making chain pulls for your lights or ceiling fans! My sister Tika wanted to make some chain pulls with Dead Sea salt inside. We picked out some large salt crystals and added them to the molds. I poured in the resin, and then dropped the end of a small length of ball chain down into the resin. The other end of the chain was clipped to the edge of a cardboard box to hold it up out of the resin. I made two different shapes of pulls, one for the fan and one for the light. They make a cool matching set that almost looks like it has snow inside.
(By the way, if you’re looking for a way to use any item as a ceiling fan chain pull, check out my post for a really neat hack!)
Arizona Desert Sand Souvenir Pendant
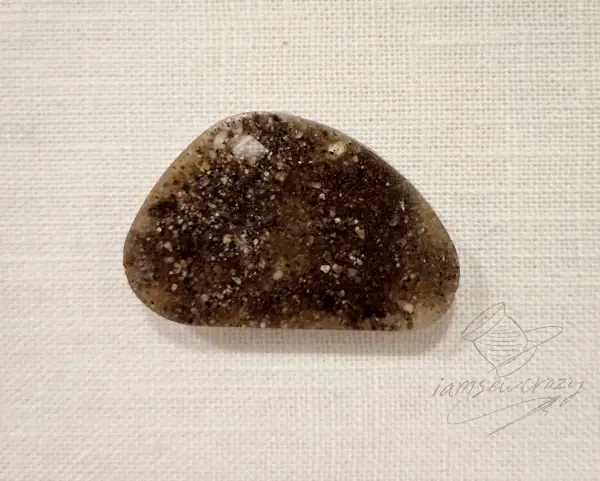
I went to Arizona a little while ago, and while I was there I collected some dirt and sand from different places I visited. The sand was a slightly different color depending on where I gathered it. I added small amounts of the different colors, and then swirled through it twice with a stir stick.

I’m dreaming up a few more souvenir sand designs, because I still have some sand left!
Now, here are some tips and tricks (and a few things I wish I knew beforehand)!
How do you mix the resin?
The kit included a two-part resin, and to use it, you simply mix equal parts from each bottle. You will want to use disposable plastic measuring cups and spoons. If you are planning to do a LOT of resin pouring, you can get reusable silicone cups and stirrers that the resin won’t stick to.
The resin flows more freely when it is warm, which will help you fill your molds more effectively with fewer bubbles. To warm the resin, put each sealed bottle in a bowl of hot water for a few minutes before you mix the two parts together. Make sure you dry the bottles off thoroughly before you open them! Do not allow water to get into the resin.
Mix the resin really well! A good rule of thumb is to mix for 2 minutes, making sure to reach every area of the cup.
Once the resin and hardener are mixed together, you have about 30 minutes to pour the resin into the molds. The resin fully cures in 24 hours.
How do you fill silicone resin molds?
Remember that the side facing the bottom of the mold will be the front of your finished piece, so add the inclusions backwards. For example, all of the leaves went into the molds face down. For the maple leaf pendants, I wanted the large Euonymus leaf to be behind the maple leaves, so I added it last.
As the resin begins to cure, it will thicken. So it’s a good idea to fill the smallest molds first, when the resin is most liquid. The thicker resin will have a harder time flowing into tiny nooks and crannies, so save your less-intricate pieces for the end of the pour. Warmer or fresher resin will also give you less trouble with bubbles than resin that is thick and/or cold.
The resin has a consistency like honey. If you are filling a small mold, you will want to use the included disposable pipettes, instead of pouring it straight out of the cup.
If you have a lot of pieces to pour, you might want to mix two batches of resin in order to make sure that you have enough time to pour all of your pieces.
Don’t trip over the finish line and remove your pieces from the molds until the 24 hour cure time is up! They might look ready, but they will still be soft or sticky for quite a while. Wait 24 hours before you unmold your treasures.
How do you avoid bubbles in your resin?
You can see if you look closely that some of my pieces did end up with bubbles. Warming the resin beforehand will help with that. And work quickly: the pieces with the most bubble trouble tended to be the last ones I poured.
If you see some bubbles in the mixing cup or molds, you can use a heat gun or a torch to pop them. I used a small craft torch on the bubbles, but you do need to be careful not to overdo it. Just a quick blast of heat is all you need, and keep the torch moving. You’re trying to warm the resin, not burn it! A heat gun is generally a safer bet, so if you have one, use that instead of a torch.
As I mentioned, I was a little hesitant to use the torch on the fern leaf barrette to remove the bubbles, because I didn’t want to wilt the fresh leaf. As a result, there are some small bubbles in the finished project. I think next time I would pour a thin layer of resin, use the torch, and then lay the leaf down and cover it with another layer of resin. Using the torch on the initial layer of resin might work better for most of the inclusions, in order to keep bubbles from getting trapped under the item.
How do you color resin?
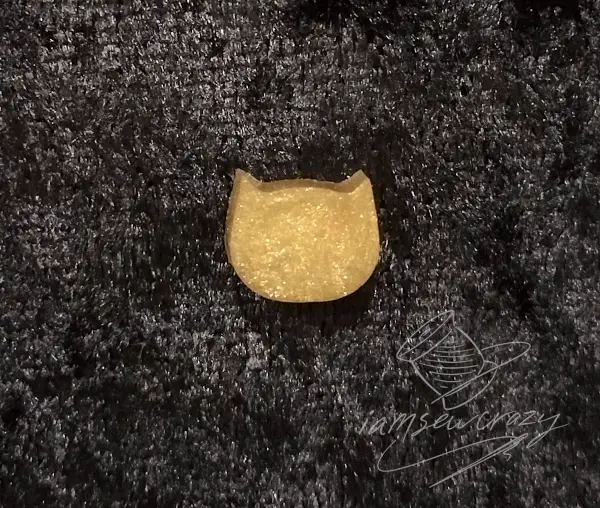
There are quite a few different ways you can tint your resin a different color. I chose to use a very small amount of metallic acrylic paint. I tested it first by filling one of the little bead molds (I chose the tiny cat face) and making sure it would set properly. If you use a ton of paint, you might have problems with the resin setting. But it doesn’t take much paint to tint a clear medium like resin.
Glitter would also make an interesting colorant for your resin. The kit comes with 12 different colors of glitter that look like tiny sequins. Mica powder or flakes, as you can see with the bangle bracelet I made, will also create a very interesting effect.
I used dirt and sand to tint one of my projects (the Arizona desert pendant). If that look fits your vision you can use some dirt from a special place nearby. Or, use sand from a recent beach trip. You can even try using powdered spices like cinnamon or turmeric. Using herbs like parsley and oregano will give you interesting texture and color.
You can buy specialty resin dyes, but I just used what I had on hand, and I think the paint worked great! I read that you can also use powdered Rit dye and food coloring to tint resin.
You can use alcohol inks to tint resin, but if you do, don’t use a torch to pop the bubbles! Alcohol ink is quite flammable.
How do you add a second layer of resin?
I filled the mold about halfway with my first inclusions in clear resin, and left it to cure. A few days later, I came back with a new batch of resin (sometimes tinted a different color with a small amount of acrylic paint) and poured it on top. You will probably want to use at least one layer of clear resin to start with. This will make your final piece glossy, and ensure that your inclusions are visible.
If you are pouring in several layers (the way I did with the fern leaf barrette and maple leaf pendant), you should leave your project in the mold in between pours. I wanted to take them out so I could get some good pictures. But if you don’t have a craft blog and don’t need pictures, then just leave them in the molds. When I put them back into the molds, the fit was not as tight as it was before I unmolded them. So I ended up with a tiny amount of resin from the second pour seeping around to the bottom. You have to look really, really close to see it, but I know that if I had never unmolded them, the fit would have remained perfect. So definitely avoid that if you can!
For the persimmon cap pendant, I didn’t put the piece back into the mold before I coated the back with gold. I just smeared on a thin layer of resin, and surface tension kept it from flowing down the sides. The resin is thick (very similar to honey), and it self-levels. So you don’t have to worry about the new layer being uneven. You can also use the torch to warm the resin so it flows better, if you’re having trouble spreading it.
How do you clean up uncured resin?
I covered my table with freezer paper, because the resin is really hard to clean up once it has hardened. Then I placed a cloth over the freezer paper so that I could get some good, clear photos. But wouldn’t you know it, for the first time in my life I didn’t spill anything!
I did, however, get resin all over my hands. (Yes, you are supposed to wear gloves. No, I did not. Don’t tell my mom.) I tried hand soap and dish soap to remove the uncured resin. They didn’t work, but Krud Kutter took the resin right off! It’s non-toxic and biodegradable, so I felt okay about using it on my hands. For real, just a little bit of rubbing and the resin was GONE. I doubt it would help once the resin has fully cured, but there’s a tip for the other gloveless free spirits out there.
How do you not freak out when you’re making a craft that has a time limit?
The 30 minute working time does add a little bit of pressure. But for me, it’s kind of a bonus. See, I like to set my projects aside and come back to them later with fresh eyes, to tweak this or change that. But this habit has also led to me sitting on a sticky floor backstage at a fashion show re-attaching the gears to my steampunk butterfly wings right before the show because I like the wings with the gears, no, I think I like them without, no, my original vision had gears, wait I think I’ll take them off, NO I NEED TO PUT THEM BACK ON THE SHOW IS STARTING SOON.
So really, the 30-ish minute working time is almost a blessing because it makes me stop messing with things. At a certain point, they are as good as they need to be, and continuing to fiddle with them doesn’t really help. And if I dreamed a piece up a certain way, then it is exactly what I wanted, and I need to be (at least a little bit) true to that.
By the way, I expected to have lots of bubbles in the cypress cone chain pull, for several different reasons: because it was a larger piece, because the mold was closed up and I couldn’t torch it at all, and because the fir cone had so many nooks and crannies. But would you believe it, that chain pull is one of the most bubble-free pieces I cast! So I guess the lesson here is not to stress out about it too much. Have fun, make a mess, get creative! Life is short, and the resin kit is pretty cheap.
I hope you give it a try, now that you know how to make your own resin jewelry!