
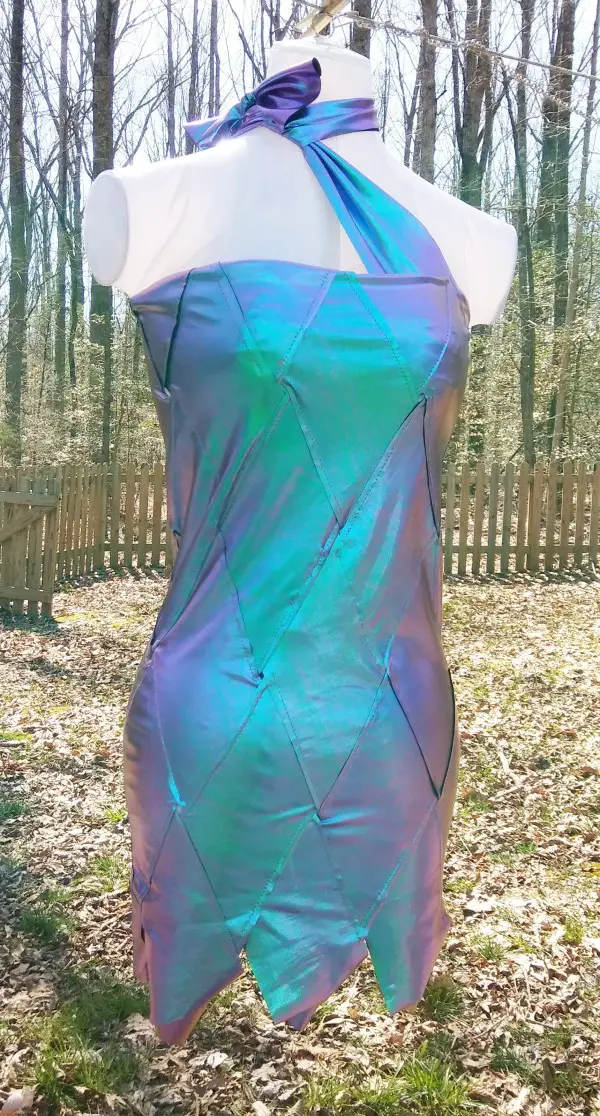
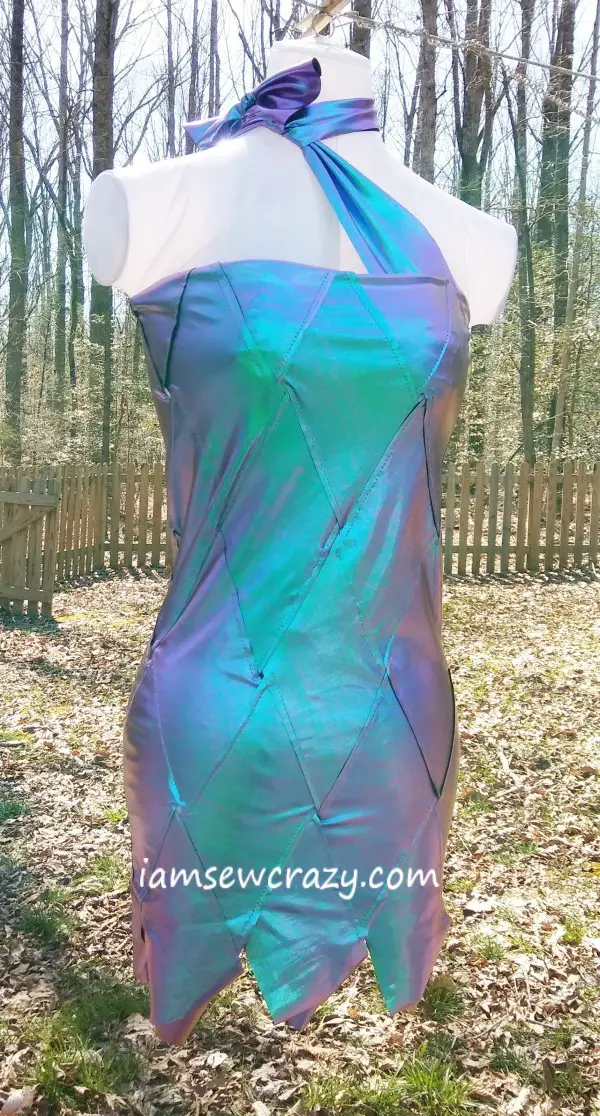
Isn’t this fabric awesome? It’s a stretchy synthetic knit with a metallic foil finish on one side, and it matches the fishscale fabric I used to make this mermaid dress. My friend sent me a huge piece of it because she rocks… It shines a bright iridescent teal or purple, depending on how the light hits it.
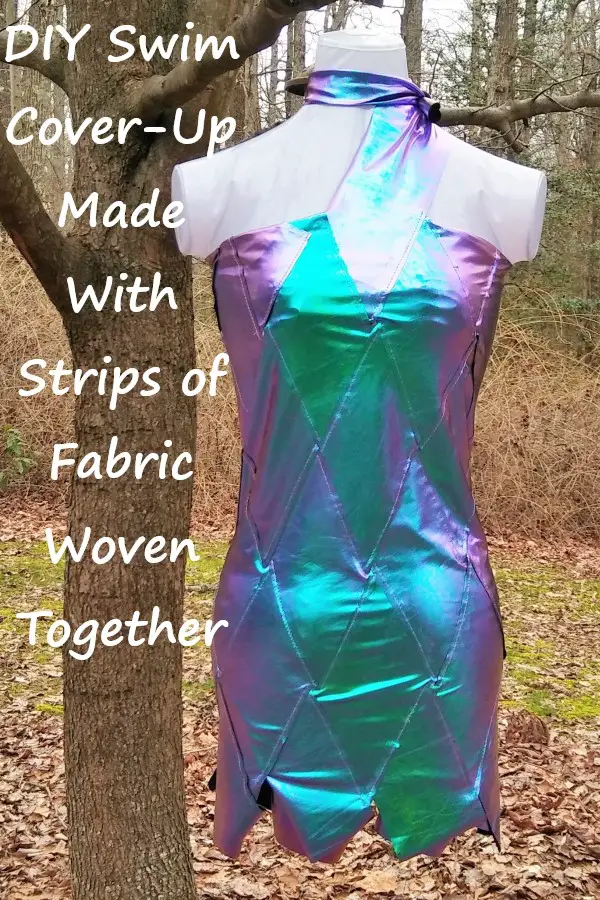
This was kind of an experimental project. I had an idea that I could use fabric strips to weave a tube that was large enough to fit around my whole body, kind of like one of those Chinese finger traps, and leave a couple of strips longer than the rest so that I could use them as straps to hold the dress up. I was thinking that it would be like a little swimdress that I could wear over a base layer.

Since you end up with a tube, it has no front or back, so you can spin the dress around to make the straps fall wherever you want, and therefore you have a bunch of different options for how you style the straps.
You can vary the length, width, and number of fabric strips to change the size of the dress, make it full-length, or even use this method to make a top or a skirt. I will give you all of the measurements that I used, and you can use the same measurements, or modify them to make a dress of your own!
Note: This isn’t really a beginner project… stretchy fabric can be hard to work with if you haven’t used it before. And swimwear fabric in particular is pretty slippery. (I used temporary spray adhesive to help keep everything in place as I was sewing.) I’ll give you all the tips I can, and if you still don’t feel like you’re ready to work with stretchy fabric, you can practice by using strips of upcycled denim jeans to make a bath mat using the same method. Denim is a lot easier to work with, and readily available. If you do the denim thing, you need to use a size 16 sharp needle (it might be called a size 100 regular, depending on where you live, or it might even be called a jeans needle. They’re all the same thing) instead of the stretch needle I’m using for the swimsuit fabric.

The fabric I’m using is a black synthetic/spandex blend knit with a metallic foil finish on one side. It’s very stretchy, and was made for dance and swim wear. If you’re making a dress that’s not for swimming, you don’t have to be as choosy about the fabric, but it’s important to note that the completed dress will be a cylindrical tube, and whatever you use needs to stretch enough so that you can get in and out of it, and still have it conform to your body in a comfortable, flattering way. (I’m not positive that the fabric in the link is identical, but it looks like the same thing I’m using.)
You can absolutely use two different fabrics to make the weave pattern stand out more, but they should be similar to each other in thickness and stretch, so that they aren’t fighting with each other once you put them together into the dress.
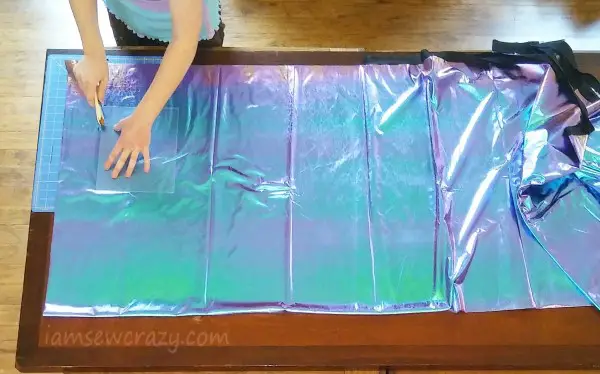
You will need to cut your fabric into strips. If your fabric only stretches in one direction, you should cut the strips so that they are stretchy from side to side, and not down the length of the strip. I used a little less than one yard of 60″ (150 cm) wide fabric, but my fabric was very stretchy in both directions. For a fabric that only stretches in one direction, I would recommend buying at least a yard and a half, so that you can cut long enough pieces to make the straps.
The strips that I used were 4″ (10 cm) wide. Most of them were 29″ long (74 cm), but two of them were 58″ long, so that I could use the extra length as straps to hold the dress up. I used 14 strips in total: 7 that slanted to the left, and 7 that slanted to the right. I ended up with a tube that was 28″ in circumference.

The basic formula is (strip width) times (the number of strips slanting in one direction) equals (the width your finished panel will be). So, 4″ X 7 = 28″. You probably want the width of the finished panel to equal at least the measurement around your waist. But your fabric might be more or less stretchy than mine was, or you might prefer a looser or tighter fit, so I can’t give you exact measurements, only that general guideline. And the width of the panel will vary slightly depending on the exact angle of your strips, so this is just a rough estimate to help you figure out about how many strips you will need.
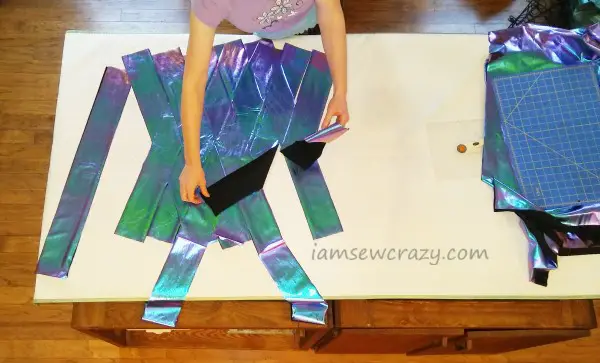
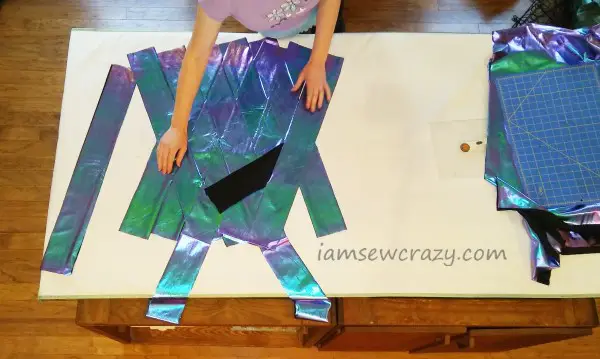
I recommend laying out all of your strips and weaving them together without gluing or sewing anything at first, to make sure that the garment will end up the right size once you are done.
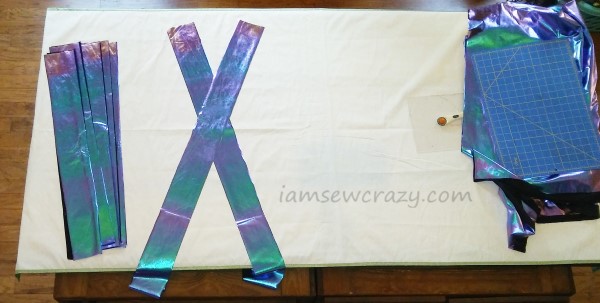
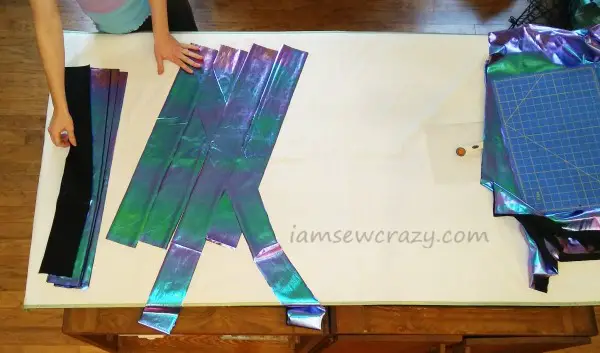
I laid out two strips to begin with, the long ones that were going to become the straps. I ignored the extra length for now, and pretended that they were only as long as the other straps. I made an X shape with them, and placed them with the ends 6″ (15 cm) away from each other. I added strips parallel to the two long strips, going under-over-under-over the opposite strips in a basic plain weave. If the previous strip went under a crossing strip, the next strip goes over, and vice versa.
If you wanted to change the size or length of the swimsuit cover-up, you can make the strips wider or use more strips, and that will give you a larger dress. Make the strips narrower, or use fewer strips, and that will give you a smaller dress. You can use longer strips to make a longer dress, or use shorter strips if you want to make just a top or a skirt.
You need to have the same number of strips slanting in each direction. So if you want a wider panel, you have to add two strips: one that leans left, and one that leans right.
You may want to cut 4 of the strips longer, so that you have more strap options on the finished dress, and you can always trim off any that you decide not to use.
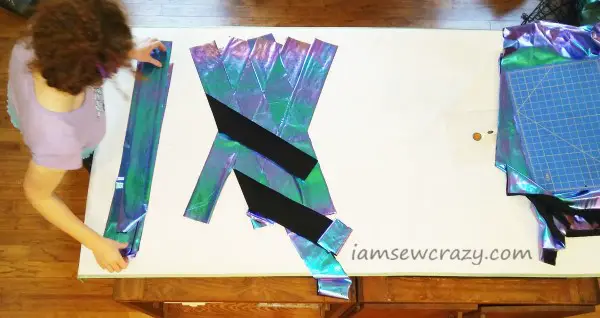
Random note: When I was starting to work out the pattern, my goofball brother photobombed me. So to pay him back, I’m putting the photo on my blog. lol
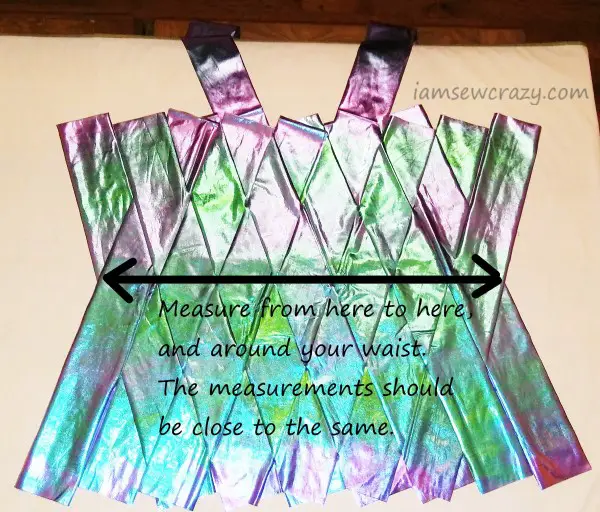
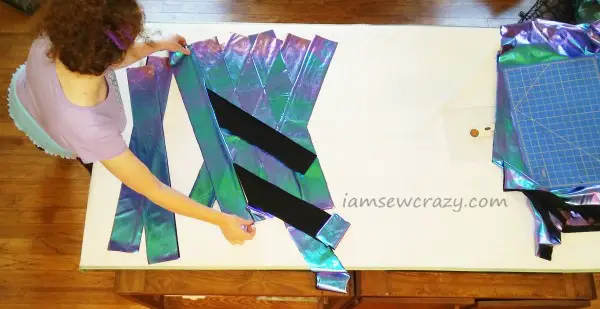
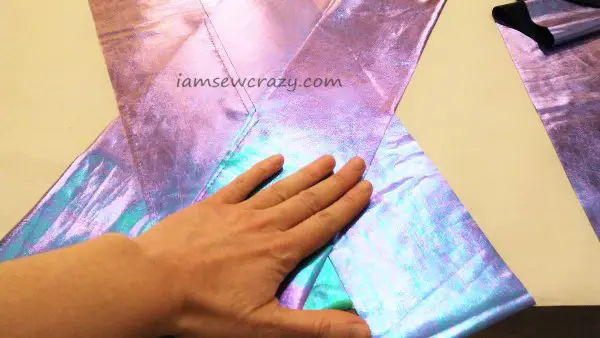
When you’re done, measure across the center like it shows here, and measure around your waist. If the two measurements are very different (more than a couple of inches), you need to add or subtract strips of fabric to get them closer to the same.
When I was happy with the size of the panel I had laid out, I was ready to sew everything together.
I chose to start with two strips, sew the first seam, and then lay the dress out flat again, add another strip, and sew the next seam. You may decide to weave together all of the strips at once, and then sew every seam one right after another. That might work out well with a less-slippery fabric, but it didn’t really seem practical for the fabric I chose.
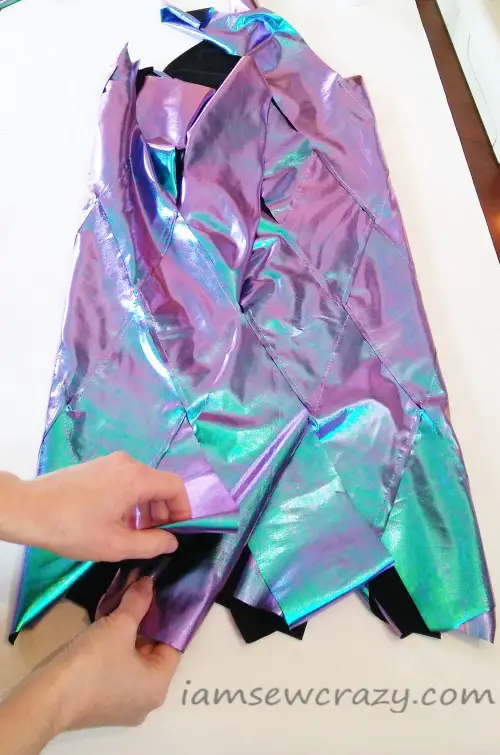
The bottom points were all aligned along a straight line (the edge of your table works great.) I made sure to line up the bottom points, and not the top, because I was planning to leave the bottom edge of the skirt with the strips hanging free, just like they were woven, and hem the top. So I wanted the bottom edge to be evenly lined up, but I wasn’t really worried about making sure the top edge looked tidy yet.
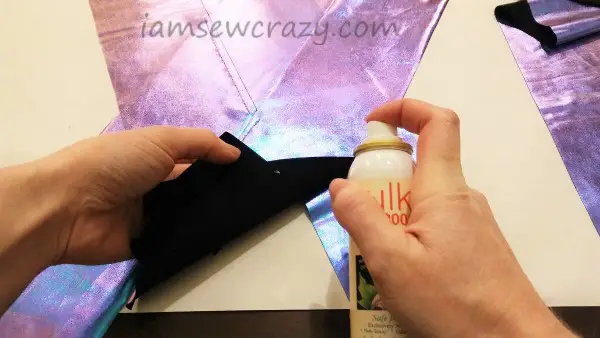
I decided to use this temporary spray adhesive to spray each strip that I was about to sew, to make sure it stayed exactly where I wanted it while I was sewing. Again, if your fabric isn’t as difficult, you might not need to do this, but it’s a helpful tip to use if you run into trouble with the fabric shifting. The adhesive makes your fabric tacky, like the sticky part of a post-it note, and then disappears on its own in a few days, so you don’t have to worry about globs of glue hanging around or gunking up on your needle.
Spray only the part of the strip that will be covered up when you lay the next strip down. You can use pieces of paper to protect the rest of the strip and your table from overspray. You don’t want the adhesive side of the fabric to be against your presser foot or the bed of your machine, because of course it will stick to them.
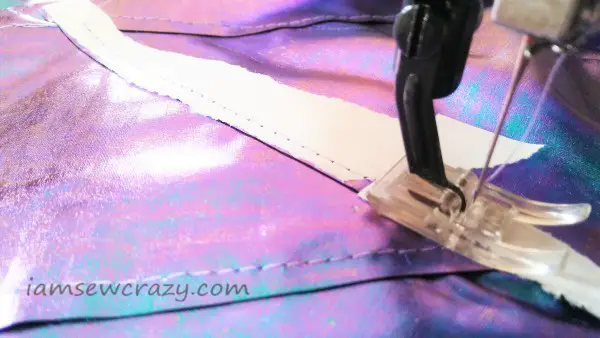
You do want to use a ballpoint (stretch) needle, or you may end up with skipped stitches. I’m using a size 11 (which may be called size 75, depending on where you live), but if your fabric is thicker you can use a size 14 (aka size 90). I used a straight stitch, but a zigzag stitch would be a good choice as well.

I sewed all of the seams from the right side (the top, pretty side of the panel), about 1/4″ (half a centimeter) away from the edge of each top strip, to attach it to the strip it was crossing over. Sew in reverse for a couple of stitches at the beginning and end of each seam, to fasten your stitches in place.
A couple of times I had a space-out moment, and sprayed the adhesive on the wrong side of the fabric strip. When that happened, I put strips of paper over the sticky area to keep the fabric from sticking to the presser foot, and sewed through the paper and fabric at the same time. Then I tore the paper away after I’d finished sewing the seam. But it’s easier to just pay attention in the first place. 🙂
I’m recommending that spray adhesive in particular because that’s the brand I actually use, and I’ve never had any issues with it being gunky when I’m sewing through it.
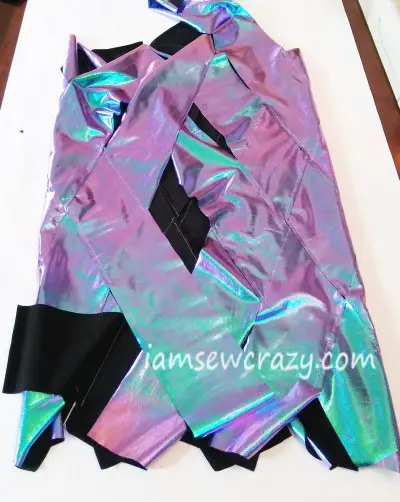
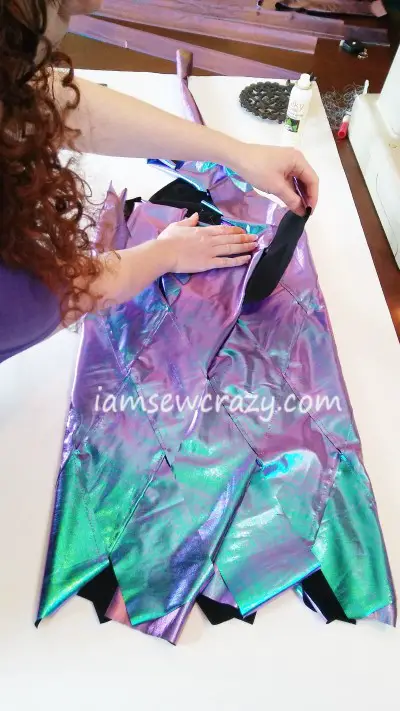
Once all of the strips are added and fastened down, you should have some loose ends hanging off to the sides of your woven panel. Flip the panel over, so that the pretty side is facing down, and fold the edges of the panel in towards the center. Now you can weave those loose ends into each other! Just weave and sew them like you did with the other strips, and as long as you have an equal number of strips slanting in each direction, they should all fit into each other perfectly.
The last few seams will be a tiny bit more difficult to sew, since you’re working with a tube now, instead of a flat panel. But just take a minute each time before you sew, to make sure that you’re not sewing the back of the tube to the front. That’s really the only thing you need to watch out for, because you should be an expert by now at weaving and sewing strips together!
I decided not to hem the bottom edge of the tube, and leave all of the tips of the strips hanging down, kind of like Tinkerbell’s skirt. I thought it accentuated the weave pattern and showed off the fact that the dress was made out of separate strips of fabric. But you can trim the strips off straight on the bottom, or fold the edge under and sew a hem, if you want to.

To finish the top edge, fold under the top of the strips (except the long straps) so that they’re all straight across, stitch a hem in place, and then trim away the ends of the strips that you folded to the inside of the dress, about 1/4″ (1/2 cm) away from your stitching line.
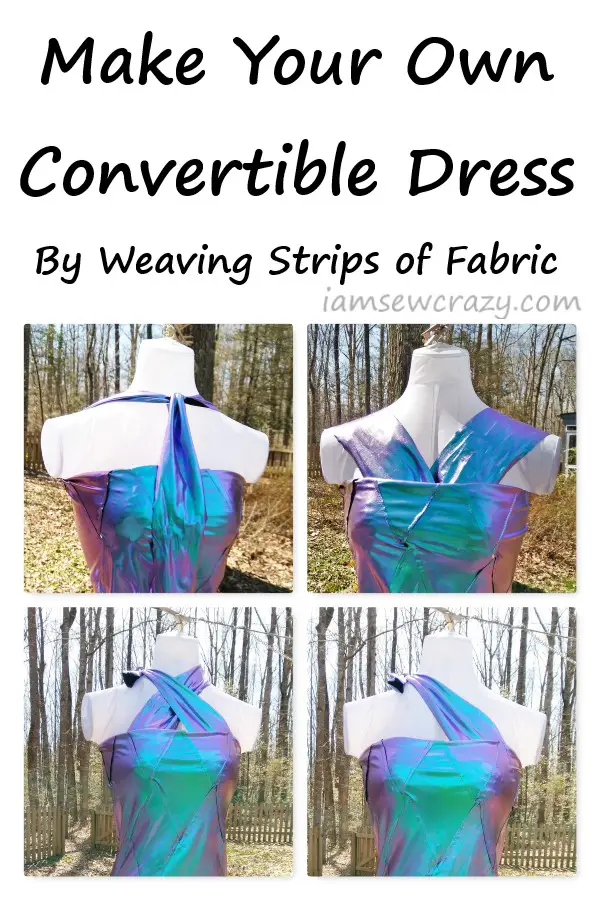
The straps are very open to interpretation. Since the dress has no specific front or back, you can spin it to make the straps fall here or there, like some of the options in the pictures.
You can tie them to each other, and then wrap the extra around your neck and make a loose bow. (Tie them together before you wrap them around your neck, or else it will get uncomfortably tight around your throat. Knotting them together first puts all of the pressure on your shoulder instead.) Or tie them together behind your neck and make halter straps. You can criss-cross them, or twist them. It’s up to you.
You can also pass them over your shoulders and sew them to the other side of the dress, like tank top straps. But if you leave them unsewn, then you’ll have options for how you can tie them, and you’ll end up with several different convertible looks in the same swim cover-up.
Random note: I was adopted by a really sweet cat last summer. Her name is Patches, but she also has a bunch of nicknames (Stuffie, BoogieBear, PatchPatch, B’Goo, Goobie, and Butthead, when she’s trying to trip me). I think she wants to break into modeling, because she loves to “help” with photo shoots. Today was no exception, so when she came sashaying over, I decided to throw in a few pics of her. So the last pictures are of my kitty “helping” me take photos of the swim cover-up.
That’s it, I hope you enjoyed the tutorial! Go hang out by the pool in your new cover-up, and be sure to tell everyone that you made it yourself!